Tuesday, October 31, 2017

SugarPea Designs / Happy Halloween!!!

Happy Halloween!  
I'm here and as I gear up for a night of spooks, tricks, and candy, I thought I would share a card using lots of Halloween icons for a fun stamped background!

Holiday Treats

I started with a scrap of kraft cardstock as I am going to be doing a simple stamping technique.  I started with adding my favorite icons and sentiments (from Holiday Treats) onto the panel of kraft cardstock in my Misti.  This way I am able to stamp a second time with black ink for nice dark images.


Holiday Treats2

I created my background using orange, purple, and green cardstock 1/2" in width.  I simply added these stripes onto a white notecard and added my kraft panel with foam adhesive.  To finish, I added a few black sequins lined up under the panel.  Simple. 

Be safe out there........


Friday, October 27, 2017

The Stamp Market / Tiny Trees and Ornaments

Tiny Trees

Good morning!  It's good to be back crafting after a week off after the Kansas Stamping Away retreat I help co-host.  It's always an amazing weekend packed full of laughter and memories.  However, it leaves me needing a short vacation afterwards!  That being said, preparations for the spring retreat have already begun!!!

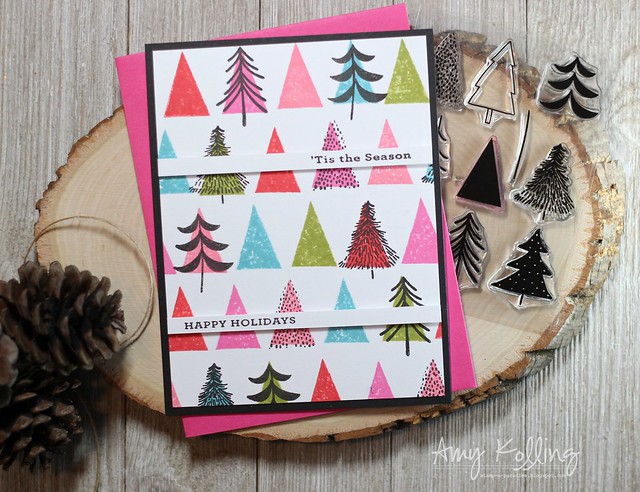
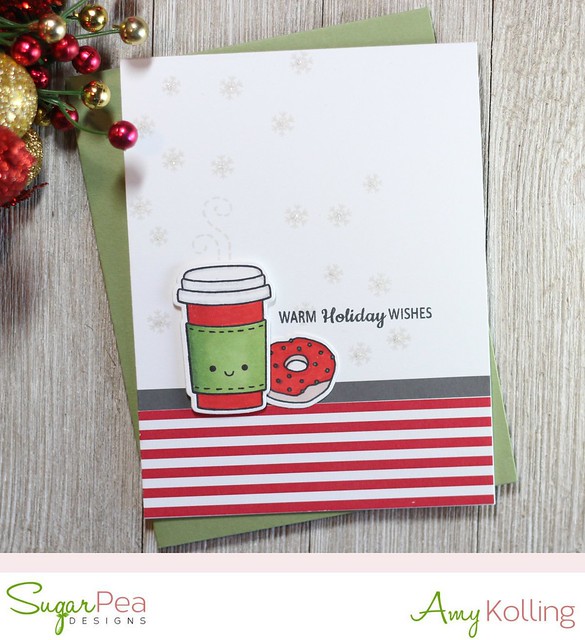
I have more inspiration featuring The Stamp Market stamps and dies from the holiday release.  I went with non-traditional colors for my 2 card projects today!
The Stamp Market
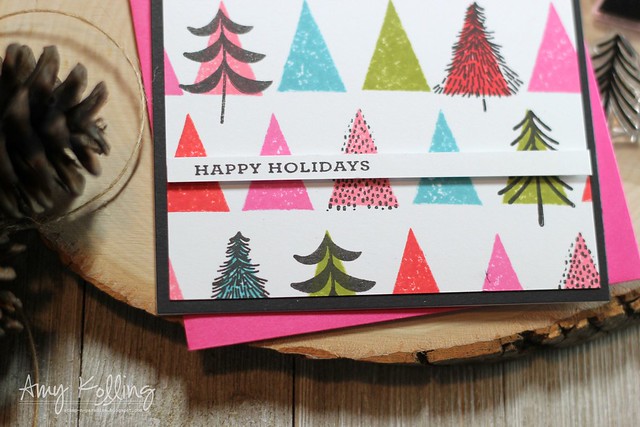
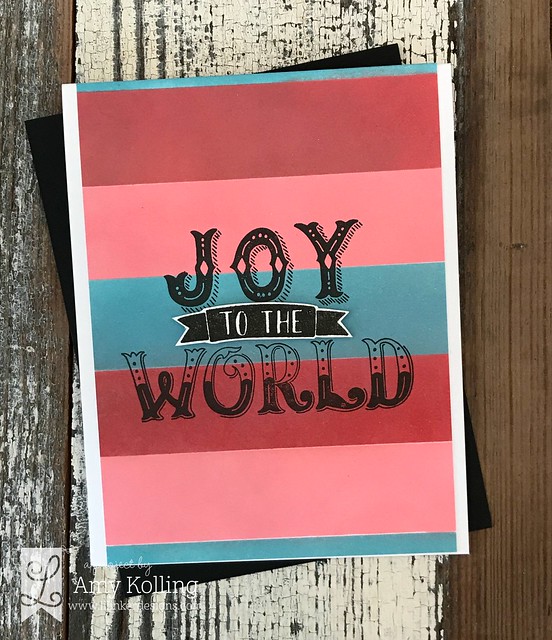
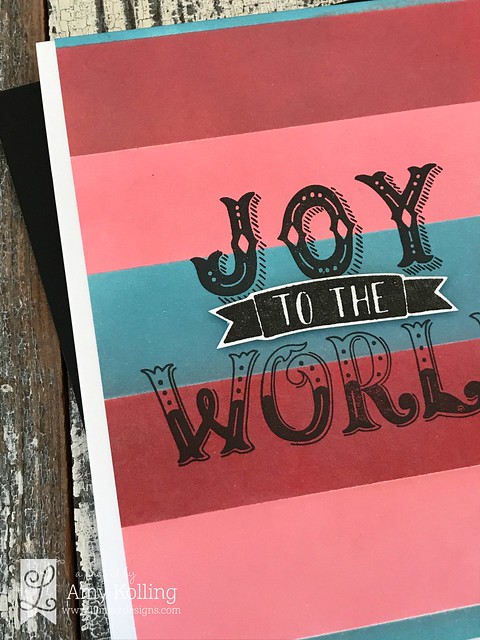
My base colors for the Tiny Trees are all Distress Oxide inks in Candied Apple, Picked Raspberry, Worn Lipstick, Broken China, and Peeled Paint.  I stamped them in little lines and overstamped the trees randomly with other images from Tiny Trees in Onyx Black Versafine ink.  I didn't worry about stamping straight as I was going for the graphic look.  To finish, two simple sentiment strips were added with foam adhesive across the trees.  

Tiny Trees2

****************************

Ornament

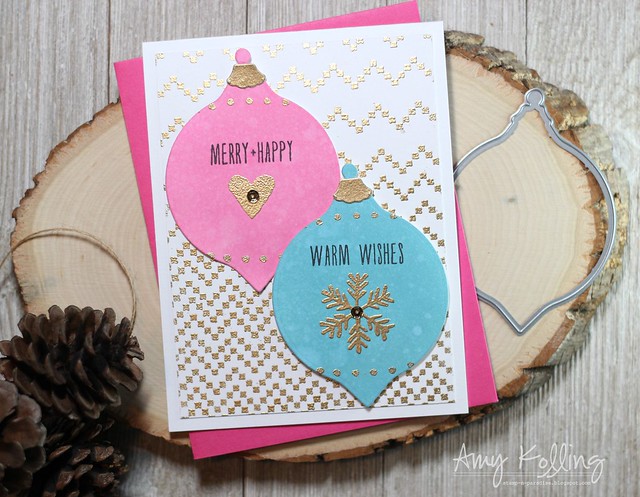
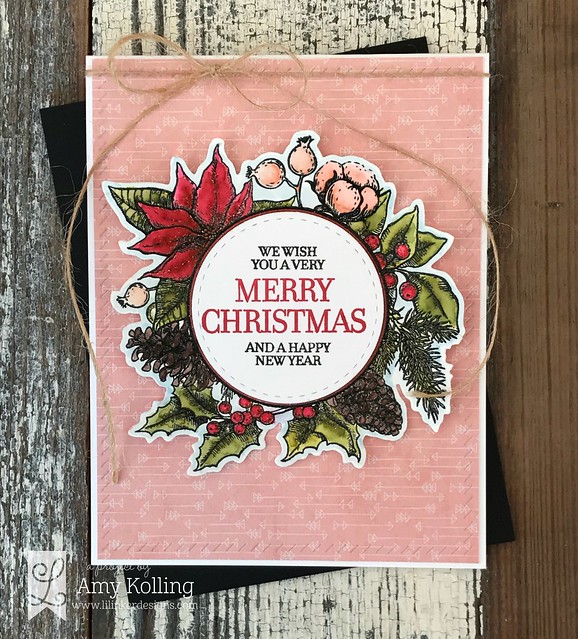
My second card also uses non-traditional colors with the addition of LOTS of gold embossing!  I've used the Ornament Stamp and dies to create 2 ornaments that were colored in by blending Distress Oxide inks.  My ornaments were embellished with black sentiments, gold heat embossed icons, and some mini gold sequins from Pretty Pink Posh.  For this ombre stamped chevron background, I used the border stamp from the Ornament Stamp Set.  Using my Misti tool, I was able to just stamp and move upward each time by a bit to create this pattern.  I simply gold heat embossed this as well!  

Ornament2


Thanks for sharing a part of your day with me!

SugarPea Designs / Happy Birthday Wendy!

Happy Birthday Wendy 

Surprise!!!  Surprise!!!
Happy Birthday Wendy!  The whole SugarPea Designs DT have come together to celebrate your day with this blog hop!  We hope you enjoy and have a wonderful birthday!  Thanks for all you do for the DT......you are an amazing, generous, kind friend!!!
Here is my Happy Birthday wishes to you Wendy!!  I used the Party Banner Duo to create some rainbow banners to celebrate!  My sentiment is simple, graphic and from Sweet Sentiments, You stamp set.  ♥♥


Happy Birthday Wendy2

SugarPea Designs Clear Stamps


Here's the full list to hop around today!!!!


Any broken link?  Make sure to visit the SugarPea Designs Blog!

Wednesday, October 25, 2017

The Stamp Market / Holiday Cheer

Holiday Cheer 

Good morning!!  I am thrilled to be back as a guest for The Stamp Market.  I adore every single thing about this company!  I may have a *slight* problem.......I can't resist the releases!  It's so bad that I have turned on post notifications for The Stamp Market on Instagram so I don't miss a single post!  

If you need some beautiful inspiration, make sure to check out Amy's posts on The Stamp Market blog.  I love her posts and gorgeous photos, let alone the fantastic projects!  Swoon! 
The Stamp Market
I created a card and small wrapped gift using the new Holiday Cheer stamp set.  First, I must say that I was going in a totally different direction with my card when I began stamping the snowflakes.  Before I knew it, I had stamped a larger snowflake out of the smaller one, so I went with it!  

Holiday Cheer2 

I white heat embossed the snowflakes and over stamped with Versamark but off setting it some.  To this, I heat embossed again but using Silver Pearl Embossing Powder.  This gives such a nice shimmer to the images.  For my sentiment, I used 2 sentiments from the set and white heat embossed onto separate black strips which were then added with foam adhesive.  To finish, I added a few flicks of Heidi Swapp White Color Shine, some clear confetti from Pretty Pink Posh, and a few drops of White Nuvo Crystal Drops to the snowflake centers!

Holiday Cheer4 

For my coordinating wrapped box, I used the same Silver Pearl Embossing Powder and heat embossed the snowflakes onto kraft gift wrap.  To finish, I hand cut 3 tags and to the black tag I white heat embossed the sentiment and snowflake.  Everything was tied off with burlap twine!

Holiday Cheer3


Thanks for sharing a part of your day with me!


Friday, October 20, 2017

SugarPea Designs / Release Day!

Tinsel in a Tangle 

Hello!  I am excited to share the last of the projects I've been working on for the brand new release from SugarPea Designs!  We have shared inspiration using the new release all week long.  With several new stamp sets and matching dies.......there's something you are sure to love!  

The NEW products will be available for purchase starting this Friday (today!), October 20th at 6PM EST in the SPD Store.


Using Tinsel in a Tangle, I Copic colored my image and added glossy accents to the bulbs and beak of the penguin.  For my background, I chose a pattern paper from Happy Camper and die cut using the Zig Zag Stitched Rectangles.  My sentiment was stamped onto a hand cut banner using Versafine Onyx Black ink.

Tinsel in a Tangle2

***************************************

Next, I have a cute trio of tags using the new Chrismas Tag Greetings stamp set along with the Snowflake Tag SugarCut.  I simply die cut the tags, stamped the tops with black ink, and stamped the icons from the set at the bottom.  Easy easy!

Christmas Tag Greetings


 ____________________________________________________

GIVEAWAY

Would you like to win one of todays setAll you need to do is leave a comment on the SPD blog.  It's really that easy!  Winners during our Product Release will be announced on Monday, October 23.


Thursday, October 19, 2017

SugarPea Designs / Sweet Peek Day 4

Mugs and Kisses 

Hello!  I am excited to share some of the projects I've been working on for the brand new release from SugarPea Designs!  Each day this week, we will be sharing inspiration using the new release.  With several new stamp sets and matching dies.......there's something you are sure to love!  

I hope you'll join me here over the last 2 days as I share Sweet Peeks for the all the NEW products that will be available for purchase starting tomorrow, October 20th at 6PM EST in the SPD Store.


The images in the Mugs and Kisses set are so adorable!  I colored my cute coffee cup like the holiday cups from Starbucks and added a single doughnut.  I layered some of the striped paper from Spots and Stripes Brights to the bottom and stamped some snowflakes randomly with light grey ink.  .

Mugs and Kisses2


 ____________________________________________________

GIVEAWAY

Would you like to win the Mugs and  Kisses stamp set? All you need to do is leave a comment on the SPD blog.  It's really that easy!  Winners during our Product Release will be announced on Monday, October 23.


Wednesday, October 18, 2017

Lil' Inker Designs / September Release Day 3

Amy_JoytotheWorld 

Hello!  We are at the final day of the Lil' Inker Designs October Release!  This release is FULL of amazing dies and stamps for the upcoming holidays.......are you ready?  Guess what??  The whole new release is now available and can be found HERE!!! 


I have 2 very different cards to share today.  My first one again uses non-traditional colors!  I am loving these colors of Distress Oxide inks.  I've used them and blended them in masked off stripes.  Using the Joy to the World stamp, it was stamped in Versafine Onyx Black over the stripes.  Easy Peasy!

Amy_JoytotheWorld2

****************************

Amy_VintageChristmasWreath

My second card uses this Vintage Christmas Wreath stamp set and die.  I have to admit this was not my favorite stamp of the release at first but in the end it became one of my favorites!  I loved watercoloring the image (after black heat embossing) with my Zigs!  I added my Vintage Christmas Wreath image with foam adhesive to a panel of pattern paper that was die cut using the Side Stitched Rectangles.

Amy_VintageChristmasWreath2

Now for the fun part!  There is a giveaway for one lucky commenter......make sure to check the Lil' Inker Designs blog for all the details!!!


Avery Elle / Snowflakes

Snowflakes

Hello!  I'm here with a glittery, metallic winter card using the Snowflakes stamp set.  I started with a white panel and using Silver Embossing Powder, heat embossed the various snowflakes.  I used the dotted border die from Picket Fence Elle-ments as the edge.  I inlaid the Let it Snow from Snowflakes Elle-ments using silver glitter paper.  I left off any embellishments to keep this flat except for the foam adhesive on the curved panel so it is easy to mail!

Snowflakes2

*****************************************************

Supplies:


Thanks for sharing a part of your day with me!


Related Posts with Thumbnails