Thursday, February 25, 2021

SugarPea Designs / Happy Bee-Day


I am sharing a fun, fresh card for a birthday! I’ve brought out some older
 SugarPea Designs products that I hope inspire you to use!!


Happy Bee-Day

Hey Honey was released a few years ago but remains one of my favorites. Using  the Honeycomb Cover Plate SugarCut, the plate was “impressed” into a panel of white cardstock. This is done much like using an embossing folder. I LOVE using cover plates like this!!! This panel was trimmed on all edges and adhered to a side folding white note card.  

I stamped multiple bees and die cut using the coordinating dies. The bees were adhered with foam adhesive to die cut hexagons from the Stacked Honeycombs SugarCut. Areas of the hexagons were ink blended using Broken China Distress Ink. For the sentiment, each one was selectively inked to fit in the spaces on the hexagons. As a final touch, a few tiny die cut hearts (from Hey Honey SugarCut) were added.

Happy Bee-Day2

Hey Honey
Hey Honey SugarCut
Stacked Honeycombs SugarCut
Honeycombs Cover Plate SugarCut


Wednesday, February 24, 2021

Reverse Confetti / Hello Wreath

Hello!  
I am sharing one of my favorite, older floral sets, Bold Blooms, from Reverse Confetti.


I pulled out Mist, Baby Blue, and Abyss Reverse Confetti Inks to stamp my blooms.  For something more muted, I used Stormy Ink for the leaves.  All the blooms and leaves were die cut using the coordinating dies and adhered to a Wreath Confetti Cuts, some with foam adhesive.  

My wreath was adhered to a white notecard that was layered with the Plaid Lines--Small Confetti Cuts.  A simple 'hello' was die cut using the Hello & Thanks Label Confetti Cuts done out of Stormy Cardstock.  To finish, a few clear gems were adhered.


Supplies:


Thursday, February 18, 2021

Reverse Confetti / Hero Arts Collaboration

HA Collab

Welcome!  
I am excited to share this fabulous collaboration between two of my favorite companies......Reverse Confetti and Hero Arts!  Read more about this below!


Here is a little about Hero Arts and this Partnership with Reverse Confetti:

Hero Arts is celebrating 45 years and counting.  To honor our beloved industry, we have teamed up with some of our favorite friends, and have together released co-branded designs focused on friendship, giving, and community.

Born with creativity in her blood, Ellie, daughter of Reverse Confetti owner, Jen del Muro, designed this uplifting and versatile multi-step floral set for the Hero Arts Partner collaboration.  Both have a passion for equality and equity, and proceeds from this stamp set will be donated to the Human Rights Campaign.   We hope that this stamp set will inspire you to create beautiful cards for those that you care for and love.

*********************************************
I love the modern look to these blooms and even better that this is a multi step stamp set!  I created my blooms with bright ink color and bold black ink for the accents.  The blooms were added to a notecard layered with the Double Stitch Window Cover Panel and stamped with a sentiment from this set.  

HA collab2


*********************************************

**GIVEAWAY**

What's a blog hop without a giveaway?  Hero Arts is giving away two $50 gift certificates - selected from the comments across all of the blogs in the hop.  One gift code will be to the Hero Arts store, and the other to Reverse Confetti. Comment on the hop by Thursday, February 25th at 11:59pm pst. The more blogs you leave comments on, the more chances to win!


Wednesday, February 17, 2021

Hero Arts / Spring 2021 Catalogue Blog Hop

Big Hugs2

Welcome to the Hero Arts 2021 Catalog Blog Hop!  
So honored to be sharing some inspiration alongside so many talented friends to celebrate Hero Arts!  There are many new stamps, dies, and stencils that I'm sure you will have a list made by the time you are done with the hop!


Spring come quick!  

Bouquet Accessories Fancy Dies has intricate cuts on the florals and make for easy ink blending to give these some color.  The bouquet wrap was die cut from some lightweight pattern paper and assembled.  The bouquet was arranged with bits of foam adhesive for dimension and added over a die cut Oval Woodgrain Frame that was ink blended with the same blue ink as the flowers.  To finish, an ombre die cut 'BIG HUGS' from Big Hugs Stamp & Cut was added.

Big Hugs

*********************************************

Hello Sunshine (1)


I fell in love with the Bee and Flowers Wreath.  The hexagon shape is imperfect and I love this!  Being from Kansas, I only saw sunflowers with the blooms!  I created a spray of sunflowers and leaves onto a die cut hexagon frame.  

This focal point was added over a trimmed panel that was stamped twice with the hexagon frame.  I couldn't let the card go without adding in the bee from the set!

Hello Sunshine2

*********************************************

**GIVEAWAY**

What's a blog hop without a giveaway?  Hero Arts is giving away three $50 gift certificates!

Comment on the hop by Wednesday, February 24th at 11:59pm pst for a chance to win one of three $50 gift certificates to the Hero Arts store. The more blogs you leave comments on, the more chances to win!


Avery Elle / Load of Hello

Hello Sunshine

Hello!  

I am here with a bright sunshiny card amidst all the winter and subzero temps here in Kansas!

***Shop for Avery Elle HERE***


I've used the Rainbow Builder stamps along with a bold sentiment from Loads of Hello.  It's no secret that rainbows bring happiness to many.  So sending this card will sure to bring a smile to someone's face!  

The rainbow was stamped in traditional rainbow colors and added to a white die cut background called Ray Elle-ments.  I love the patterned area to this rainbow!  A smiling sun, from Sunshine, was added with foam adhesive.  To finish, the bold HELLO from Loads of Hello was added along with the smaller label sentiment 'sunshine'.


Hello Sunshine2

Supplies:

Rainbow Builder
Rainbow Builder Elle-ments
Sunshine 
Sunshine Elle-ments
Ray Elle-ments


SugarPea Designs / Mix It Up Challenge #76

Amy_MIU76

I have a card made for the current Mix It Up Challenge over at SugarPea Designs
 Make sure to check out the challenge photo and/or sketch for this month.


Here is this month’s Mix it Up Challenge!


There are so many ways to take these Mix It Up Challenges.  I used a little of the sketch and a little of the color/inspiration photo.

Beautiful Books was the obvious choice to use for this challenge.  I couldn't pass up this change to ink of the main book image and readers from the stamp set.  I added in some mini florals from the set stamped in shades of purple.  For the sketch, I turned it on it's side and added some purple die cut strips from Card Front Element Builder III.

Amy_MIU76 (3)


Supplies:
Beautiful Books
Beautiful Books SugarCut
Card Front Element Builder III


You have all month to play along with us, and each week several of our designers will share some fresh inspiration with their take on the challenge. Remember the more times you play along during the month using SugarPea Designs product, the better chance you have of winning a $50 gift certificate to our store!

Tuesday, February 16, 2021

MFT & Friends February Release

Mice Day2 (1)

I'm joining the MFT February release and the rest of the Design Team!  
It's time to CELEBRATE!!


There is a new Birdie Brown set called Mice Day to Celebrate.  Can you say adorable??  
I created a CAS scene by masking off a circular area and blending Broken China Distress Ink.  The panel was cut with the Stitched Rectangle Stax.  The sentiment was stamped at the bottom to ground my images.  The mouse and stack of crates were added with foam adhesive over some stamped and non-colored balloons.  The cute little banner colored in rainbow colors was added to the corner of the panel.  This whole panel was added to a Red Hot panel of cardstock and added to a white notecard.

Mice Day (1)

*********************

This card features the Balloon Besties and I've paired it with the Grass Stencil and Rolling Clouds Stencil.  This panel was die cut with the Stitched Rectangle Stax.  One simple image was Copic colored and added with foam adhesive to take center stage.  The sentiment (which I love!) was stamped directly below.  

Sending You

*********************

This last card features the Balloon Bouquet stamps and coordinating dies.  The single balloon die was used to die cut a rainbow of balloons and then paper pieced into the balloon image, some with foam adhesive.  The white and black panels were die cut using the Stitched Rectangle Stax.  The sentiment was stamped onto an Elegant Folded Banner Die.  Once everything was adhered, a few clear gems were added.

Birthday

Thanks so much for sharing a part of your day with me here!  


(Affiliate link at no cost to you and I appreciate all that use my links!)

Thursday, February 11, 2021

Reverse Confetti / Hope

Hello!  
I am sharing some HOPE today.
  I like having these types of cards in my stash for just that moment.


Hope3


I stamped all the blooms from Farmhouse Wreath several times and Copic colored them in bright reds/yellows.  (Can you tell I'm longing for spring?)  They were all die cut and arranged on a sample panel.  Using Press 'n Seal, I picked all of the up at once.  This made it super easy to adhere to my note card.

Hope


My note card was stamped with the sentiment, from Mixed Messages, front and center.  Then, the note card was impressed with the Outlined Frame Cover Panel.  I love the look of using a die as an impression plate!!  All my arranged blooms were then adhered to the corners of the note card.  Stickles were added to the flower centers and some white gems for sparkle to finish.

Hope2


Supplies:

Wednesday, February 10, 2021

Avery Elle / A Head Above


A Head Above2
Hi!  
I have a bright BIRTHDAY card for you using one of the newest sets from Avery Elle......A Head Above.  


I started with ink blending Squeezed Lemonade, Mustard Seed, Tumbled Glass, and Broken China Distress Inks over a white panel leaving white space in between the colors.  This panel was die cut using the Double Pierced Rectangles Elle-ments.  Using this same die set, this same size rectangle and one bigger was IMPRESSED into a white note card.  I love the texture it adds!  

The ink blended panel was stamped with the Happy Birthday sentiment from A Head Above at the bottom.  The adorable images were all Copic colored, die cut and added with foam adhesive to the scene.  For a pop of black accents, the solid mini start from the set was stamped a few times into the scene.

A Head Above
Supplies:

Monday, February 8, 2021

Pinkfresh Studio / February 2021 Stamp, Stencil and Die Release Blog Hop

Hoping2

Welcome!  I am so excited to be sharing the new Pinkfresh Studio February Release alongside the Design Team and special guests!  You are in for an amazing release!!


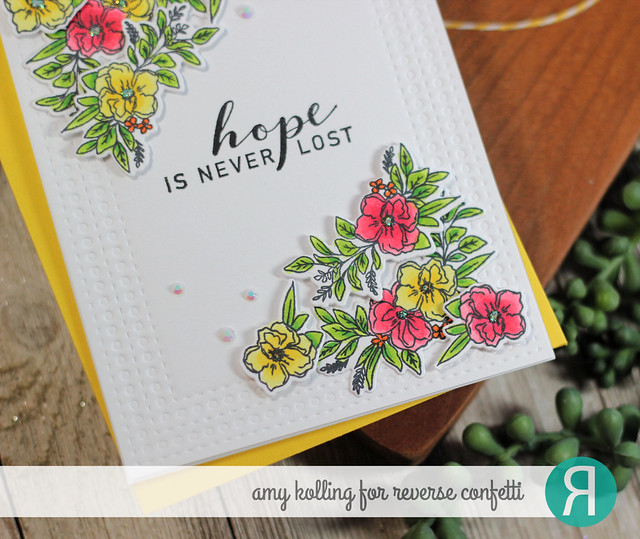
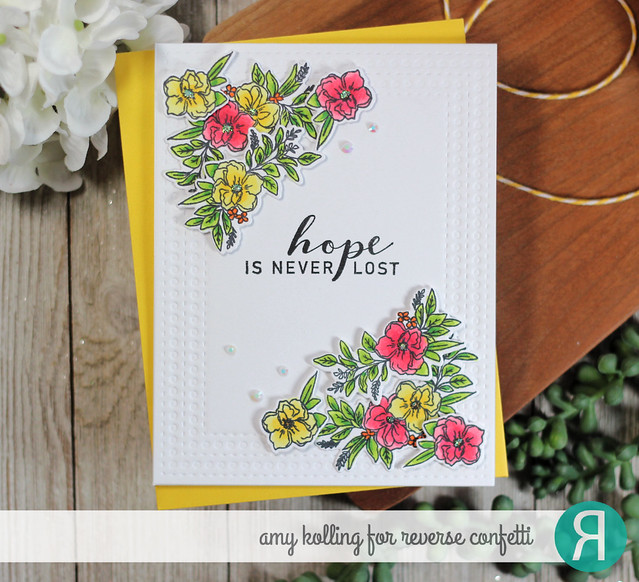
Choose Hope has a beautiful main floral image that is to be used with the layering stencils.  

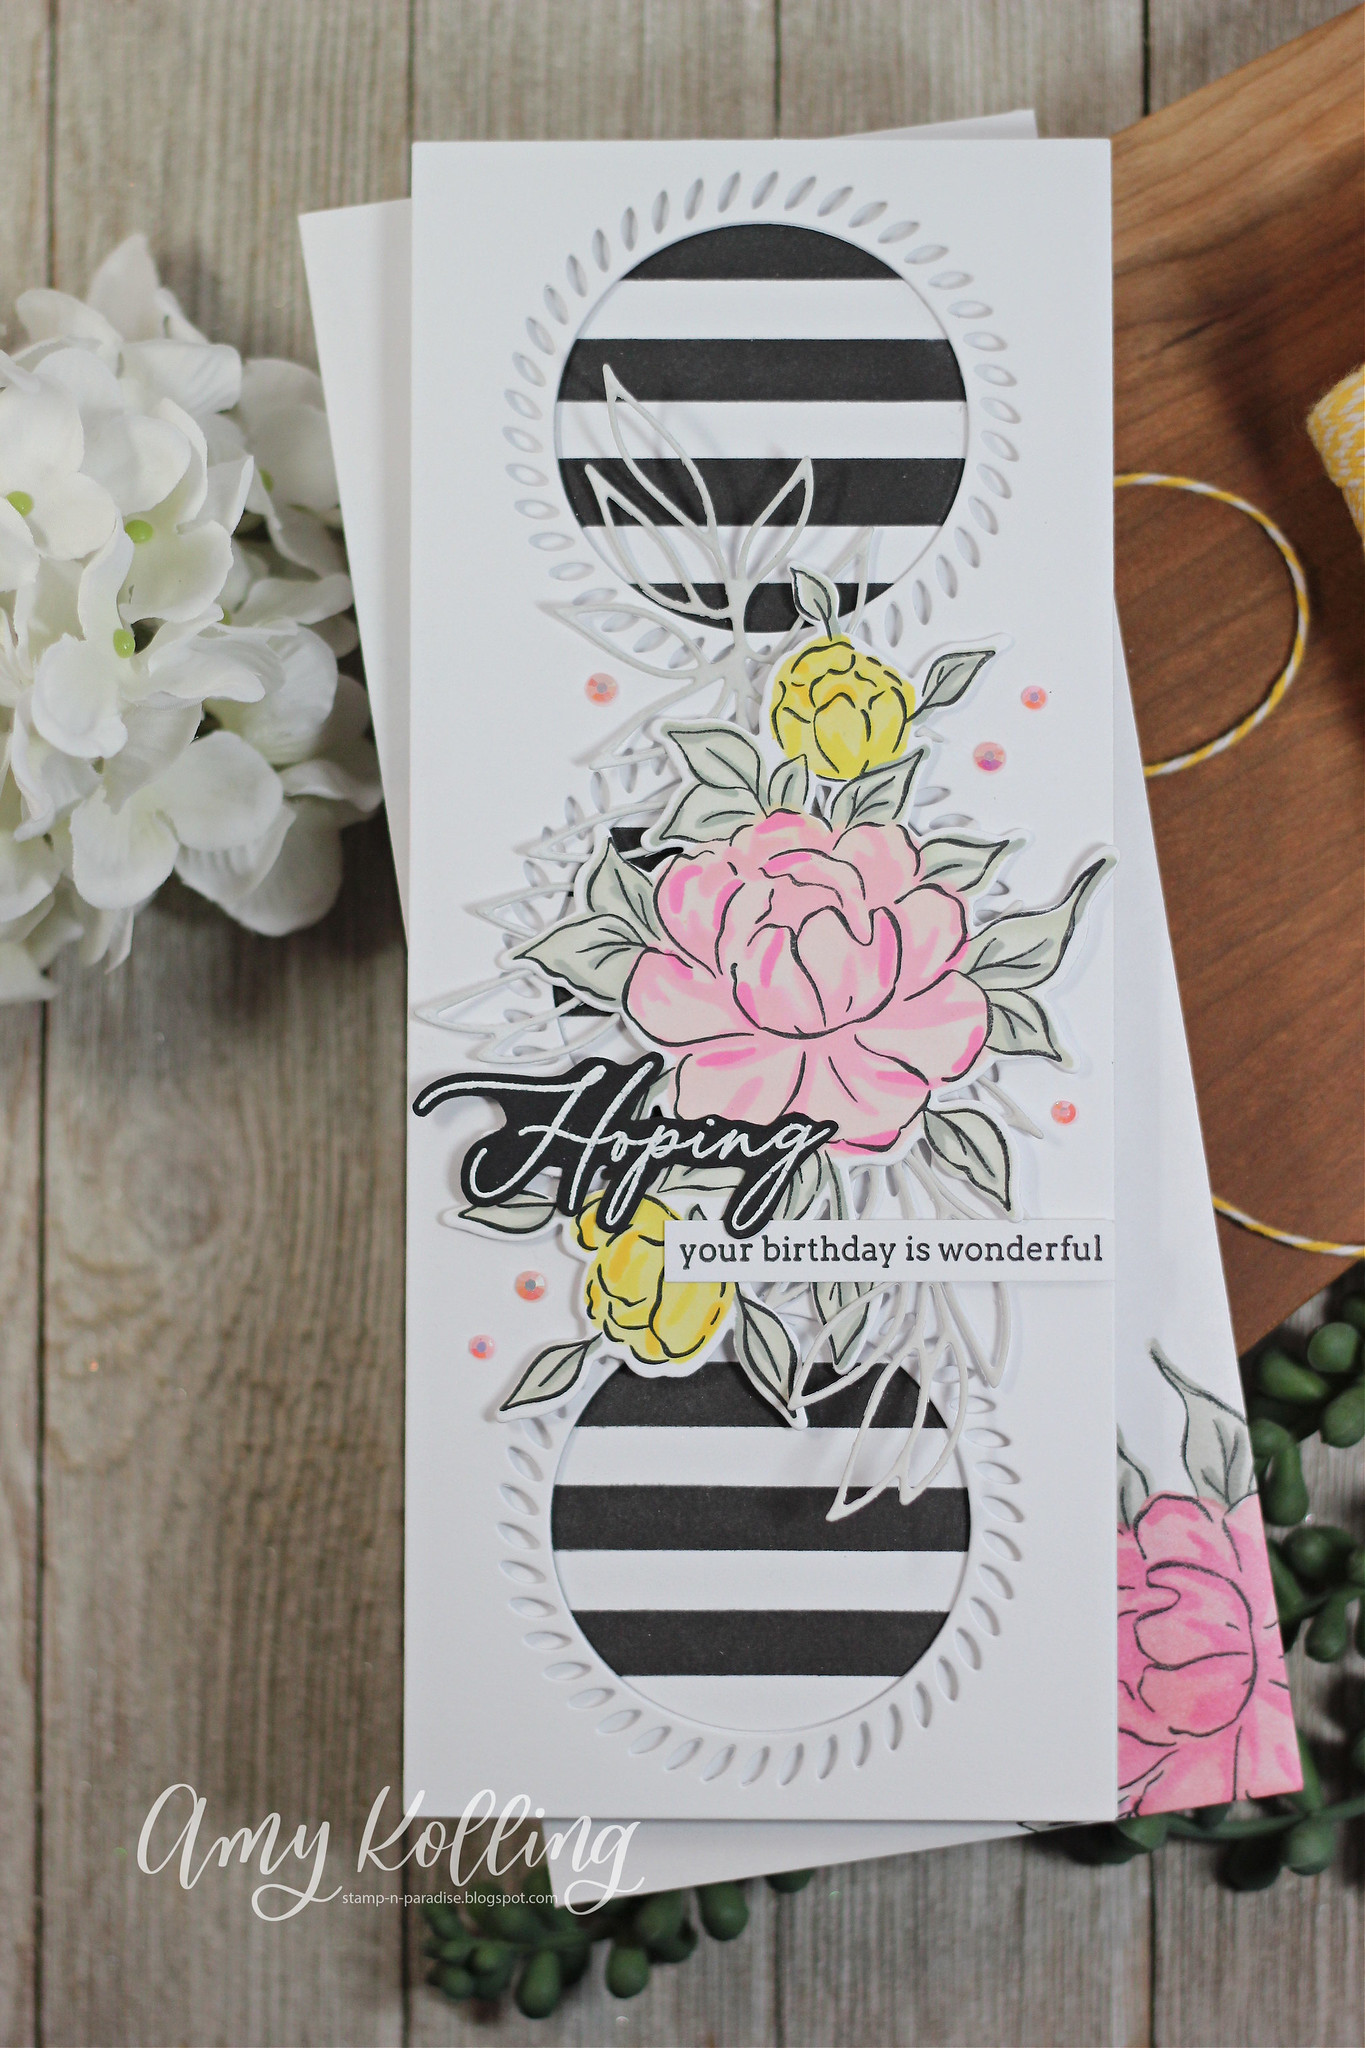
I've used Pinkfresh inks for my floral and the grey Pinkfresh inks for the leaves using the stencils for this set.  I layered the floral with the Leafy Branch Die that was lightly inked with grey ink.  The floral grouping was layered over the Slim Braided Circles Die.  This was layered over circles that were stenciled with the Horizontal Stripes Stencil with Black Soot Distress Ink.  The sentiment was white heat embossed on black cardstock and hand trimmed.  A coordinating sentiment strip and some pink gems were added to finish.


Hoping


****************************

Friend2

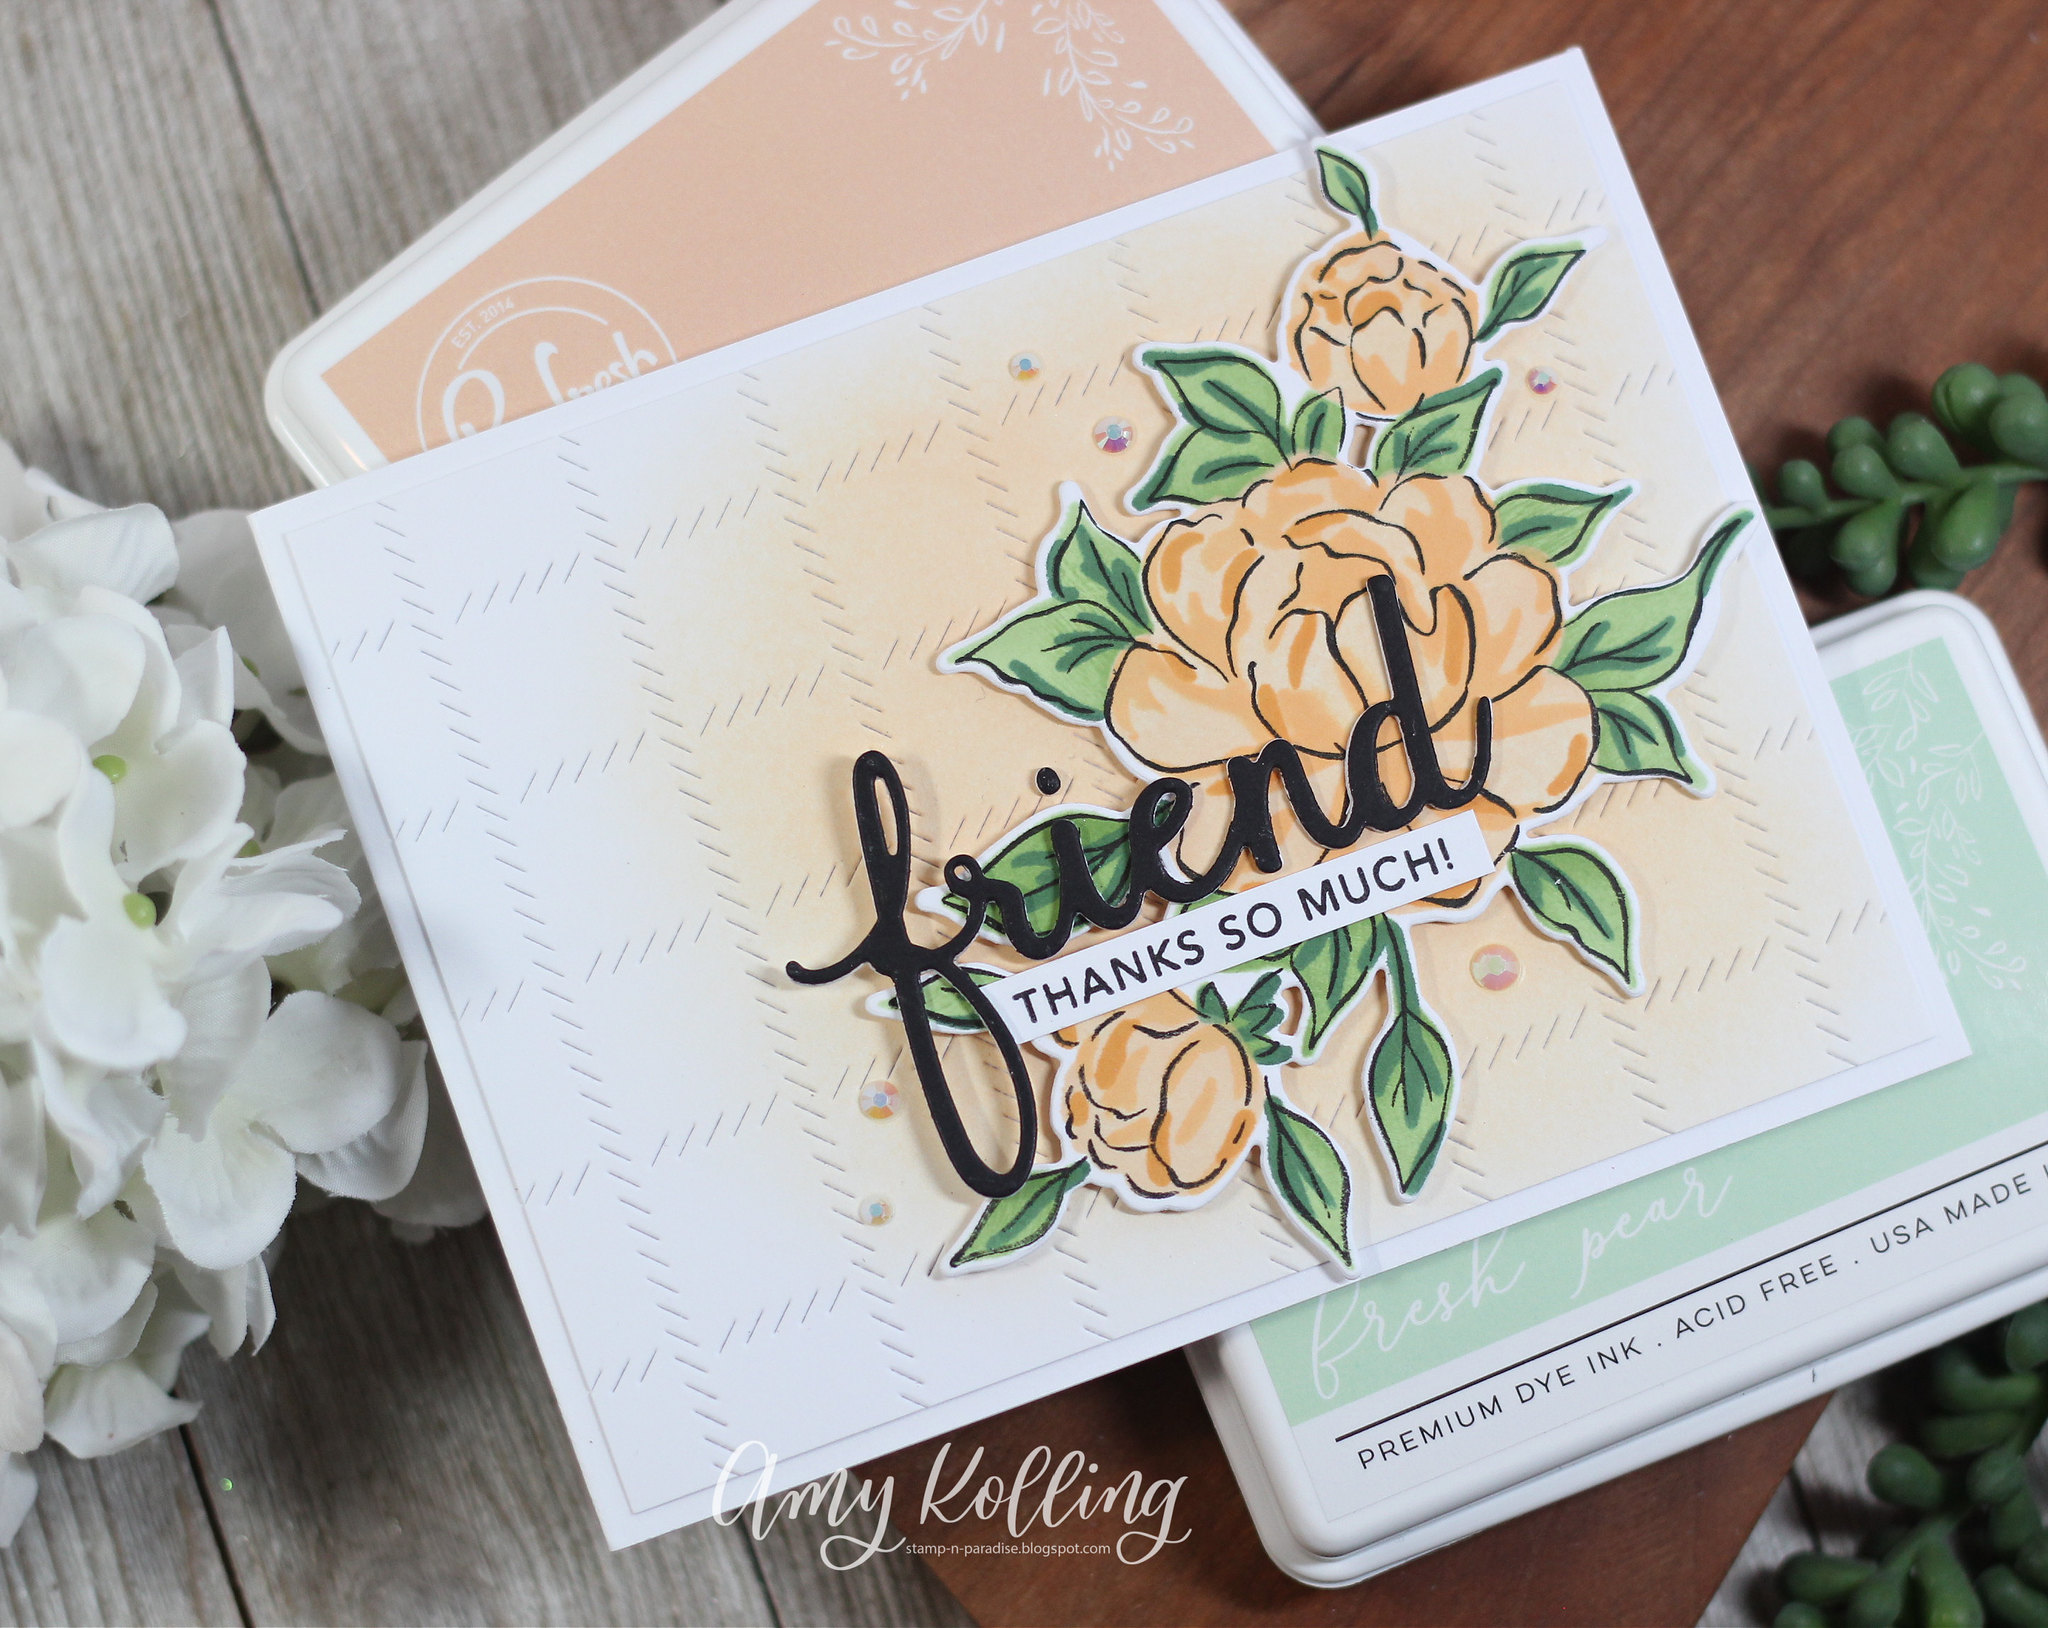
This card uses Choose Hope again but using some orange and green huges.  I've paired it with the Friend die and layered over the Diagonal Stitched Plaid Die.  

Friend

****************************

Way to go2


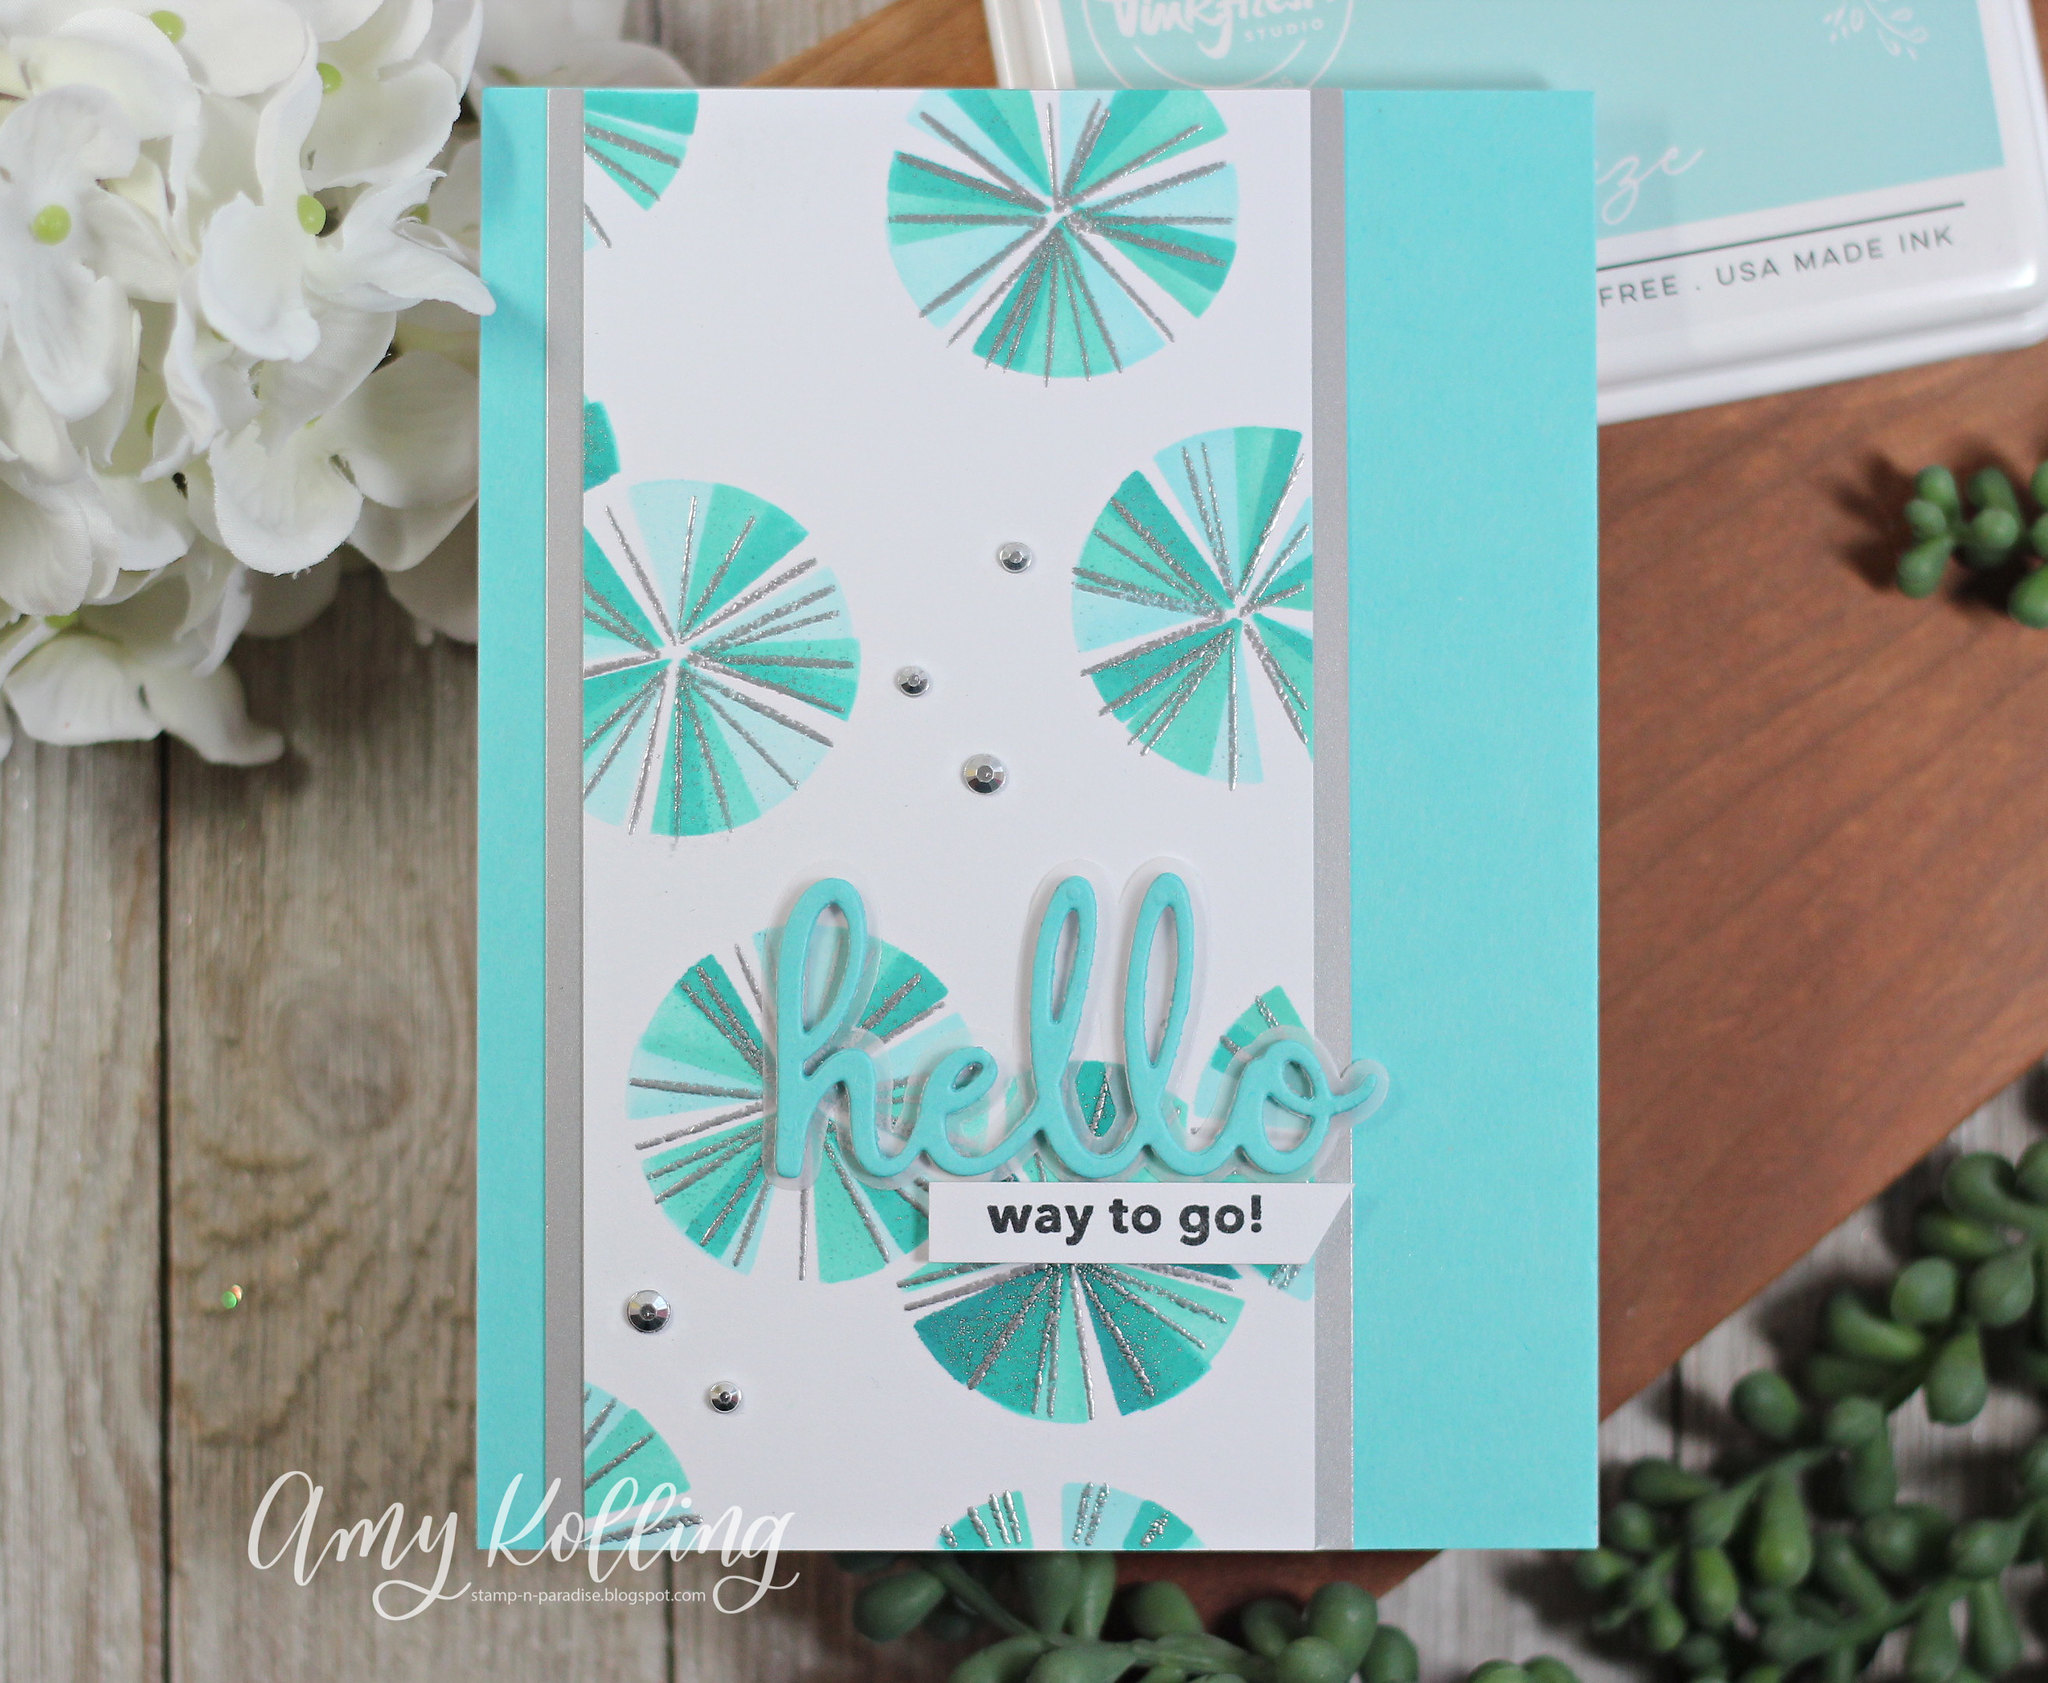
This last card goes in a totally different direction with the Seamless Starburst Circles and Stencils.  A full panel was stenciled and then stamped with Versamark to then silver heat emboss the starburst lines.  The panel was trimmed and matted with silver mat paper.  A 'hello' die cut, supporting sentiment, and silver gems were added to finish this off.

Way to go


GIVEAWAY:

-PInkfresh Studio will be giving away the full release on the Pinkfresh Studio blog, IG feed & YouTube channel..

-I will be giving away a $25 gift card here on my blog post.---The winners will be chosen from the comments.


-Winners will be posted on February 15 , 2021 on the Pinkfresh Studio GIVEAWAY PAGE. You must check that page & claim your prize within 2 weeks.

You are invited to the Inlinkz link party!

Click here to enter


SHIPPING PROMO:


Free US shipping on all orders $50+ from February 8th to February 14th.


FREE Die PROMO:

There is a free die with $50 purchase for this release (no code needed). This promo will run from February 8th to February 14th (or while supplies last).

Related Posts with Thumbnails