Monday, September 25, 2017

Pinkfresh Studio Stamp & Die Release Blog Hop

Shine 

Hello and welcome!  I am excited to help Pinkfresh Studio with their September Release and Blog Hop!  There is definitely something for everyone in this release including those that are itching to start their holiday cards!  Make sure to scroll to the bottom to find out about the "comment to win" the whole release (see graphic below)!!


I have several cards to share so let's get started!  

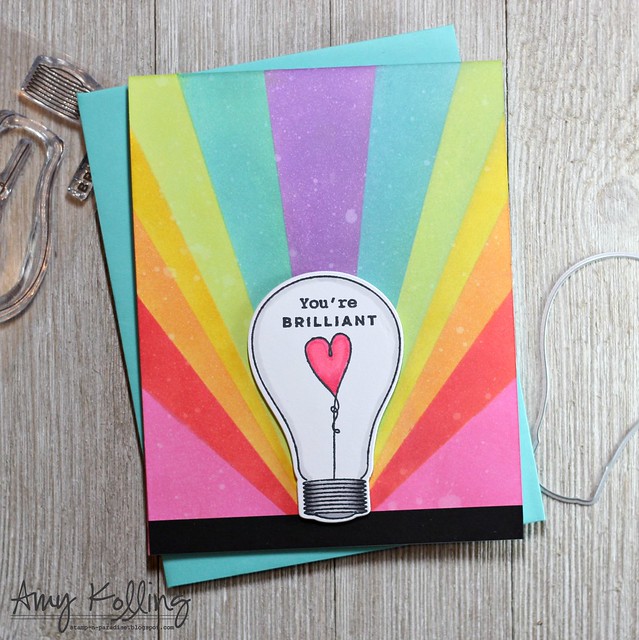
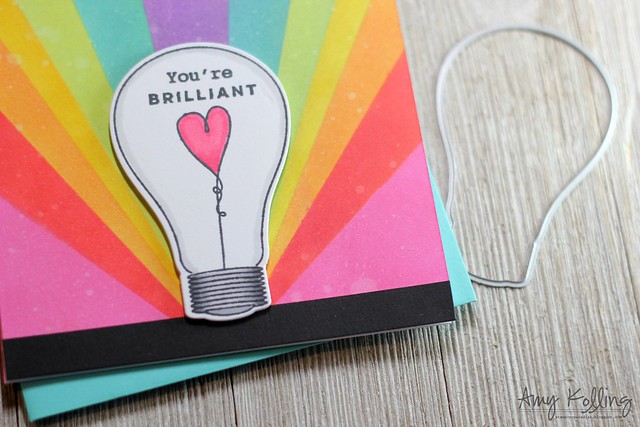
Using the new set called Shine, I stamped and die cut my lightbulb image and did some Copic shading with N1, N2, N3 and some color to the heart filiment with RV13 and RV14.  I created my colorful sunshine ray background using Post It tape and Distress Ink and Distress Ink Oxides.  I spritzed my background lightly with water and let the ink do its magic!  This was so fun to do but messy!  :)  Once my panel was done, I added a thin black cardstock strip to the bottom and added my lightbulb with foam adhesive.   

Shine2

*********************************

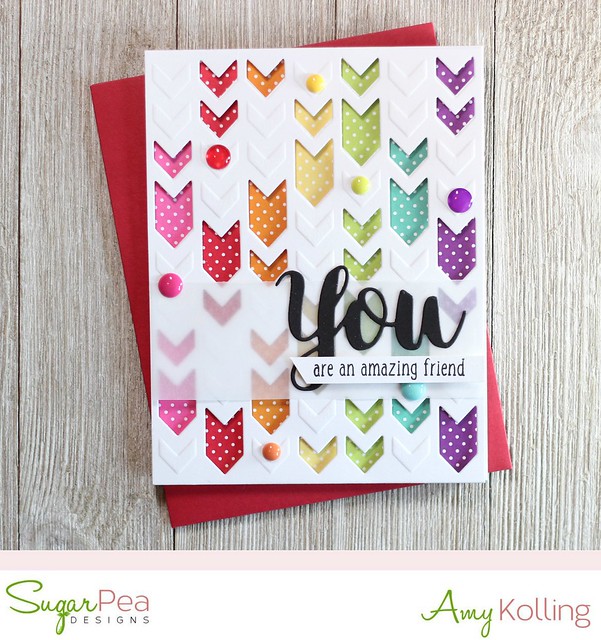
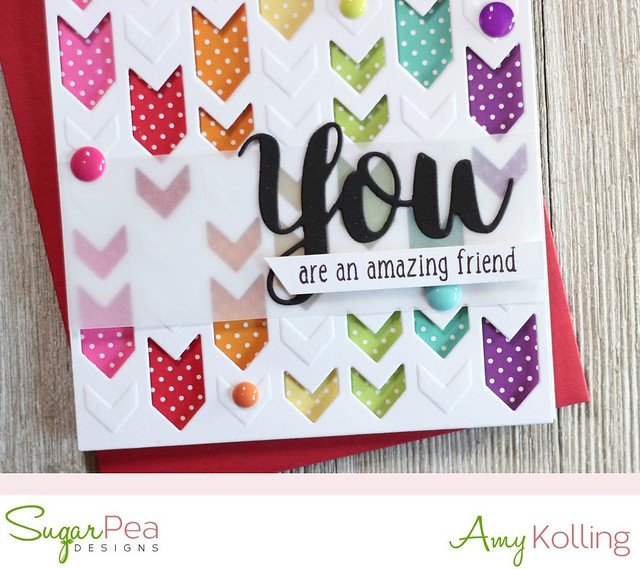
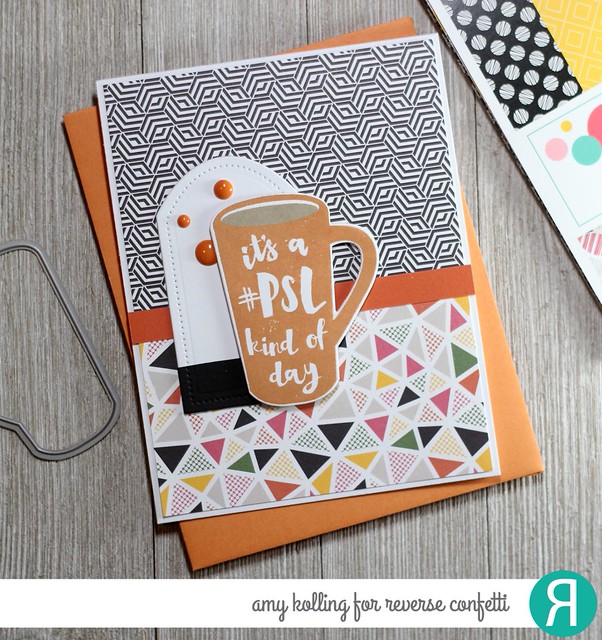
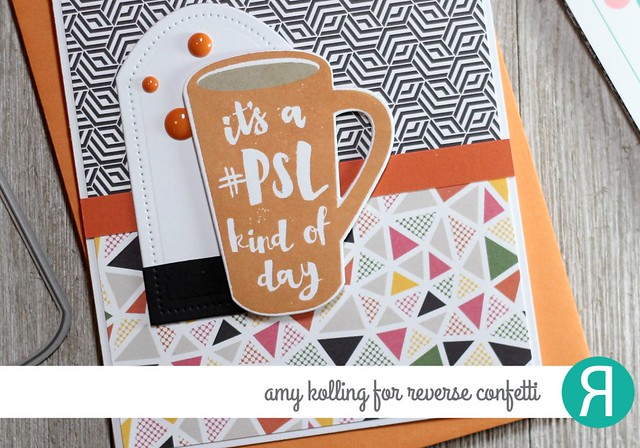
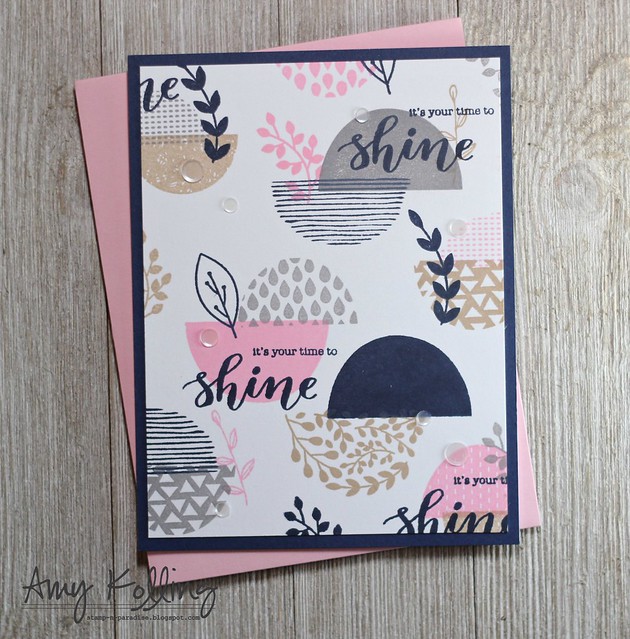
Using Semi Circle Patterns, I created this fun and graphic background paper using the stamps and ink.  The ink colors (in general) were kraft, navy, pink, and grey.  I love the color combo!  I stamped the various patterns randomly offsetting them and stamping a floral image from this set.  My sentiment comes from the new set called Shine.

Semi Circle Patterns

********************************

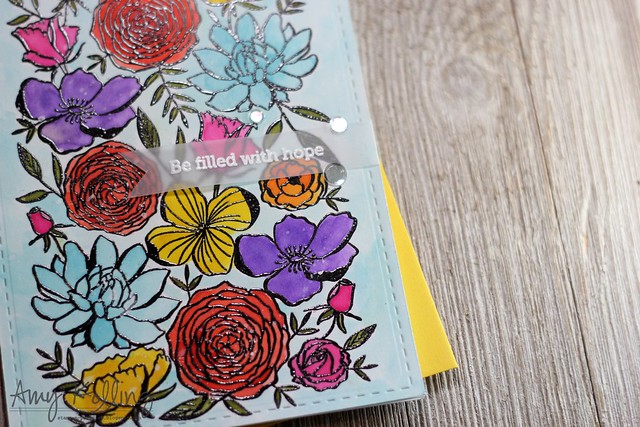
As you can tell, I'm not ready for fall and winter just yet!  I've created this bright floral card using the Floral Background stamp by black heat embossing the image and watercoloring with various Distress Inks.  This card will be perfect as a sympathy card!  

Floral Background0

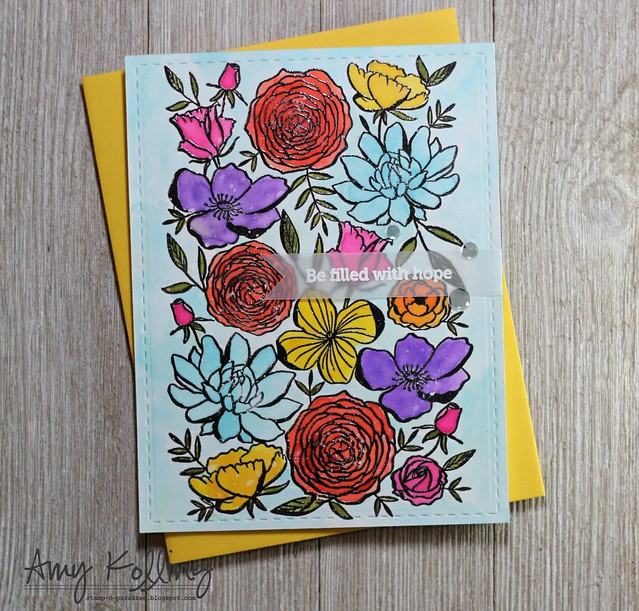
Let's just say there is no better way to watercolor than to heat emboss first!  Makes watercoloring an image like this a breeze!

Floral Background2


***Comment to Win***

Do you want to win all the stamps/dies from the Pinkfresh Studio new release?  Make sure to leave a comment on each blog in the hop!  Comments will close at 11:59 CST on Monday, October 2nd.  Winner will be announced on Monday, October 9th.   


Sunday, September 24, 2017

Avery Elle / STAMPtember

Merry Mistletoe

Hello!  Did you know STAMPtember®  is still in full swing over at Simon Says Stamp?  This whole month there are new products released and one of the most fun are the collaborations they do with other companies! 

Avery Elle STAMPtember Exclusive

I am excited to share the latest collaboration with Avery Elle and Simon Says Stamp for STAMPtember® !

I started by stamping my mistletoe image, from Merry Mistletoe, to the top of a white cardstock panel with Memento Tuxedo Black ink.  Using Copic Markers, I colored my mistletoe and then added Glossy Accents to the berries and let the panel dry.  Once dry, I stamped the sentiment and tiny hearts.  I wanted to add a fun edge to my mistletoe panel so I used the Large Treat Bag Topper Elle-ments for it's decorative edge by only partially diecutting the edge.  I added the trimmed panel with foam adhesive to a strip of green striped paper from The Jewel Collection paper pad from Avery Elle.

Merry Mistletoe2

Avery Elle MERRY MISTLETOE Clear Stamps SSS101778 Stamptember Exclusive

Thanks for sharing a part of your day with me!

Friday, September 22, 2017

SugarPea Designs / Sweet 2 Repeat Blog Hop

S2RHop2

Hello!  It’s time again for the Sweet2Repeat Blog Hop witih Sugar Pea Designs!  Now that so many of you have the September Product Release in your hot little hands, the Pod Squad of designers have geared up to inspire you with even MORE creative possibilities featuring the newest and hottest products!

I figured it was time to get some masculine BIRTHDAY cards made up.  Sweet Sentiments - You is a perfect set to make masculine!  I stamped the ombre look "YOU" stamp in navy, grey, and purple.  I added a white heat embossed sentiment on grey cardstock with foam adhesive over the center "YOU" and added some star wood veneers.  Done!

S2RHop3


Would you like to WIN a $20 gift certificate to spend on some SugarPea Designs of your own?  Please visit with each of our design team members and leave a comment for your chance to win!  Check the SugarPea Designs blog for the complete blog hop list!


Reverse Confetti / Inspiration Station


Hello!  
I am sharing just a sneak of my card that can only be seen in the Reverse Confetti Newsletter!  You don't want to miss any of this additional inspiration.......go sign up HERE.


Wednesday, September 20, 2017

Avery Elle / Winter Wonderland Wonders

Winter Wonderland Wonders

Hello!  I am here with a layered Christmas shaker card that is full of glittery fun!
It was time to get out my coarse "chunky" Martha Stewart glitter for a winter wonderland scene.

Using the Winter Wonderland Wonders stamp set and coordinating Winter Wonderland Wonders Elle-ments, I stamped, Copic colored, and die cut my main images.  For my birch tree, I actually stamped it onto some light gray cardstock and did some no line coloring to make it appear like a birch tree.  It's hard to see but I did create layers of snow banks inside my shaker card using the Picket Fence Elle-ments.  My shaker card was created with the help of the Sweet Scallops Elle-ments.    

Winter Wonderland Wonders2

Little extras were adding the white dots to my images using a white pigment pen.  It gives that perfect little touch!

Supplies:


Thanks for sharing a part of your day with me!

Tuesday, September 19, 2017

SugarPea Designs / Arrow Cover Plate


Hello!  I am here with a card that is not "fall" related.  Even though I am preparing my fall decor here and the leaves are starting to turn, I am not ready!  My card definitely screams sunshine!!

I adore the new SugarCut Arrow Cover Plate.  It cuts AND embosses!  I created a panel out of white cardstock because I wanted to showcase some of the new Spots & Stripes Brights Pattern Paper Collection.  

YOU2

I trimmed off strips of each color of the rainbow of the polka dot paper and added them to a top folding notecard.  My white panel cut with the Arrow Cover Plate was added over the top with foam adhesive.  For my sentiment, I added a wide strip of vellum and a black SugarCut You along with a supporting sentiment from Sweet Sentiments, You.  As a final touch, I added enamel dots in coordinating colors!

TIP:  My photo was taken with one of the new Heartthrob Envelopes that is available now at SugarPea Designs!

YOU


Thanks for sharing a part of your day with me!


Monday, September 18, 2017

CZ Designs / STAMPtember

CZ Designs

Hello!  Did you know STAMPtember is now in full swing over at Simon Says Stamp?  This whole month there are new products released and one of the most fun are the collaborations they do with other companies! 


I am so honored to have been sent this FUN "Hollo-Ween" set from CZ Designs and Simon Says Stamp for STAMPtember!  If you do not follow CZ Designs on Instagram, you need to!  You can't help but smile with her IG stories!  

I created a fun background that left my hands very messy but it was fun to see the colors blend together!   Using Blueprint Sketch, Seedless Preserves, Black Soot, Mustard Seed, and Crushed Olive Distress Inks, I blended them together onto a piece of smooth watercolor paper.  They blended beautifully!!!  I then zapped my panel with my heat tool because I was embossing next.  I used an aniti-static powder bag to prep my panel before white heat embossing the ghosts and sentiments.  When I was done, I went back over my ghosts with Black Soot Distress Ink which made them a gray color!  As a last touch, I added some chunky black gems!

CZ Designs2

Thanks for sharing a part of your day with me!

Saturday, September 16, 2017

Reverse Confetti / SFYTT

SFYTT 

Hello!  I am here sharing a card using the current SFYTT (Sketch For You to Try) over at the Reverse Confetti blog.  Check out the SFYTT post......HERE for all the details!


Since it's been a rough week here at my house, I thought I'd share my take on the SFYTT.  I used the Just Brew It stamp set, just for the #PSL kinda day!  I paired it up with the newest 6x6 paper pad, Every Little Bit.  I love the patterns in this paper pad as they truly work so well together especially for this month's SFYTT.  My #PSL image was stamped in Reverse Confetti's Rust ink and I also carried that color over to the cardstock strip separating the patterns in the sketch.  To ground my image, I layered it over one of the smaller Pierced Round Top Layers and added a black strip at the bottom.  Matching enamel dots finished the sketch!

SFYTT2


Now the best part is.......there is always a winner every month!  Here are the details:


The winner will receive a $20 gift certificate to the Reverse Confetti store and claim the title of ‘Fetti Fave. The winner of SFYTT will be posted on the Reverse Confetti blog on the 30th of each month.
Check out the SFYTT post......HERE.

So let's see your Reverse Confetti creations this month.....you still have time to get it done!

I'm sharing this for the Fall Coffee Lover's Blog Hop that started yesterday!  Nothing says fall like a #PSL!


Related Posts with Thumbnails