Showing posts with label Queen & Co. Show all posts

Thursday, November 29, 2018

Queen & Co. / New word dies!

Sending Smiles 

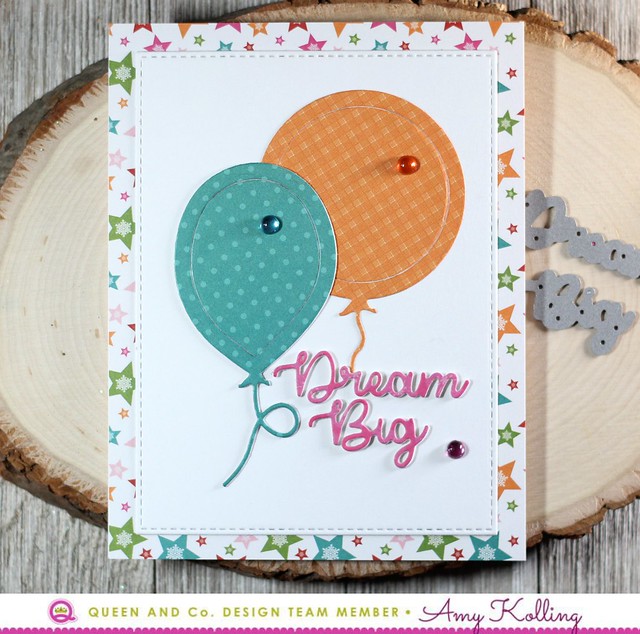
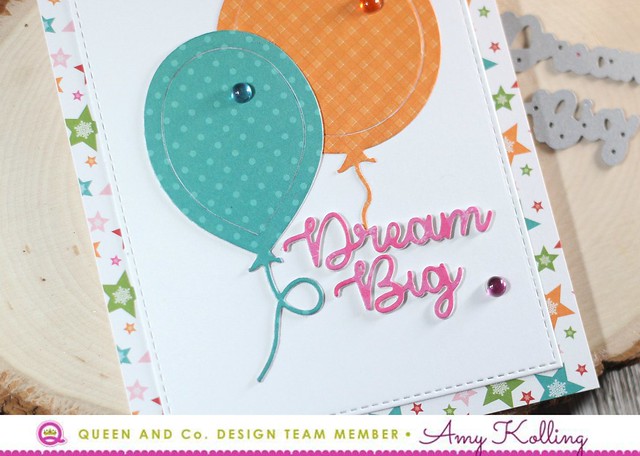
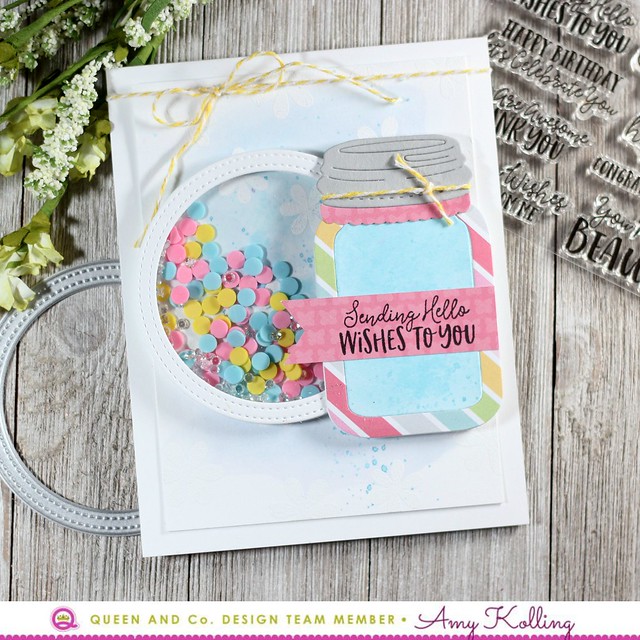
Hello!  I'm here with two totally different cards but ones I wanted to share to show the versatility of these new word dies from Queen & Co.  

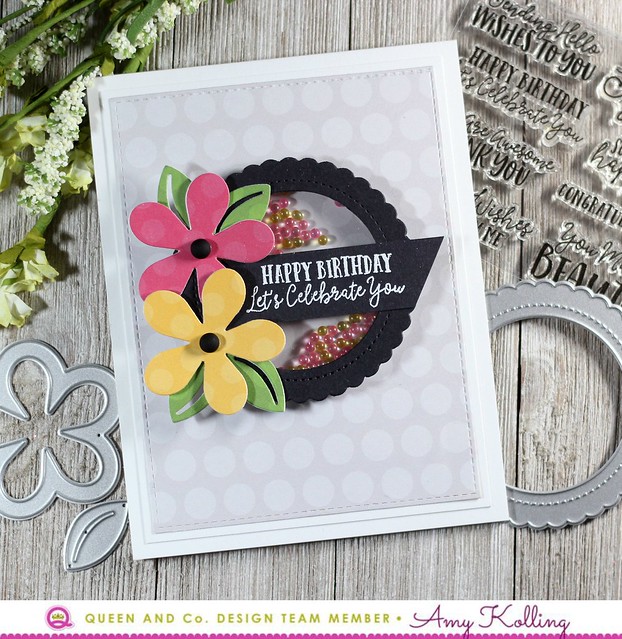
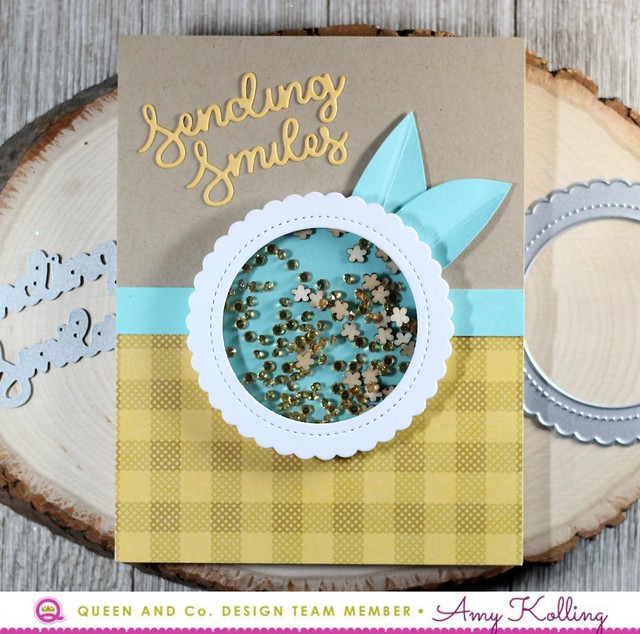
My first card uses the yellow gingham paper from Happy Harvest.  A trimmed portion of the yellow gingham was adhered to a kraft notecard.  

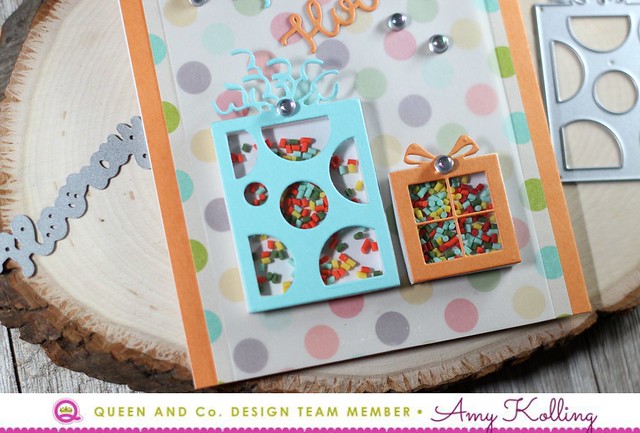
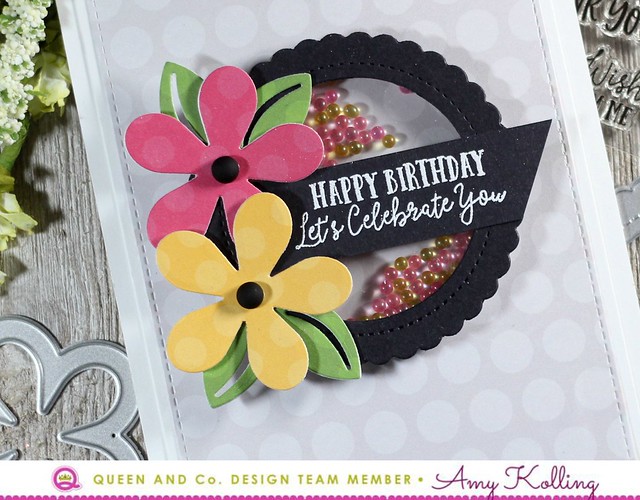
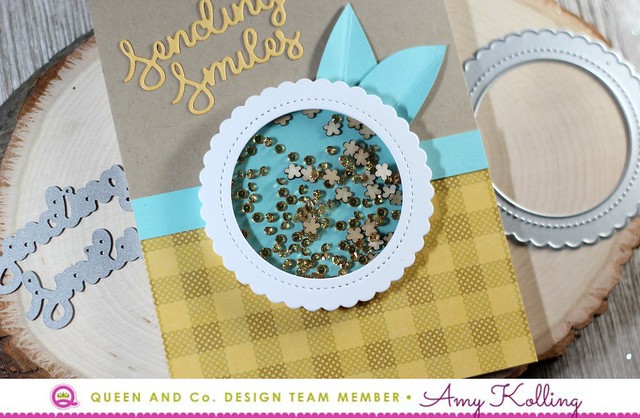
I created my shaker using Wood Toppings and Diamonds Prime.  Because I used the scallop circle shape, I finished off my card with some hand cut leaves and the die cut sentiment "Sending Smiles".  

Sending Smiles2 

Supplies:
Circle Shaped Shaker
Happy Harvest 6x6 Paper Pad
Wood Toppings
Diamonds Prime

********************************

Merry Christmas 

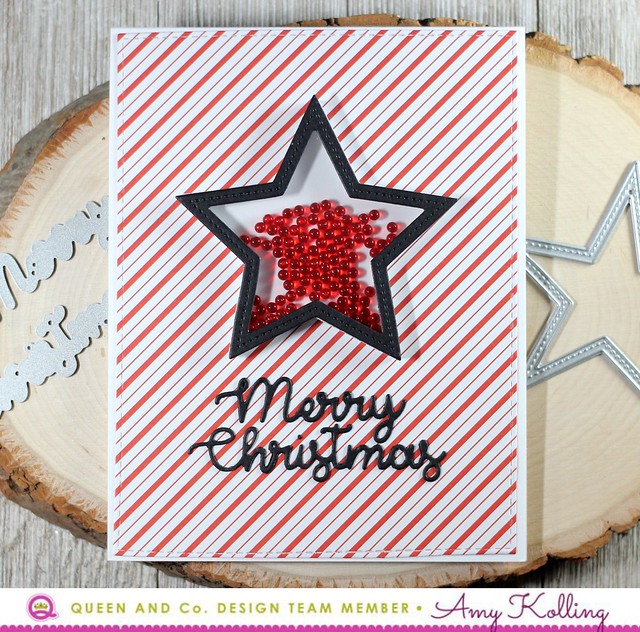
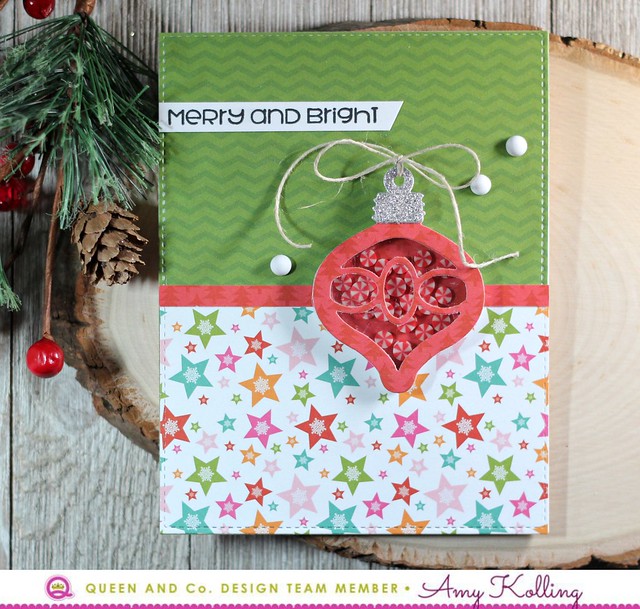
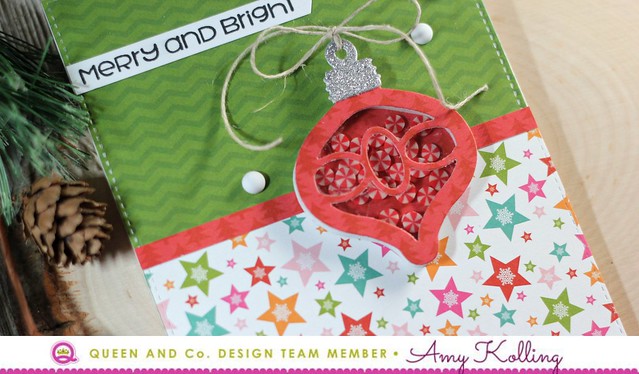
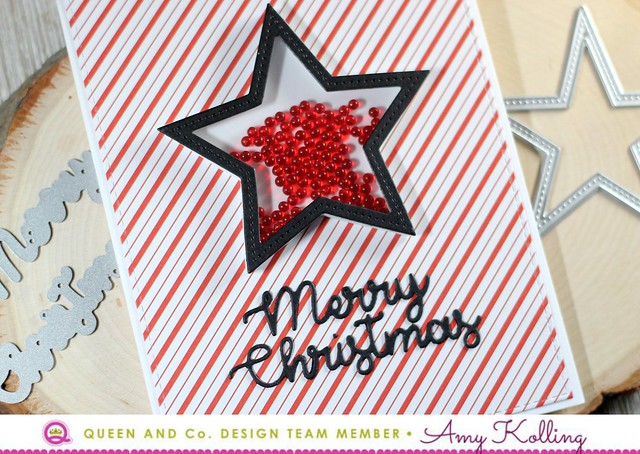
My second card is all holiday!  Using paper from Merry & Bright, I added a panel to a white notecard and a die cut 'Merry Christmas' done in black cardstock.

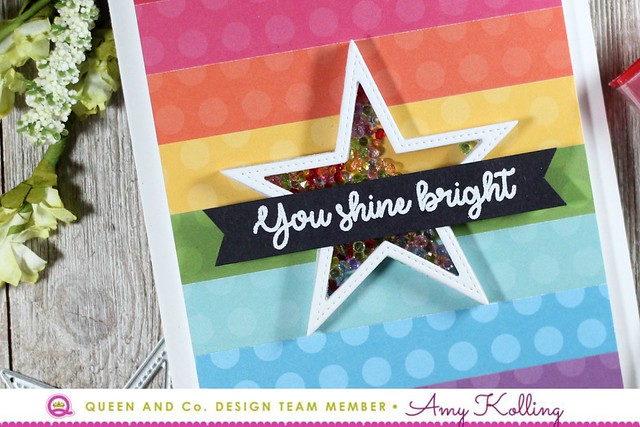
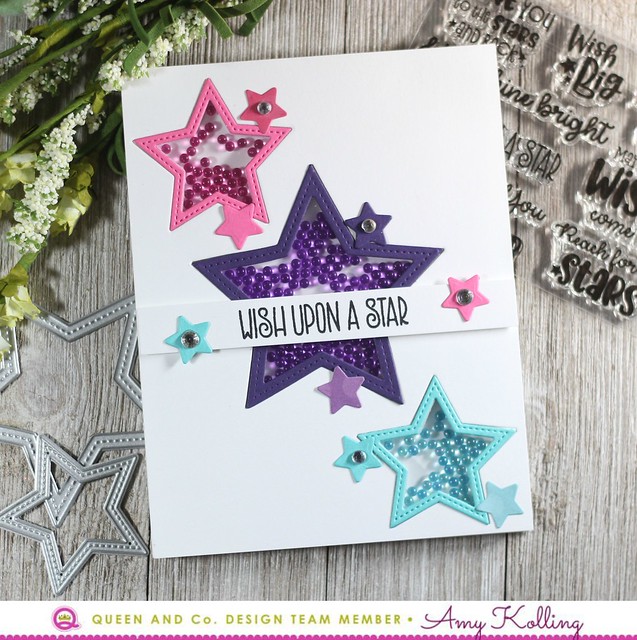
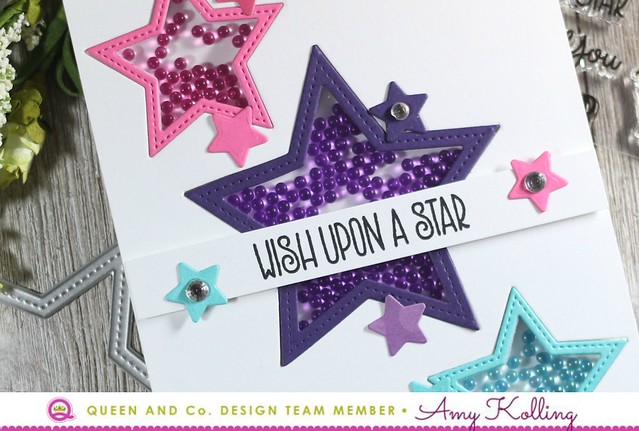
I created my star shaker using Tiny Bubbles as the toppings!  I love the look of these!  To keep this as simple as can be, I added my star shaker.  

Merry Christmas2

Supplies:
Merry & Bright
Tiny Bubbles
Star Die

Thursday, November 8, 2018

Queen & Co. / Hooray and Dream Big

Dream Big 

Hello!  I'm here sharing some birthday cards using the newest WORD dies from Queen & Co.  

Using a past shaker kit called Shaped Shaker Kit Balloons, two of the balloon images were die cut using paper from Merry & Bright 6x6 paper pad.  I decided to use the die cut as is and not as a shaker.  

I adhered a white panel to a white notecard that was layered with pattern paper from Merry & Bright.  To pull in the colors, the balloons were added and the sentiment "sending smiles" was done in paper from Merry & Bright as well.  To finish, the sentiment (layered 3 times for dimension) was added along with a few Bubbles embellishments.

Dream Big2 

Supplies:
Bubbles

*******************************

Hooray

My second card uses pattern paper from Happy Harvest along with Pretty Presents Shaker Kit.  To tone down the pattern, I added a stripe of vellum over the top and adhered the die cut words.  

Assembling these shakers are so easy!  I assembled two presents and added toppings from the Pretty Presents Shaker Kit.  To finish, a few clear Bubbles were added to the presents and background.

Hooray2 


Tuesday, October 16, 2018

Queen & Co. / Monster Bash

Green Monster

Hello!  
I'm here on the blog today with a fantastic new pom pom kit called Monster Bash!  It can create the most adorable pom pom monsters!  It has so many parts and pieces to make whatever kind of monster you want! 

Queen & Co

My first card uses the large green pom poms included in the kit to make the rectangle monster.  Piecing the monster together is so easy as Gloobers (adhesive dots) are included in the kit.  The hardest part?  Deciding what color the hair, arms, and legs are!  

I added my green monster onto a white die cut rectangle and stamped the sentiment at the bottom in black ink.  This panel was added to my notecard that was already layered with pattern paper from the 6x6 paper pad Fright Night.

Green Monster2  

Supplies:

****************************

Yellow Monster 

My second card I went with making an outer space monster on the moon!  I thought it was perfect for this sentiment!  

Using a die from my stash, I impressed it onto a panel of white cardstock and die cut using a standard circle die to resemble a moon.  I pieced my yellow monster together using the large yellow pom poms, mouth, arms and legs!  I added the monster to my "moon" atop pattern paper from Fright Night.  

Yellow Monster2 

Supplies:


Thanks for sharing a part of your day with me!

Wednesday, October 3, 2018

Queen & Co. / Monster Mash

Purple Monster 

Hello!  
I'm here with some cards using the new pom pom Monster Mash Kit from Queen & Co.  The papers alone are swoon worthy!  So perfect for Halloween or a special birthday!

For my first card, I created a purple pom pom monster and gave it green horns, arms, and legs die cut out of green pattern paper from the 6x6 Fright Night paper pad.  

To keep this simple, I layered up some pattern paper for the background and banners to ground my monster.  To give this some sparkle, I added some Halo embellishments.

Purple Monster2

Supplies:

****************************

Orange Monster

My second card, uses lots of pattern paper again from Fright Night 6x6 paper pad.  I created an orange pom pom monster for this Halloween card that is perfect to give to a youngster!  

I used this layout as it really gives the pattern papers a time to shine besides, it is fun to mix and match!  I added some Orange and Turquoise Goosebump embellishments.  

Orange Monster2 

Supplies:


Monday, September 24, 2018

Queen & Co. / Holiday Wishes Kit

Merry and Bright 

Hello!  Ornaments are a classic, holiday icon.  The Queen & Co. Holiday Wishes Kit which features 6 different ornament shaker die shapes, loads of adorable shaker toppings, festive paper pad, and stamp set filled with sentiments.

My first card uses 3 pattern papers from the Merry & Bright 6x6 paper pad.  They were layered over a white notecard.  My ornament shaker was created with adding the red/white candy toppings from the kit and finishing it off with a silver topper and twine bow.

Merry and Bright2

The stamp set included in the kit has many sentiments that can be stamped for a sentiment banner.  This is one of my favorite ways to add a sentiment!  To embellish, a few white Rubber Bubbles were added.

Supplies:

**************************************

Jingle all the Way

My second card is more interactive and features a "hanging" ornament through an opening in the front of the card.  I created my ornament with pattern paper from the Merry & Bright 6x6 paper pad so that when the card opens, both sides are "finished".  The ornament is more of a chipboard type element.  I die cut many ornaments and glued them together.

Jingle all the Way2

To create the notecard, a standard circle was die cut from both a white panel and the notecard itself.  This way I could string the ornament from the top and sandwich the ends between the layers for a finished look.  After adding a few score lines and a stamped sentiment, I lined the inside of the card with the fun retro striped paper.

Supplies:

Monday, September 17, 2018

Queen & Co. / Holiday Wishes Kit

Hello!  Christmas will be right around the corner and I've got some easy shaker cards to share using the Queen & Co. Holiday Wishes Kit.

My first card is traditional with light bulb type ornaments using some of the red and green papers from Merry & Bright 6x6 paper pad.  I filled them with the candy cane and snowman face toppings included in the kit.  

Christmas Greetings

My ornaments were mounted onto a polka dot embossed white panel and embellished with glitter tops along with silver embroidery floss.  A simple sentiment fishtail banner was added.

Christmas Greetings2 

Supplies:

********************************************

My second card uses non-traditional colors along with lots of silver embellishments.  I added silver paper to the bottom of a notecard and added the pink snowflake paper from Merry & Bright 6x6 paper pad that was die cut with a decorative edge.

Peace Love Joy

My ornament shaker is all done in silver glitter paper and some gorgeous metallic round toppings.  I added a sentiment banner cut at an angle with foam adhesive.  To finish, a few Clear Goosebumps were added.

Peace Love Joy2 

Supplies:

Thursday, August 30, 2018

Queen & Co. / Bug Jar Kit

Hello!  I wanted to share some ways to use the Bug Jar Kit from Queen & Co. without the shakers!  I created two cards from this kit but there are so many other ways to use this kit too!  

Queen & Co

I am starting with a super clean and simple card using just the butterflies from the stamp set included in the Bug Jar Kit.  I went with Copic coloring the butterflies in pastel colors of the rainbow and die cut using the coordinating dies.


Because I wanted the butterflies to be the focal point of my card, I added them to a white panel of cardstock which was adhered to a white notecard that was scored to have 3 lines on either side.  I love how this simple texture adds to the card!  To create some shine, I added Glossy Accents to the butterfly bodies.  What's fun about this kits' stamp set is that it includes both whimsical and bold sentiments using fonts.  I stamped one of the sentiments on a hand trimmed banner and added it with foam adhesive.


Supplies:

For my second card, I used the jar dies from Love Jar Kit just as die cuts.  I needed a place to have my ladybugs perch!  I ink blended a light blue background using Tumbled Glass Distress Ink onto the inside of the jar and then stamped the branches.  I added some Copic colored and die cut ladybugs to the scene.  My jar topper was stamped and die cut from Delightful Dots paper pad.


I added my ladybug jar to a notecard that had a cloud sky stenciled in with Tumbled Glass Distress Ink.  The grass was created with some grass dies and pattern paper from Flirty Florals paper pad.  


Supplies:

Tuesday, August 14, 2018

Queen & Co. / Bug Jar Kit


Hello!  I have to share the cutest addition to the Love Jar Kit.......Bug Jar Kit!  The toppings in this kit are so adorable!!  I created two shaker cards from this kit but there are so many other ways to use this kit too!  

Queen & Co

Let's start with a BUG card.  Specifically this little caterpillar image!  I created my shaker using the dies from the Love Jar Kit and filled it with the leaf toppings, wood toppings, and the rubble toppings.  I love the woodsy effect with pairing the wood with the rubble toppings!


My background was created with pattern paper from Delightful Dots.  To ground my bug shaker, I white heat embossed the 'cute as a bug' sentiment many times onto a strip of dark brown cardstock.  To finish, I added some twine around the jar lid and the caterpillar with branch to the jar.  


Supplies:


For my second card, I decided to keep it fresh using pastel colors.  I started by creating my bug shaker using the same dies except I added the bow and jar topper from the Bug Kit.  I added three colors of butterfly toppings and some clear diamond toppings for my shaker contents.


My background was created with several pattern papers from Flirty Florals paper pad.  To finish, I added a colored die cut butterfly and sentiment banner to the butterfly jar.  


Supplies:

Monday, July 30, 2018

Queen & Co. / Star Shakers


Hello!  Queen & Co. has done it again with their shaker kits!  I am sharing some STAR shakers that make great cards for any occasion.  The star dies that are included in this kit have stitching around the edges....I love this detail!

My first card starts with cutting 5/8" strips of the larger polka dot print papers from Delightful Dots.  The strips were added to a piece of cardstock and trimmed all the edges for a clean look to my panel.  

Star Shaker 

My shaker was made using one of star dies with white cardstock.  I filled my star shaker with Pastel Diamond Toppings in all colors to go with the rainbow theme of my card.  To finish, my sentiment, from the Star Shaped Kit, was white heat embossed onto a hand trimmed black banner.

Star Shaker2 

Supplies:


My second card uses an "inlaid" technique so that my card is flat but still has the shaker element.

I started making my inlaid shakers by die cutting the stars in a panel of white cardstock.  Using this panel as a guide, I laid this panel over my notecard and added the foam shaker outlines to the panel.  After removing my panel, lots of foam adhesive was added to the back and added to my notecard.  

Inlaid Star Shaker

I filled each star with various coordinating colors of Bubbles Toppings and sealed my shakers.  I die cut the stars out of cardstock and inlaid them over the shaker to hide them.  A few small star die cuts were added along with Iridescent Rhinestones.  Lastly, a simple stamped sentiment banner was added across the middle star.

Inlaid Star Shaker2 

Supplies:

Monday, July 16, 2018

Queen & Co. / Circle Shakers


Hello!  Queen & Co. has some amazing shaker kits.  I am sharing some CIRCLE shakers that literally can be used for so many things. The circle dies that are included in this kit have that cute stitching around the edges!

I created a simple birthday card using the shaker as the focal element.  My circle shaker was made using black cardstock and added to a white notecard layered with pattern paper from Flirty Florals.  My shaker was filled with Iridescent Bubbles Toppings.

Circle Shaker 

To my shaker focal point, I added some die cut flowers using dies from the Shaped Flowers Shaker Kit die cut from the Delightful Dots Paper Pad.  The flower centers are black Rubber Bubbles.  The sentiment was white heat embossed onto a black banner.

Circle Shaker2

Supplies:


My second card again uses the circle shaker dies to make a shaker but this time more as a supporting element to my jar die. To a white panel, flowers from the Love Jar Kit were white heat embossed and using emboss resist, I painted loosely over the top with watered down Broken China Distress Ink.  

Circle Shaker3

My circle shaker element was created by adding in some of the Confetti Toppings along with some clear Pastel Diamonds.  To finish, an assembled Love Jar was added along with a fun sentiment banner.

Circle Shaker4

Supplies:

Related Posts with Thumbnails