Wednesday, August 25, 2021

Papertrey Ink / The Great Cover Up


Hello!
I am up over at Papertrey Ink with 'The Great Cover Up' feature this week.  

GreatCoverUp2 8.18

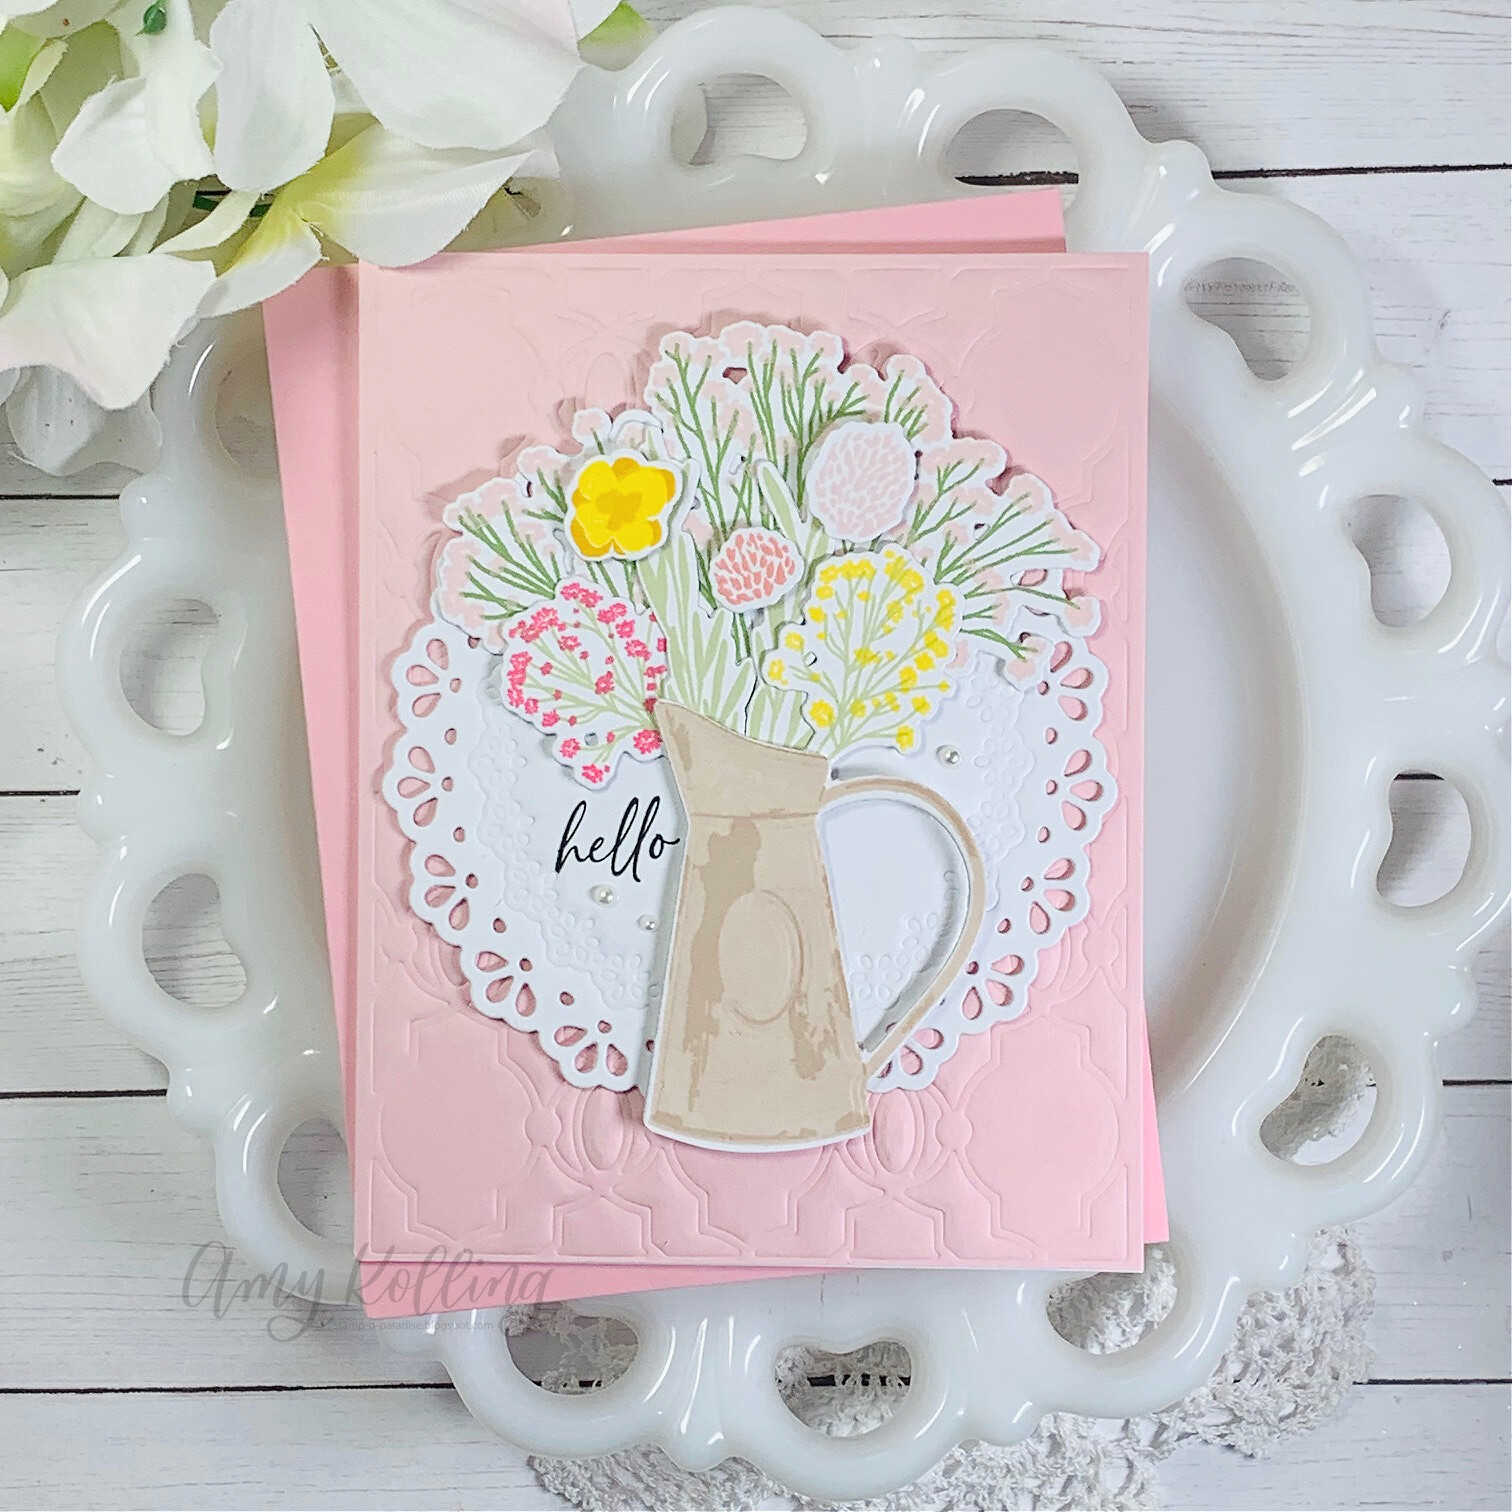
For this week's 'The Great Cover-Up Feature', I decided to do some layering and impressing of dies from Papertrey Ink.  I started with the background.  The Cover Plate: Ornate Die was impressed into a piece of Sweet Blush cardstock.  Next the layering element, the largest Delicate Doilies Die was die cut from white cardstock and the next largest Delicate Doilies Die was impressed into that layer for a subtlie look but not too busy.  An assortment of blooms from Sprigs & Sprays were added to the pitcher element from Abundant Blooms.  As finishing touches, a simple hello, from Just Sentiments: Happy Hello, was stamped and a few pearls added.

Great Cover Up 8.18


Supplies

Stamps:  Sprigs & Sprays, Abundant Blooms, Just Sentiments: Happy Hello
Dies:  Cover Plate: Ornate Die, Delicate Doilies Die
Misc:  Pearls, Foam Adhesive

--Amy ♥

Reverse Confetti / Lots of Hugs


Hello!  
I am sharing a "hint" of fall using the stamp set......Bloom, from Reverse Confetti.  
I decided to create some mums and sunflowers for this floral arrangement.


All of the flowers were black heat embossed onto white cardstock and ink blended with various colors of Distress Inks.  Emboss resist is one of my favorite techniques!  Each bloom did have some Copic shading added for a bit more depth.  The blooms and leaves were die cut and arranged over a background made with the Stitched Pinwheel Cover Panel Confetti Cuts done out of white (each piece was added with foam adhesive for dimension).  A sentiment from Scripty Sentiments was stamped in black ink and a few gold pearls were added.   


--Amy ♥

Avery Elle / Halloween S'Mores

Hello!  

I have my first Halloween card of the year!  Halloween S'Mores from Avery Elle features this adorable image with several interchangeable sentiments!

***Shop for Avery Elle HERE***

I created my background by ink blending 4 different shades of purple Distress Inks.  Using the Slimline Borders Elle-ments, the zig zag was done on either edge of the ink blended panel.  For a background for the S'Mores, the Star Scene Elle-ments was die cut from black cardstock and silver, glitter stars were paper pieced into the starry sky.  The S'Mores were Copic colored and layered twice for just a bit of dimension.  To finish, slim sentiment strips were stamped and added with foam adhesive.  This whole panel was added to black strips down either side leaving a thin white line of cardstock at the edges.  


Supplies:


--Amy ♥

Tuesday, August 17, 2021

Heffy Doodle, Maker Forte, and SugarPea Designs Collaboration Blog Hop


HeffyDoodleMakerForteSPD7


Welcome to the Heffy Doodle, Maker Forte, and SugarPea Designs Collaboration Blog Hop!
Design Team members from all three companies are sharing inspiration using products from all three companies!


I have a few projects to share that combine products from each of these companies.

Rainbows are always a good thing.  This card started with an ink blended cloud background using the Heffy Doodle Cloudy Skies Stencil and the Maker Forte Rah Rah Skirt Ink.  I used the Wendy Vecchi MAKE ART Stay-tion for my ink blending.  This tool is fantastic!  

HeffyDoodleMakerForteSPD3


The Heffy Doodle Starry Rainbow Die was done in some of my favorite colors and added to the cloudy background with foam adhesive.  A few die cut clouds, from the SugarPea Designs Spring Scene Builder Cover Plate, were added with foam adhesive.  I thought this sentiment was perfect to add......from SugarPea Designs Color of Life.  Crystal Stickles was added to all the star centers.

HeffyDoodleMakerForteSPD6
***************************************

My second card uses products from Maker Forte and SugarPea Designs.  I used the Flower Trio SlimLine Stencil by Alex Syberia from Maker Forte along with Pop Art, Rah Rah Skirt, and California Love Inks also from Maker Forte.  The panel was ink blended and trimmed down.  

HeffyDoodleMakerForteSPD4

To this panel, the SugarCut Hello Block Word from SugarPea Designs was die cut into the floral panel.  The HELLO was die cut once more but out of foam for dimension.  To keep this simple, the panel was matted with light grey cardstock and a few coordinating gems were added.

HeffyDoodleMakerForteSPD5

BLOG HOP DETAILS:

To be entered to win the giveaway, all you need to do is comment at each stop along the Blog Hop!
Maker Forte will be giving away $35, Heffy Doodle will be giving away £25, and SugarPea Designs will be giving away $25 to their respective stores!  Be sure to comment before 11:59 PM EST on Aug 20th to be entered to win!

Each company will post their random winner on Aug 21st at 10AM EST!  Make sure to check the Heffy Doodle Blog,  Maker Forte Blog, and SugarPea Designs Blog to see if you’re a winner!


You should have come from Amanda Fitterer and the next stop is Kim Boliver.


Blog Hop Lineup:

Heffy Doodle Blog

Amanda Fitterer

Amy Kolling

Kim Boliver

Cassie Trask

Kari VanNoy

Vera Yates

SugarPea Designs Blog

Maker Forte Blog


--Amy ♥

Thursday, August 12, 2021

Avery Elle / Fall 2021 Release Blog Hop

Nutcracker2

Welcome to the Fall Release from Avery Elle!  There is an amazing Blog Hop with tons of inspiration with this release!!  Get ready for some fall, Halloween, and winter!!


How about some holiday to start things off!!  The new Nutcrackers are so fun to color!  I decided to color in my favorite image with green and dark red Copics.  The oval background was spritzed with Shimmer Spray and some stars were stamped into the background with Cracked Pistachio Distress Oxide Ink.  A frame using the Oval Burst Elle-ments was added.  The image and the sentiment were added with foam adhesive and a few silver pearls!

Nutcracker


Check out the Blog Hop for more projects using the new release!

--Amy ♥

Monday, August 9, 2021

Ink to Paper / Papertrey Ink / What Do I Do With This

Happy Birthday2

I am up over at Ink to Paper / Papertrey Ink with 'What Do I Do With This' feature this week.  


Happy Birthday

The Cover Plate: Birthday Die is such a fabulous die to use as a cover for an ink blended background!!  The possibilities of colors for a background for a BIRTHDAY are endless!  A bonus?  Your background doesn't have to be perfect......the cover die covers the imperfections!  This combination uses Distress Oxide inks on Bristol Smooth Cardstock.  The ink just glides and blends so well on this paper!  Over this panel, Shimmer Spray was added.  A separate panel was also ink blended with the same colors and the cover plate was die cut from this.  The sentiment from inside of the die was hand trimmed from the frame and stars and added over the white Cover Plate: Birthday Die.  As finishing touches, rainstones were added across the card.  What is fun about clear rainstones is that they take on the colors of the cardstock behind them but also add dimension and shine!  

Happy Birthday3

Supplies

Dies:  Cover Plate: Birthday Die
Ink:  Wild Honey, Spiced Marmalade, Seedless Preserves Distress Oxide Inks
Accents:  Rainstones, Shimmer Spray


--Amy ♥

Sunday, August 8, 2021

Reverse Confetti / Confetti Release Day!

Sincere Gratitude2

WELCOME to Release day for this fantastic mini release from Reverse Confetti!  We are sharing even more inspiration using these new sets with a HUGE blog hop!


I have two more projects to share using these sets WITHOUT the Cover Panel dies!  
These flower dies are so fantastic on their own that I wanted to show them off!  


My first card uses the Double Stitch Window Cover Panel which has the perfect space for these Scripty Sentiments!  The window was spattered with Champagne Gold Gansai Tambi watercolor.  The flowers, from Floral Chain Cover Panel, (Rose, Tangerine, Aqua, and Sunshine carstock) were die cut and layered together pulling up the petals for dimension.  The flowers were layered on opposite corners and a few gold pearls were added.

Sincere Gratitude

*********************************************

My second card uses a "retro" color palette that I have fallen in love with!  Pair these colors with stripes and it's perfect!  

Retro Hello

The flowers from Hello Daisy Cover Panel were die cut using the same "retro" colors and gold chunky cardstock was die cut for the flower centers.  More gold watercolor splatter was added over the cardstock stripes and the Hello die was multi layered with the silhouette layer slightly off center for more of a shadow look.

Retro Hello2


****BLOG HOP****

--Amy ♥

Saturday, August 7, 2021

Reverse Confetti / Countdown to Confetti Mini Release Day 2/ Giveaway

IMG_1857 (1) (1)


Welcome to Day 2 of the Mini Release from Reverse Confetti!
TWO new sets will be releasing tomorrow, August 8th!  

Make sure to follow below and comment for a giveaway!


Today, I'm sharing the Hello Daisy Cover Panel.  I love that this die comes with a "HELLO" die sentiment and it's shadow!

I decided to ink blend a background using Picked Raspberry, Spun Sugar, Shaded Lilac, and Blueprint Sketch Distress Inks.  Once the panel was blended, a striped stencil was added over the top every so lightly, ink blended some more, and then spritzed with water droplets.  To keep the same color scheme, cardstocks from my stash were used to color coordinate with the inks for all the florals.  Two panels were used to create florals in opposite corners.  As a last touch, random silver pearls were added.

IMG_1856 (1)


****GIVEAWAY****

Leave a comment by noon central on August 7th for a chance to win. There will be a $15 Gift Certificate for one blog commenter and also one FB commenter.  Make sure you pop over to the Reverse Confetti Blog for all the details!

****BLOG HOP****

--Amy ♥

Friday, August 6, 2021

Reverse Confetti / Countdown to Confetti Mini Release / Giveaway


Floral Chain2

Surprise!  Welcome to the Mini Release from Reverse Confetti!
These TWO new sets will be fast favorites if you love die cutting and florals!  There is also a new beautiful handwritten sentiment set too!

Make sure to follow below and comment for a giveaway!


I'm starting things off today with the Floral Chain Cover Panel.  

I trimmed some cardstock colors (Piggy Bank, Flamingo, Buttercup, Sunshine, Tangerine, Iced Aqua, and RC Aqua) into strips and added them to a white notecard spaced evenly.  Using the Floral Chain Cover Panel, the panel was die cut and the floral spray was hand trimmed out.  Since the background is super colorful, the flowers were kept white with gold glitter centers (cut out of gold chunky cardstock) and added with foam adhesive for dimension.  The sentiment was carefully stamped onto the strips of cardstock.  As a final touch, a few gold pearls were added to tie in the gold flower centers.

Floral Chain (1)


****GIVEAWAY****

Leave a comment by noon central on August 7th for a chance to win. There will be a $15 Gift Certificate for one blog commenter and also one FB commenter.  Make sure you pop over to the Reverse Confetti Blog for all the details!

****BLOG HOP****
--Amy ♥

Wednesday, August 4, 2021

SugarPea Designs / Mix It Up Challenge #82

Amy_MIU82_2

I have a card made for the current Mix It Up Challenge over at SugarPea Designs
 Make sure to check out the challenge photo and/or sketch for this month.


Here is this month’s Mix it Up Challenge!


Autumn and all it's glory will be here before you know it.  Fall days means beautiful leaves changing color, crisp days, and thankfulness.  I truly went with the challenge and followed both the colors and sketch.

I've heat embossed the Autumn Background with Silver Pearl embossing powder an then ink blended some orange and browns over the top for an emboss resist look.  The panels were die cut using Stitched Rectangles and the Stitched Scalloped Rectangles.  The lovely script sentiment, from Autumn Blessings, was stamped in black ink onto a light grey circle.  A few pearls were added to tie in with the pearl embossing.


Amy_MIU82


--Amy ♥

Related Posts with Thumbnails