Friday, June 30, 2017

SugarPea Designs / Sending Sunshine

June DT Feature
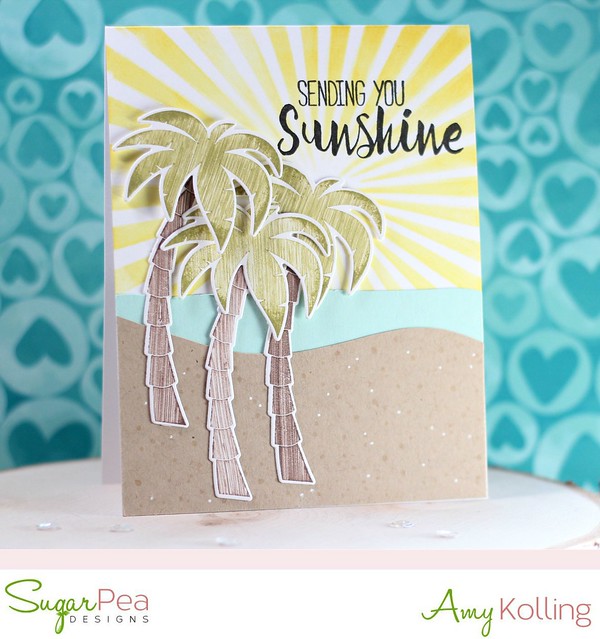
Hi everyone!  Amy K. here sharing a piece of SUMMER with you and where I'd like to be right now!  Our family loves the beach and usually goes about every 2 years.....this is our off year so this scene will have to do!


I've used some sets from SugarPea Designs newest release Let's Flamingle and Tropic Like it's Hot.  I created my own beach scene by handcutting water and a beach.  I added dots of "sand" with my E31 Copic and a white pigment pen.  For my palm trees, I used a technique that I haven't done in ages.  I call it stamp dragging and it works well with solid images.  I simply inked up my stamp and then put it back on the ink pad and dragged it across the ink pad, giving it the striped appearance.  

June DT Feature2

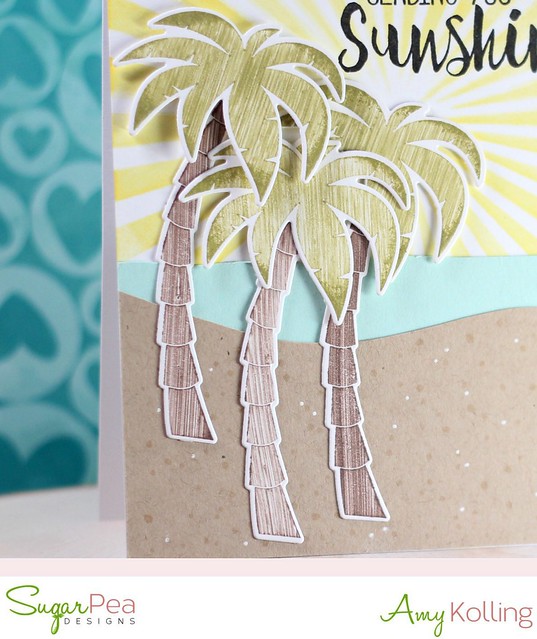
My beachy scene was adhered to a top folding notecard that was stenciled with Mustard Seed Distress Ink with a Starburst Stencil.  To finish, I stamped the "Sending You Sunshine" sentiment in black ink and added my beachy scene below.


Wednesday, June 28, 2017

Avery Elle / Copic Coloring on Vellum

Mom and Dad

Hello!  I am sharing a card that can be seen over on the Avery Elle blog today using Mom and Dad.
I wanted to use the technique, Copic Coloring on Vellum, for my card.  The key to this technique is to white heat emboss and then turn the image over and color your images with Copics on the backside.  Make sure you choose vibrant colors of Copics as the vellum really softens the color.  

I used the floral image from Mom and Dad to white heat emboss onto a panel of vellum that was die cut with the dotted wavy edge die from Picket Fence Elle-ments.  I chose bright colors and colored on the backside of the images.  To continue with the vellum, I've also white heat embossed the word 'Mom' and 'Happy Birthday' onto vellum and a vellum banner.  The sentiments were adhered to the main floral vellum panel.  The whole panel was then added to a white top folding notecard that was layered with a piece of chevron grey/white paper from The Neutral Collection.  As a finishing touch, Marshmallow sequins from Pretty Pink Posh were added for softness.

Mom and Dad2


Thanks for sharing a part of your day with me!

Saturday, June 24, 2017

Pretty Pink Posh / Inspired By

Inspired By

Hello!  I have the pleasure of playing along with the Inspired by......All The Little Things Challenge this week as their Guest.  It's become one of my favorite challenges to look at when I need something to spark an idea!  Thanks to my friend Tracey for inviting me for this challenge! 


When I first saw the inspiration photo, I immediately thought of the umbrella stamps from Pretty Pink Posh all stamped in those luscious colors but when I sat down to make my card, I was instead inspired by the COLORS in general.  So that's where my card went!  I used the newer Bold Blooms stamps from Pretty Pink Posh along with the vine stamp from Build a Bloom, also from Pretty Pink Posh.  All the flowers were stamped in Catherine Pooler inks (Party Dress, Tiki Torch, and Something Borrowed).  Have you tried these inks yet???  They are so amazing with their coverage!  I layered all the vines and flowers over a Stitched Notes rectangle that was added with foam adhesive.  My sentiment, from Thoughtful Greetings, was stamped in Versafine Onyx Black ink.

TIP:For the tiny flowers, I found it easier to die cut lots of flowers and then stamp.  Much easier than lining up the dies with each stamped flower.  ☺


Inspired By4

*****************************

Here is the Inspired By photo for the challenge.  
I hope you can find time to play along with us!


Friday, June 23, 2017

Summer Coffee Lovers Bloghop!

Summer Coffee Lovers Bloghop 

Hello!  I am excited to play along with the Summer Coffee Lovers Bloghop today!  I am playing along with SugarPea Designs who is one of the sponsors!


I enjoyed playing with the coffee themed products that SugarPea Designs has released.  I paired the coffee cup image from Caffeine Addict along with the Coffee word stamp from the new set, The Perfect Blend onto a Zig Zag Stitched Circle.  The strip of pattern paper layered behind is from Sugar & Spice paper pad.

Summer Coffee Lovers Bloghop2 


Wednesday, June 21, 2017

Avery Elle / Beside the Sea

Hello!  I am sharing a card that can be seen over on the Avery Elle blog today using Beside the Sea.

I just love this color combination so I thought I'd pair it with this fun beachy set, Beside the Sea, from Avery Elle.  I colored the beach huts with my Copics and die cut using the coordinating Beside the Sea Elle-ments.  The images were layered over a Distress Ink blended sky and a kraft "beach" done with the Picket Fence Elle-ments.  My two layered circles were added to a Burst Elle-ments background.  LOVE!

Beside the Sea


Thanks for sharing a part of your day with me!

Friday, June 16, 2017

CAS-ual Fridays / Emboss Resist


Hello and Welcome!  I am excited to share a card that I have up over on the CAS-ual Fridays blog today as a guest!  I once was a CAS-ual Fridays Challenge Team member so this is a bit of a homecoming for me!

I couldn't wait to use these Pretty Posies stamps and Pretty Posies Fri-Dies with one of my favorite embossing techniques......Emboss Resist.  Please check out my full post over on the CAS-ual Fridays blog for all the details on my card.  ☺

Pretty Posies3
CAS-ual Fridays Stamps


Thanks for sharing a part of your day with me!

Reverse Confetti / SFYTT

SFYTT

Hello!  I am here sharing a card using the current SFYTT (Sketch For You to Try) over at the Reverse Confetti blog.  Check out the SFYTT post......HERE for all the details!


For the most part, I stayed true to this month's SFYTT but I changed up the focal point.  I used the new Sunburst Tag Layer over a white Topped Off Tag Confetti Cuts.  I layered several black Hello Confetti Cuts together and added it over my sunburst background tag.  I stamped a friend sentiment, from You're So, onto a white strip of cardstock and layered it behind my die cut sentiment.  This was layered over 3 strips of pattern paper from the Pattern Play 6x6 Paper Pad.

SFYTT2


Now the best part is.......there is always a winner every month!  Here are the details:


The winner will receive a $20 gift certificate to the Reverse Confetti store and claim the title of ‘Fetti Fave. The winner of SFYTT will be posted on the Reverse Confetti blog on the 30th of each month.

Check out the SFYTT post......HERE.

So let's see your Reverse Confetti creations this month.....you still have time to get it done!

SugarPea Designs / Sweet Peek Day 5

Pucker Up

Hello!  I am excited to share my last project I've been working on for the brand new release from SugarPea Designs!  Each day this week, we shared inspiration using the new release.  With several new stamp sets, matching dies, and even a new paper product.......there's something you are sure to love!  

Did you enjoy this week of new product peeks?  The NEW products will be available for purchase starting today, June 16th at 6PM EST in the SPD Store.


Today's card is one that epitomizes summer in my eyes......lemonade!  Pucker Up has so many adorable images with little faces on them!  Pair them with the punny sentiments and it's a great set!

I started by layering a turquoise polka dot paper from Life is a Carnival paper pad over a white top folding notecard.  My images were all black heat embossed and colored with my Zig Clean Color Real Brush Markers.  The images were added over a panel of vellum (to soften the polka dot paper) and over a black die cut strip of cardstock where my sentiment was white heat embossed.  A few enamel dots brought the turquoise back to the front of the panel.  

Pucker Up2 


Would you like to win the Pucker Up stamp set? All you need to do is leave a comment on the SPD blog.  It's really that easy!  Winners during our Product Release will be announced on Monday, June 19.


Related Posts with Thumbnails