Sunday, April 30, 2017

Lil' Inker Designs Mini Release Blog Hop

Amy_AngelPets_StitchedCloudCoverUp 

Hello and Welcome to a mini release from Lil' Inker Designs!  This is a special blog hop too.  We are joined by most of the girls that attended the Stamping Away craft weekend I help host where they all received a "new, not released yet" stamp set from Laura!  Each of them received one of 2 different designs that you will for sure get plenty of inspiration for during this hop!  You should have arrived from the Lil' Inker Designs blog HERE to get started and for the FULL blog hop list.  Your next stop is a fabulous designer, Heather Nichols!


To get things started, we also have a few "other" new items the DT will be sharing as well!  We are so excited to introduce the Stitched Clouds Cover Up Die!  As you know, Lil' Inker Designs is known for the wonderful patterns and backgrounds the Cover Up Dies offer.  The new Stitched Clouds Cover Up Die will surely be a go-to die for those scene builder cards!

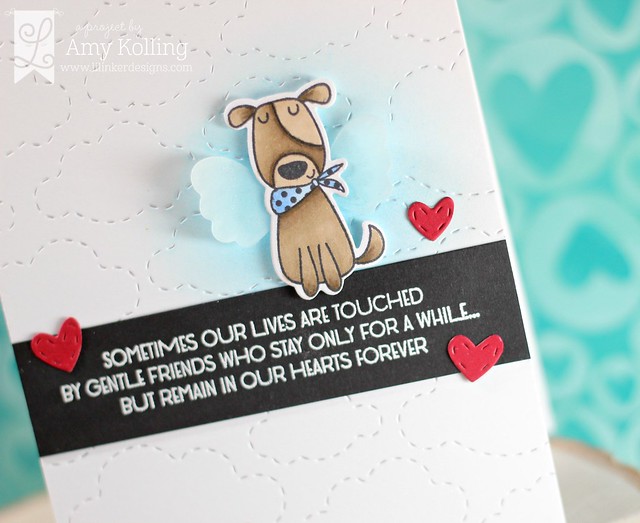
I paired the new Stitched Clouds Cover Up Die with the Angel Pets stamps and dies.  This is a perfect set for sending anyone that has suffered the loss of a dear pet.  I added some shading to my Stitched Clouds background using Distress Ink and added my Copic colored pup along with some vellum "wings".  This sentiment has just the right meaning.....♥.  I also added a few stitched hearts I cut a part from the Hearts Banners Die Set

Amy_AngelPets_StitchedCloudCoverUp2

*********************************

Amy_BeTheReason

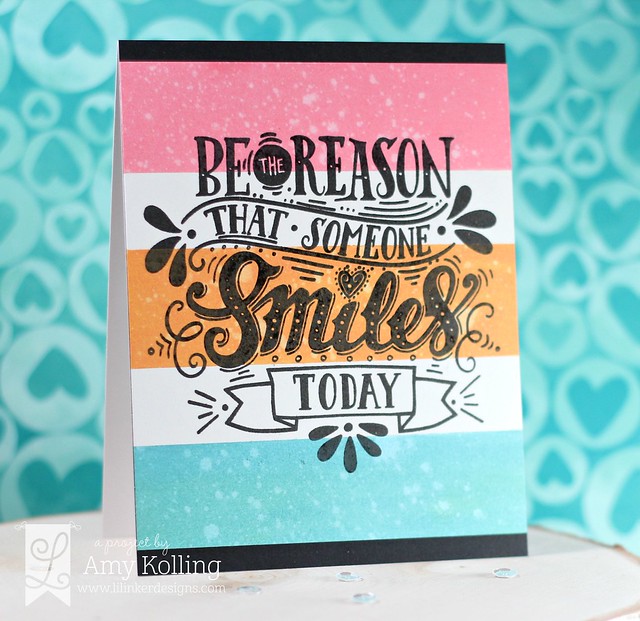
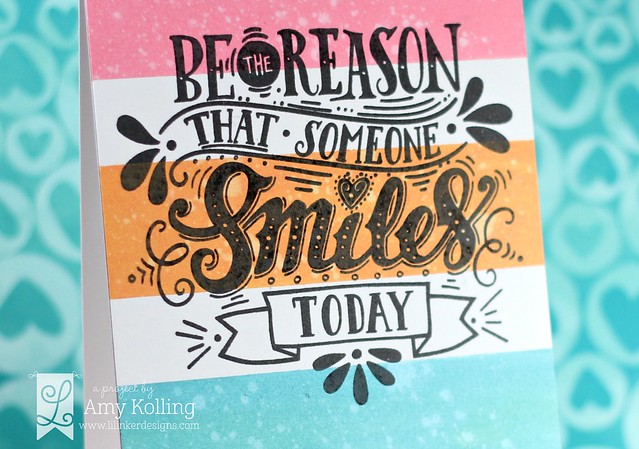
Next up, we are releasing these 2 new large sentiment stamps (and be prepared for more in upcoming releases!  Yay!) called You Will Never Regret Being Kind and Be the Reason That Someone Smiles Today.  These stamps are bold and large to be the total focal point of your card when paired with different backgrounds!    My first card uses Distress Oxide inks to create my own striped background to which I overstamped the sentiment once the stripes were dry.  (I also spritzed the Distress Oxide ink wtih water droplets and blotted with a paper towel)  

Amy_BeTheReason2


***************************************


Amy_NeverForget


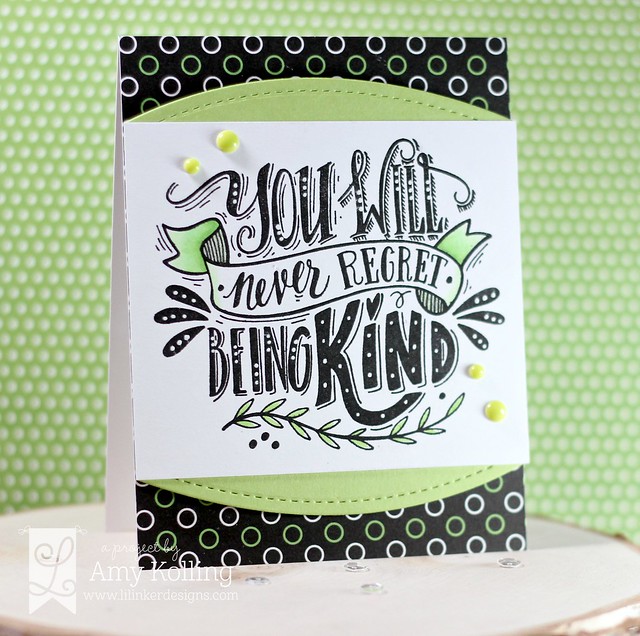
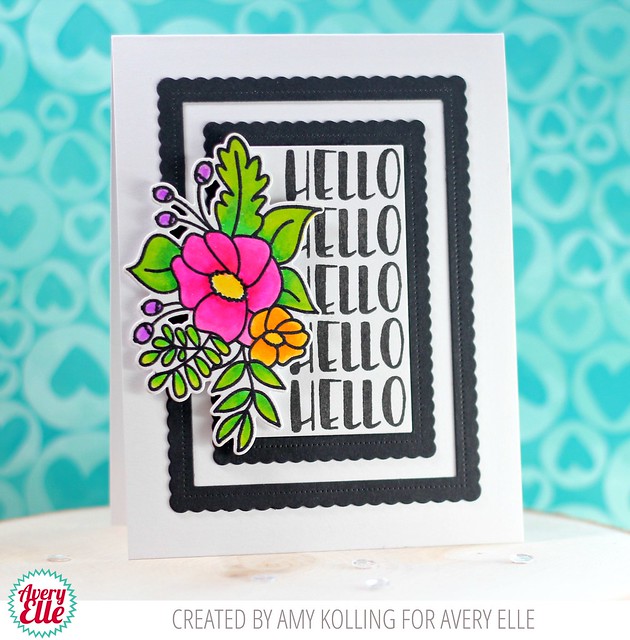
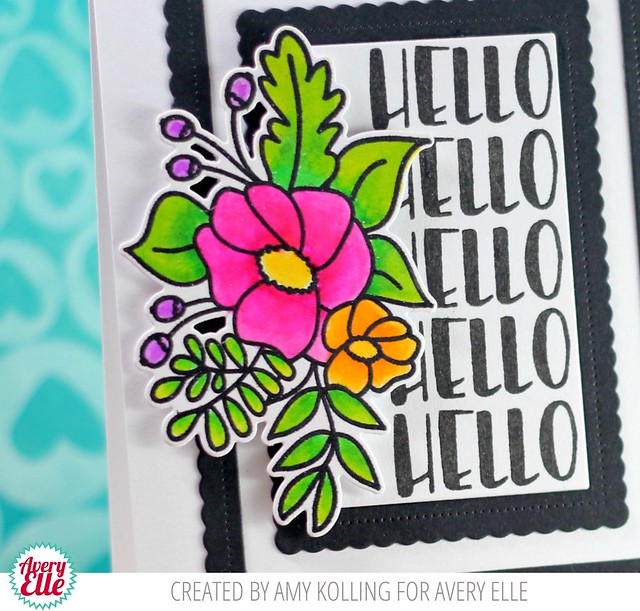
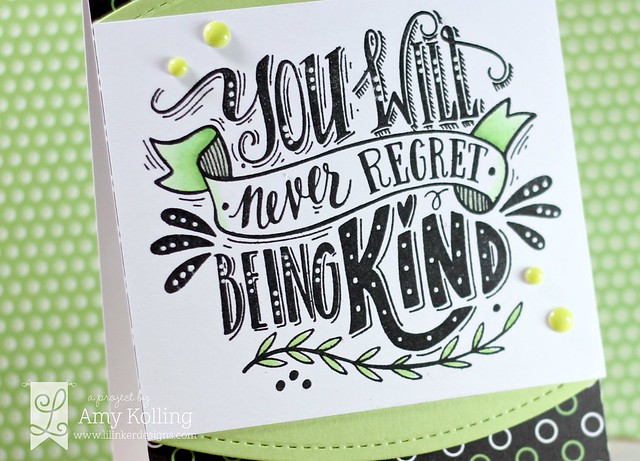
My final card uses pattern paper and design to showcase the sentiment.  Here I've used a bold black pattern and paired it with a chartreuse green color from the pattern.  I love how it turned out!  I added in some rounded, stitched edges with the Border Builders Die Set.  To the sentiment design, I added lots of extra white detail with my Signo Uni-ball Pigment pen and some green Copic detail to the banner.


Amy_NeverForget2


****PRIZES****
Make sure to comment along the way, as there are THREE prizes up for grabs!  One will receive the Be the Reason stamp, one will receive the You Will Never Regret stamp, and a third winner will receive a copy of the Angel Pets Stamps/Dies and Cover Up Stitched Clouds!  Check out the details over on the Lil' Inker Designs blog.  Your next stop is a fabulous designer, Heather Nichols!


Pretty Pink Posh / Hello Butterflies

Hello spring!  Even though spring is the season, I just can't wait for more warmer weather here in Kansas........yes, that Kansas weather has us all turned around!  We've pulled out winter coats to go to softball games!  Crazy!

HelloButterfly

Whenever I am a little challenged with color, I refer to my color board over on Pinterest.  You can follow me HERE.  I knew what I wanted to do for this card but needed a bit of help in the color department.  Insert, Pinterest.  And this color board.  Instant color inspiration!


I love the look of stripes and I've used the Stitched Borders 3 from Pretty Pink Posh to make my colored stripes for my card panel.  The cardstocks were all scraps (bonus!), were die cut, and mounted onto a white cardstock panel.  I stamped 2 "hello" sentiments from Blissful Butterflies onto the strips......made for easy stamping!  The gorgeous butterflies were Copic colored to match the shades of stripes with some Wink of Stella for shimmer.  The butterfly "trails" were stamped in black and butterflies attached with the wings pulled up for dimension.  This whole panel was added to a white top folding notecard with foam adhesive.

HelloButterfly2

Thanks for sharing a part of your day with me.......Spring or not!  ☺

Thursday, April 27, 2017

CAS(E) this Sketch and Reverse Confetti

CAS(E) this Sketch219

Stopping in tonight to share a quick card for one of my FAVORITE challenges.....CAS(E) this Sketch.  Whenever I am struggling with a card, I look to a sketch challenge.  This challenge is ran by my friend Chrissy......she is beyond talented and super nice!!!  

I've used the adorable Foodie Fun from Reverse Confetti.  I thought making a card using the "You're the coolest" ice cream cone stamp would be perfect for my daughter, Payton.  She's been having a rough time of things lately......5th grade and friends is hard!  I stamped and die cut 2 of the cute ice cream cones and layered it over a white die cut panel done with the Drop Cover Panel Confetti Cuts.  A wavy banner of some coordinating polka dot paper was die cut using the banner from Greetings Frame Confetti Cuts.  A few enamel dots from Gina Marie Designs (these are amazing and cheap!) were added to finish.

CAS(E) this Sketch219  #2


Thanks for sharing a part of your day with me!

Just a note

Just a Note3

Hello!  I've been busy making and sending some Happy Mail.........I have some great crafty friends to thank!  I knew just what I wanted to use to make a few cards!

I have been wanting to make a card like this ever since I got the Special Delivery Accents SugarCut.  I mean, who doesn't love rainbow envelopes?  I have lots of them and just looking at them makes me happy!  So I thought, let's re-create some rainbow envelopes!


Just a Note4


Using the Envelope die, I cut out 8 envelopes in rainbow cardstock colors.  I trimmed each "flap" off with my Tim Holtz guillotine trimmer, glued it back on, and added tiny white hearts to the centers (die cutting 8 white envelopes gave me the white hearts).  While I wanted to use the Stitched Rectangle from Birthday Journal Card, the envelopes didn't quite fit.  So, I trimmed down a white panel and added all my envelopes with foam adhesive.  This panel was layered onto a black scallop layer from Birthday Journal Card, leaving just a small black scallop border.  This ties in with the black sentiment strip that was white heat embossed with "Just a note" from Special Delivery.

supply list


Wednesday, April 26, 2017

Bold frames with Avery Elle


Double Pierced Rectangles


Hello!  I am sharing a card that can be seen over on the Avery Elle blog today using Scalloped Pierced Rectangles Elle-ments.
I knew I wanted to go BOLD using these Scalloped Pierced Rectangle dies.  They are a must have in your Avery Elle stash!  I used the smaller 2 frames and die cut both out of black cardstock.  I left in the black rectangle with the small one when I adhered it, so I could add the stamped "HELLO" panel done in white over the top for dimension.  (The HELLO stamp is from Canopy) The bloom, from Mimosas, was black heat embossed onto Bristol smooth watercolor paper.  To color, I used my Zig Clean Color Real Brush Markers.  The ink just glides on and blends beautiful!  (gamechanger----the paper!!!!)

Double Pierced Rectangles2

Thanks for sharing a part of your day with me!

Tuesday, April 25, 2017

Hello, life happens


Hello!  I wanted to share photo of my card that is up over on the Right at Home blog today.  I've used the Cup of Joy stamps, sentiments, and dies.  Pair those with the current CAS(E) this Sketch!, you have a perfect match!  


Hello Coffee

Please check out my post in FULL over on the Right at Home blog!


Friday, April 21, 2017

CardMaker Magazine and Lil' Inker Designs Blog Hop

CardMaker 

Hello!  Welcome to the CardMaker Magazine/Lil' Inker Designs Blog Hop.  We are excited to collaborate with the CardMaker Magazine's DT for this fun event!  

You should have arrived from my good friend Heather Pulvirenti's blog.  If not, please start back over at the CardMaker Magazine blog for the full blog hop list.  Make sure to check out the bottom of my post on how to win a $35 Gift Certificate from Lil' Inker Designs!

No automatic alt text available.

Our theme is ANYTHING GOES!  This gave me the perfect opportunity to use a set that was released a while back but have fallen in love with again.....So Prickly.  I've paired it with the newly released Silly Stitched Squares Dies for some layers on my card.  One of the layers is from the coordinating So Prickly paper pack.

My cactus image was stamped with my FAVORITE inks from Fresh Ink by Impress Cards and Crafts.  (what's even better, they are having a local sale and later this weekend an on-line sale-----not to enable or anything!)  I stamped the cactus in the main color and then added shading with a darker/different color using my Misti.  My cactus was hand trimmed and added with foam adhesive.  The sentiment was white heat embossed onto a thin strip of black cardstock, ends trimmed into a banner, and adhered with foam adhesive.

CardMaker2

There is a chance to win a $35 gift certificate to Lil' Inker Designs by leaving comments over on the LID blog........HERE.  Your next stop is Kat Benjamin's blog.
Image may contain: text
Remember, if you want to shop........click over on my link.....HERE!  
Thanks for sharing a part of your day with me!  

Thursday, April 20, 2017

TBT with Pretty Pink Posh

Hello!  I wanted to share a sneak at my project that you can find over on the Pretty Pink Posh blog for my Throwback Thursday post this month!

Pretty Pink Posh: Throwback Thursday

This month I focused on a popular older product called Storybook 2.  Stop over at the Pretty Pink Posh blog for the rest of my project to see how I used this die for a BABY shaker card!

Congrats3

Thanks for sharing a part of your day with me!

Related Posts with Thumbnails