Wednesday, September 29, 2021

Papertrey Ink / The Great Cover Up

Let it Snow2

Hello!
I have a card share for a feature over at Papertrey Ink called The Great Cover Up.


Foiling has become very popular.  Foiling your already present dies whether they are sentiment dies or in this case the new Border Bling: Snow Flakes Die, is a way to get more out of your dies.  Using smooth cardstock, the Border Bling: Snow Flakes Die was foiled using Skybright foil from Spellbinders.  It's such a pale shade of blue and perfect for this wintery card!  

Let it Snow

While I had great intentions of creating a scene for this frame, I decided to change course and create a snowy shaker card!  The center of the Border Bling: Snow Flake foiled panel was die cut using a standard rectangle and backed with clear cardstock to create the shaker.  It was filled with chunky glitter.  To tie in with the foiled snowflakes, the "Let it Snow" sentiment dies included with the Border Bling: Snow Flakes Die were done using a piece of foiled cardstock and then die cut. 

Let it Snow3
 

Paper: White, Clear Cardstock
Dies: Border Bling: Snow Flakes Die
Other: Foam adhesive, Skybright Foil, Chunky Glitter


--Amy ♥

Avery Elle / Layered Holiday Truck

Hello!  

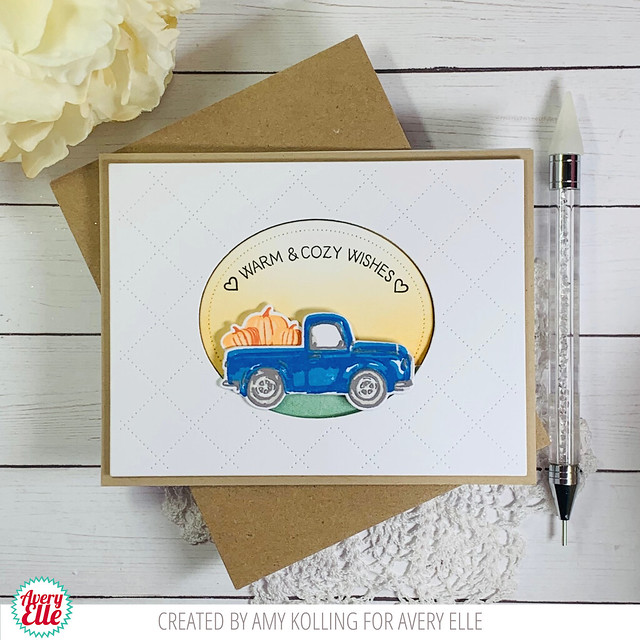
Amy here with a darling new set called Layered Holiday Truck.  Since it is officially fall, my truck is blue with some festive fall pumpkins!   

***Shop for Avery Elle HERE***


Layered Holiday Truck2

To highlight this adorable truck, I used the Quilted Frame Elle-ments.  To the oval behind the truck, the orange dusky sky was ink blended with orange ink.  To keep it simple, a sentiment, from Fall Picnic, was curved onto a block and stamped in black ink.  To keep this masculine, I layered my frame and scene onto kraft cardstock with no embellishements!  BUT I can't wait to use this truck done in RED for the holidays! 


Layered Holiday Truck

Supplies:


--Amy ♥

Monday, September 27, 2021

Pinkfresh Studio / September Stamp, Die, Stencil, and Hot Foil Release

Pink Dahlia2

Welcome to the Pinkfresh Studio 
September Stamp, Die, Stencil, and Hot Foil Release!
Super excited to share this release with you!  If you are a fan of PFS layered stencils, you will LOVE this release!

Make sure to scroll all the way through the post for the promotions during the release.  

For all release information please start from the Pinkfresh Studio Blog.


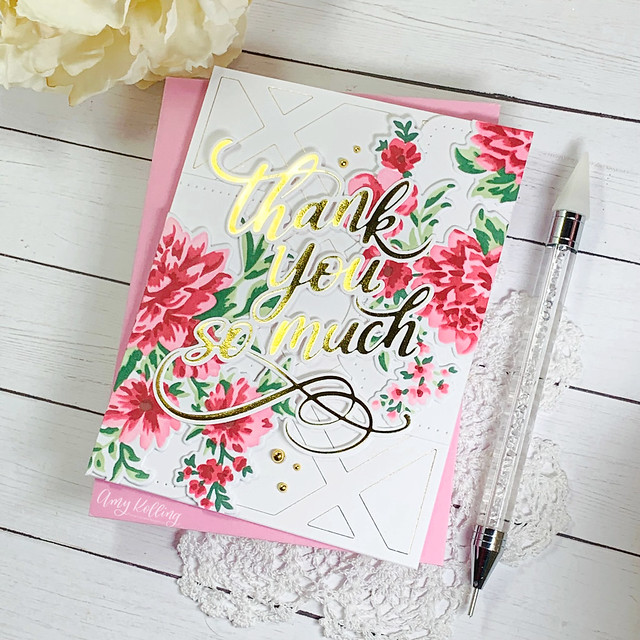
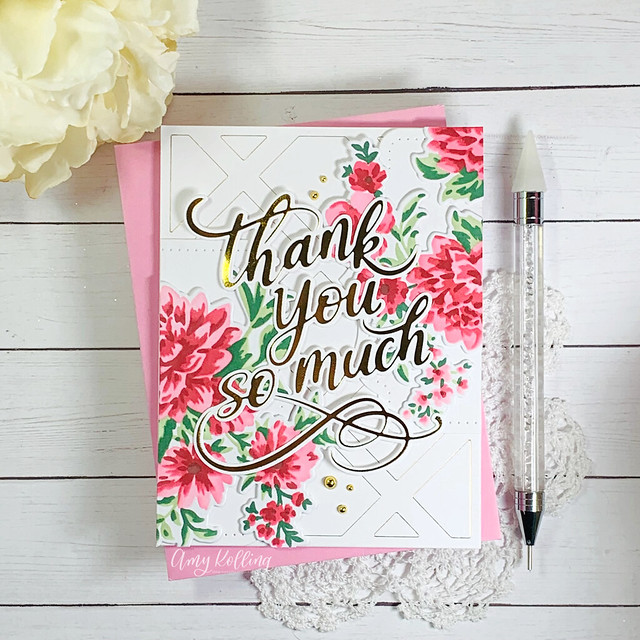
My first card uses the beautiful Dahlia Bunch along with previously released products such as the Thank You so Much Hot Foil Plate/Die, Ornate Banner Dies, and the Simply Diamonds Die.  The Simply Diamonds Die was foiled using gold foil for a very subtle look for a background.  The Dahlia Bunch was done using rich pink inks and I chose to not use the outline stamp for a softer look.  

Pink Dahlia

*********************

My second card still uses the Dahlia Bunch but in fall colors with a touch of pink on the petals.  For this card, the background was created using a FABULOUS new plate called Solid Hot Foil Plate.  This plate allows you to use all that leftover foil for no waste!!  

Fall Dahlia

The background was done using the Diagonal Stripes Hot Foil Plate but using the negative portion of the foil (Aura foil) for a totally different look.  Keeping it simple, a foiled sentiment (using Aura foil) was added using Perfect Sentiments.

This is a MUST have tool for hot foiling!


Fall Dahlia2

*********************

My third card uses another new stamp, die, stencil set called Blooming Branch.  I've done the stenciling in soft oranges and greens.  Once die cut, the large stenciled image was trimmed into several pieces and then added to the edges of the card.

Blooming Branch2

The Blooming Branch images were layered over some die cut vellum Leafy Branches and then layered onto a Diagonal Stitched Plaid background.  The Best Wishes Hot Foil Plate was done in gold foil and die cut several times for dimension.  The sentiment was added to the bottom right, layering it over parts of the Blooming Branch.  Gold Pearls were added as accents to tie in with the foiled sentiment.

Blooming Branch


**GIVEAWAY**

We will be giving away the full release on the Pinkfresh blog & YouTube channel (note change - Instagram giveaway will be later with an Instagram Hop).

-We will be giving away a total of TEN $25 gift cards along the hop. As per usual with blog hops - the winners will be picked from the comments.


Winners will be chosen and posted on October 5, 2021 on the Pinkfresh Studio GIVEAWAY PAGE. You must check that page & claim your prize within 2 weeks.


**LINK PARTY**

You are invited to the Inlinkz link party!

Click here to enter
**PROMOTIONS**


--Amy ♥

Friday, September 24, 2021

STAMPtember with SugarPea Designs

Everyday Home2


Welcome to STAMPtember with SugarPea Designs!

This exclusive set is only available at Simon Says Stamp and once it sells out, it's gone!  So hurry to order yours now!

(affiliate link at no cost to you)


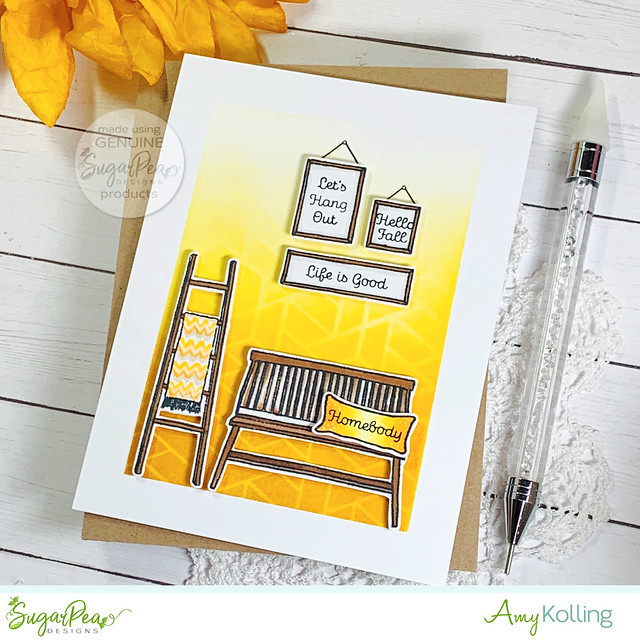
Everyday Home as lots of elements to create a warm cozy scene.  I mixed and matched these images with those from Let's Stay Home and Let's Stay in Bed.  The images were adhered with foam adhesive over a Distress Ink blended background and stenciled over for "wallpaper".

Everyday Home


--Amy ♥

Wednesday, September 22, 2021

Avery Elle / Layered Stars

Hello!  
I am here today with a fun layered set called Layered Stars
 

***Shop for Avery Elle HERE***


Layered Stars2

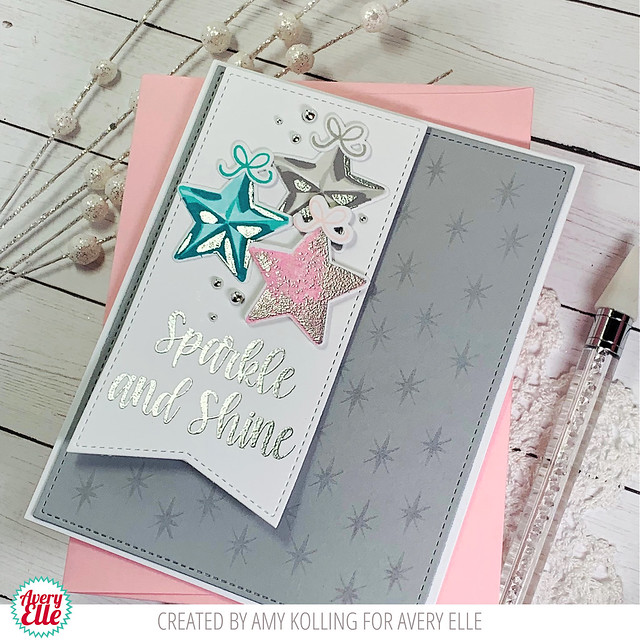
I decided to use this set in a non-holiday fashion.  This card could be sent to anyone needing encouragement, birthday, or congratulations!  

Using the Easy Layers 1 Elle-ments, the gray background and the banner shape were die cut.  The gray cardstock was stamped with the star stamp in Versamark ink for a tone on tone look to create a non-distracting background for my star banner.  The stars are SO easy to line up and make for a quick and effortless card!  My final layer of stamping on these stars was done in Versamark and silver heat embossed (as well as the sentiment).  For a final touch, some dimension was added with foam adhesive and some silver pearls for shine!


Layered Stars

Supplies:

Layered Stars
Layered Stars Elle-ments
Easy Layers 1 Elle-ments


--Amy ♥

Tuesday, September 21, 2021

Taylored Expressions / Wheatfield Dreams Kit


Amy_WheatfieldDreams6

Welcome!
I'm so excited to share a NEW kit that is releasing from Taylored Expressions today called Wheatfield Dreams.  My talented friend, Lori Craig, designed this kit and it is truly amazing.  We are both from Kansas where inspiration for this kit is everywhere!!


The Wheatfield Dreams Kit includes the following:

Wheatfield Dreams Stamp Set + Coordinating Dies
Burlap Background
Foil It - Wheatfield (12 panels for heat foiling)
Mini Embossing Powder - Copper

The kit will be packaged in a zippered pouch with an exclusive kit pouch sticker, envelopes, and evelope seals to match.


🌻🌻🌻🌻🌻🌻🌻🌻🌻🌻🌻🌻

I have THREE cards to share with this kit.  

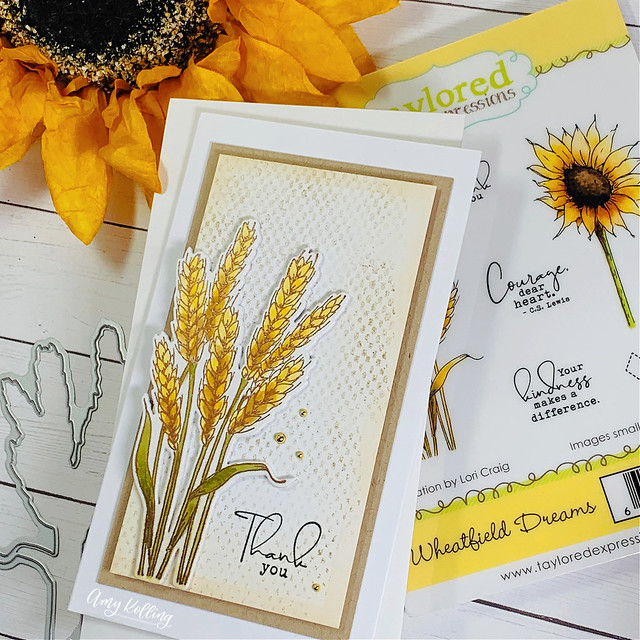
My first card is a Mini Slim and uses the wheat image which was Copper heat embossed and then loosely Copic colored with some Antique Linen distressing at the bottom.  The background was created using the Burlap Background included in the kit onto an off white cardstock.  It was done using a second generation stamping method and I wasn't going for perfect!  The edges were distressed with the same Antique Linen Distress Ink.  A simple stamped sentiment and some gold pearls finish off this panel which was layered onto kraft cardstock using foam adhesive.

Amy_WheatfieldDreams5
  
************************************

My second card was super simple using one of the wheat panels for foiling from the kit.  I added Deco Foil and then used a Minc machine to foil the image.  Here you can see the beautiful results with gold foil!!  

Amy_WheatfieldDreams2

The panel was trimmed and very lightly ink blended over three sections of the panel.  The panel was added to a panel that was done using the Diagonal Stitch Rectangle Stacklets.  Keeping it simple here, a gold heat embossed sentiment strip was added with foam adhesive.

Amy_WheatfieldDreams2
 
************************************

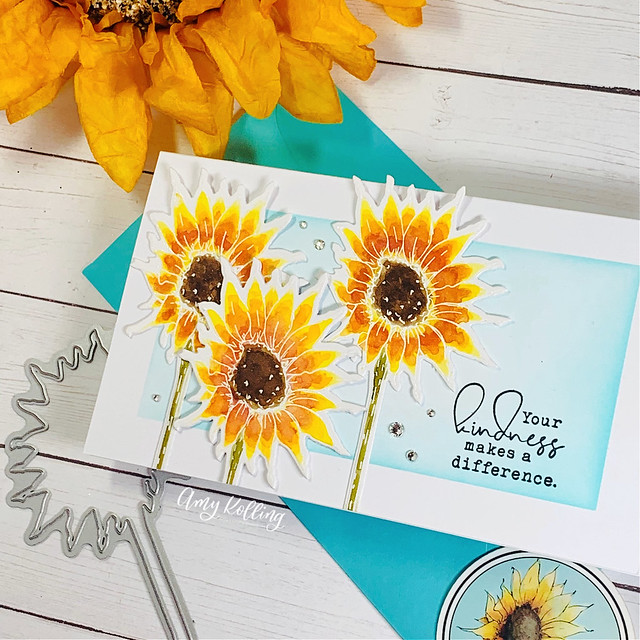
My third card uses the sunflower image with white heat embossing and watercolor using Distress Inks for another mini slim card!

Amy_WheatfieldDreams4

The sunflowers were added to a mini slim card base that was blended using a stencil.  After stamping the sentiment, a few jewels were added.

Amy_WheatfieldDreams4

Here is a look at all THREE cards.

Amy_WheatfieldDreams7


--Amy ♥

Friday, September 17, 2021

SugarPea Designs / Sugar Rush Day

Amy_BookClub2

Welcome to SUGAR RUSH day for the SugarPea Designs September release!  
Have you followed along this week?  What new products are your favorites?

 All the NEW products will be available for purchase starting TODAY at 2PM EST in the SPD Store.

**Click here to shop my affiliate link at SugarPea Designs.**


The new 'Book' themed stamps and dies are so adorable!  They can be customized and in any color!

My books are yellows and grays.  I added in some florals die cut from the Basic BookMark SugarCut.  All the images were added to an ink blended notecard that was masked off since all the elements on the card were added with foam adhesive.

Amy_BookClub1


Would you like to win a $50 Gift Voucher to our store? Leave a comment below for your chance to win. TWO lucky commenters will be randomly selected from the Sweet Peek Week comments to win a $50 Gift Voucher! Winners will be announced on our blog: Monday, September 20th.

Our team has some amazing and creative inspiration for you using the products releasing today. You can visit each of the designers’ blogs below for details on their projects.  And while you’re there be sure to leave a sweet comment!


--Amy ♥


Thursday, September 16, 2021

SugarPea Designs / Sweet Peek Day 4 / Giveaway

Amy_Coffee Cuties2

Welcome to the SugarPea Designs Sweet Peek Week for the September release!   

I hope you'll join me here over the next 2 days as I share Sweet Peeks for the all the NEW products that will be available for purchase starting this Friday, September 17th at 2PM EST in the SPD Store.

**Click here to shop at SugarPea Designs.**


There are some cute COFFEE themed products this month!  

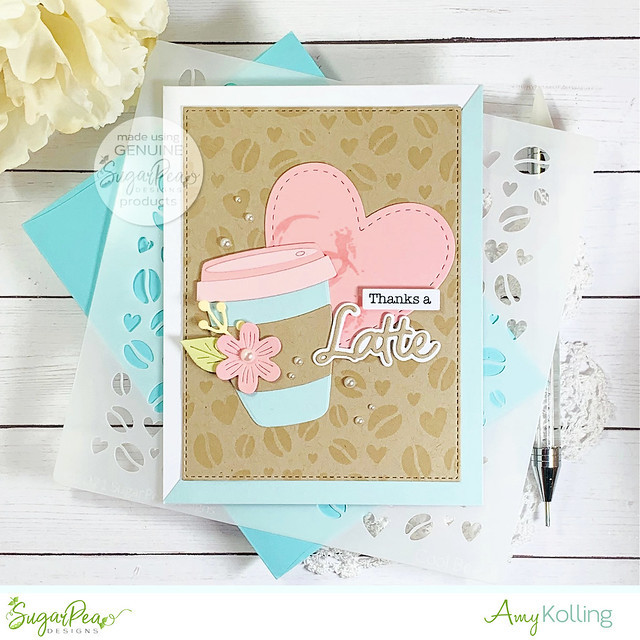
While this card was going in a different direction initially, I switched gears and made a thank you card and yes it's pastel/spring colors not fall colors! 

Using the Coffee Cuties, the coffee cup was die cut and assembled.  A die cut flower from Floral Pocket Tag was added for a different twist.  The cup, sentiment (from Brew-tiful Sentiments), and die cut heart from Postage Stamp SugarCut were all added to a kraft panel that was ink blended with the Cool Beans Stencil.  A few pearls were added to tie in with the softness of the card.

Amy_Coffee Cuties (3)
Supplies:


Would you like to win a $50 Gift Voucher to our store? Leave a comment below for your chance to win. TWO lucky commenters will be randomly selected from the Sweet Peek Week comments to win a $50 Gift Voucher! Winners will be announced on our blog: Monday, September 20th.

Our team has some amazing and creative inspiration for you using the products featured here today. You can visit each of our designers’ blogs below for details on their projects.  And while you’re there be sure to leave a sweet comment for them, giving you an extra entry to win!

Amy Kolling
Francesca Vignoli
Jennifer Timko
Kitty Day
Stephanie Beauchemin
Tatiana Trafimovich
Tricia Barber
Vera Yates


--Amy ♥

Wednesday, September 15, 2021

SugarPea Designs / Sweet Peek Day 3 / Giveaway

Amy_ShutTheFrontDoor2

Welcome to Day 3 of the SugarPea Designs Sweet Peek Week for the September release!   

I hope you'll join me here over the next 3 days as I share Sweet Peeks for the all the NEW products that will be available for purchase starting this Friday, September 17th at 2PM EST in the SPD Store.

**Click here to shop at SugarPea Designs.**


Welcome Home!

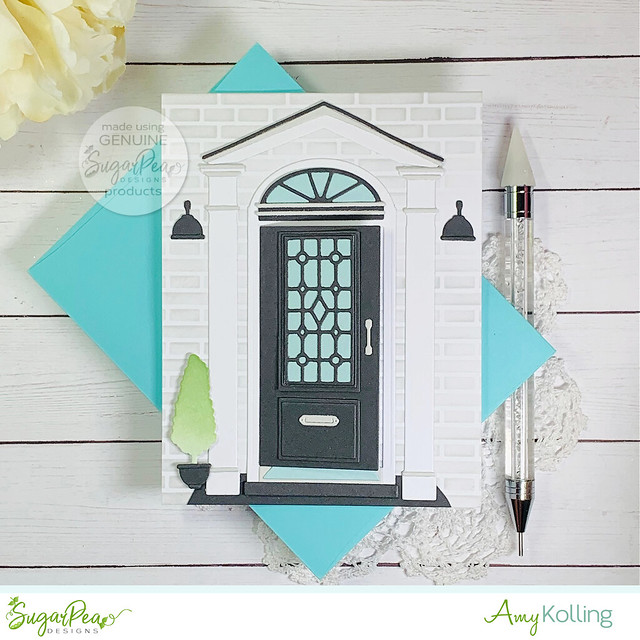
Shut the Front Door SugarCut is so detailed and fun to piece together in your own color scape!  I have looked at front doors for some time on Pinterest because ours is in dire need of a paint job.  So off to Pinterest I went to look at some of my favorites.  This one with a dark gray front door with gray accents really stood out to me.  After a light stenciling with gray ink using the English Bond Brick Wall Stencil, the door was build in layers to complete.  Instead of the sentiment stamped on the inside of the card, the door opens and 'Welcome Home' was stamped using Little Village.

Amy_ShutTheFrontDoor


Supplies:


Would you like to win a $50 Gift Voucher to our store? Leave a comment below for your chance to win. TWO lucky commenters will be randomly selected from the Sweet Peek Week comments to win a $50 Gift Voucher! Winners will be announced on our blog: Monday, September 20th.

Our team has some amazing and creative inspiration for you using the products featured here today. You can visit each of our designers’ blogs below for details on their projects.  And while you’re there be sure to leave a sweet comment for them, giving you an extra entry to win!

Amy Kolling
Francesca Vignoli
Jennifer Timko
Kitty Day
Stephanie Beauchemin
Tatiana Trafimovich
Tricia Barber
Vera Yates


--Amy ♥

Related Posts with Thumbnails