Wednesday, October 31, 2018

Avery Elle / Christmas Magic

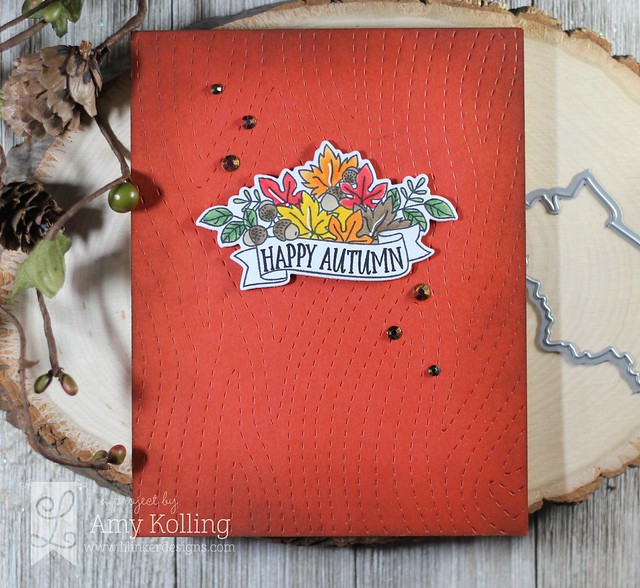
Hello!  I'm here today sharing a little piece of magic for Christmas.  Some of my favorite sets are these mini sets from Avery Elle.  Christmas Magic is one of those sets!  


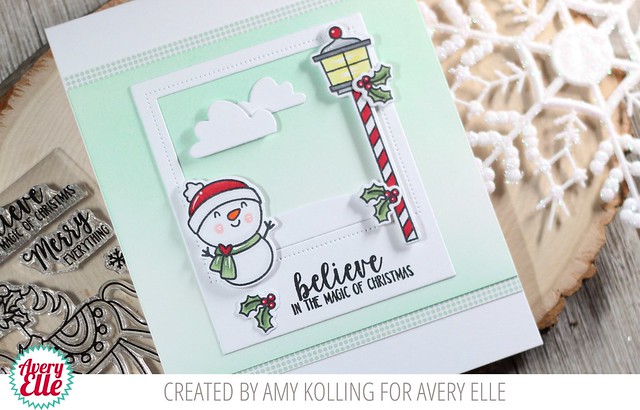
I knew the Photo Mat Elle-ments would be perfect to create my scene.  The entire scene/frame was die cut from white cardstock to keep this clean and simple.  The frame was layered over a cardstock panel that was ink blended with Cracked Pistachio Distress Ink.  

Christmas Magic


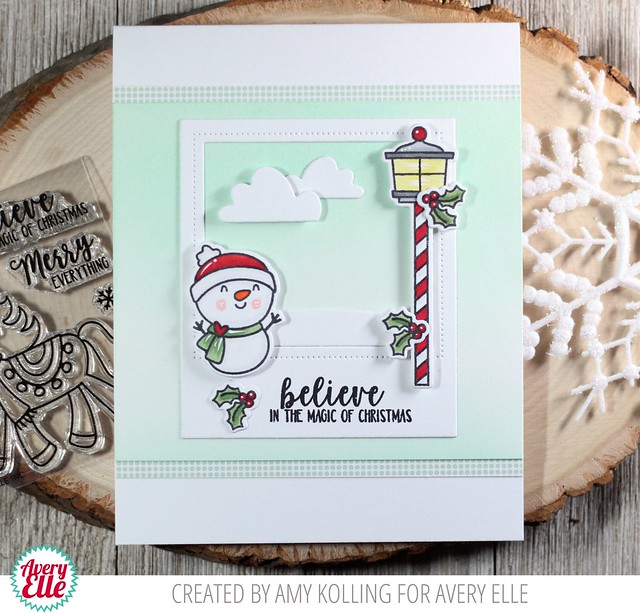
I adore the little snowman from Christmas Magic.  I colored the snowman, holly, and light pole in traditional holiday colors with Copics.  The images were added to create my scene, some with foam adhesive.  As a final detail, white pen accents were added with a paint pen.

Christmas Magic2

Supplies:

Technique Tuesday / Countdown to Release Day 2

Sweater Weather 

Hello and Welcome!  
Today starts the countdown to the Technique Tuesday November release!  
There are fun stamps and dies this month to get you started thinking about Christmas!

Make sure to check out the Technique Tuesday blog for all the products featured today and full list of inspiration from the rest of the Design Team!  All products will be available for purchase starting on November 1.  


I LOVE the new Sweater Weather Die!  I used the die five times over a white cardstock panel.  It took some time to poke all the pieces out but it was so worth it!  So I have a little confession.  As I was deciding what to layer my die cut panel over, I was mulling around striped cardstock behind the cutouts but then thought, hmmm......I'll check my ready made backgrounds that "weren't up to par".  Once I layered my Sweater Weather panel over the top of this watercolor striped background (which was NOT pretty by itself), it was like the heavens sang!  haha!  I stamped my sentiment in Worn Lipstick Distress Oxide ink on to a Jar Label Die and added it with foam adhesive.  Sentiment from Classic Christmas Sentiments.

Moral of the story:  Do not throw those backgrounds away!   😁

Sweater Weather2


Tuesday, October 30, 2018

Technique Tuesday / Countdown to Release Day 1

Dani Deer 

Hello and Welcome!  
Today starts the countdown to the Technique Tuesday November release!  
There are fun stamps and dies this month to get you started thinking about Christmas!

Make sure to check out the Technique Tuesday blog for all the products featured today and full list of inspiration from the rest of the Design Team!  All products will be available for purchase starting on November 1.  


I have been enjoying doing some ink blending for scene building but in non-traditonal colors.  Here I've ink blended Worn Lipstick and Spun Sugar Distress Inks onto Bristol Smooth cardstock.  I added in some stamped snowflakes in Worn Lipstick and added my sentiment.  I adhered my dee with foam adhesive and added a burlpa bow!

Dani Deer2


Thursday, October 25, 2018

Lil' Inker Designs / October Release Day 3 / Giveaway

Amy_HappyHolidays 

Hello!  
Welcome to Day 3 of the Lil' Inker Designs October Release!  This release is FULL of amazing dies and stamps for fall and Christmas......are you ready?  Guess what??  The whole new release is now available and can be found HERE!!!


My first card shows off just how large this sentiment die is!  I love the size and thought it would be perfect for the cardstock to shine by doing an inlay technique.

I adhered strips to a Stitched Mats: Rectangles done out of thin typing paper for less bulk.  From this panel, I die cut the sentiment 'Happy Holidays' and added all the pieces back in.  To finish, I added some coordinating lavendar gems.

Amy_HappyHolidays2

**************************

Amy_MittenDieSet

My second card uses the Mitten Shaker Die Set.  I die cut loads of the mini mittens out of a fun color palette.  Each one was stamped (in Versamark) with the small snowflake.

Amy_MittenDieSet2

These were all adhered to a Stitched Mats: Rounded Rectangles.  As a finishing touch, the sentiment was stamped in a coordinating color and cut out.  To round out my ensemble, I also made a mini shaped card using the large Mitten Die and filled my shaker with sequins and snowflake bits.

Amy_MittenDieSet3

Supplies:
Mitten Shaker Die Set
Ready, Set, Snow Stamps
Stitched Mats: Rounded Rectangles

***************************************************


Now for the fun part!  There is a giveaway for one lucky commenter......so make sure to check out the Lil' Inker Designs Blog for details!


Wednesday, October 24, 2018

Lil' Inker Designs / October Release Day 2 / Giveaway

Amy_ChristmasStamps3

Hello!  
Welcome to Day 2 of the Lil' Inker Designs October Release!  This release is FULL of amazing dies and stamps for fall and Christmas......are you ready?  Guess what??  The whole new release is now available and can be found HERE!!!


Today's cards show off the new Classic Christmas Stamps.  I wanted to share how to create a very CAS design with one card and to ramp things up on my second card with just a few changes.

My first card shows the CAS version.  I gold heat embossed the main image from the set onto red cardstock along with the sentiment.  To finish, I ran this panel through my Big Shot using the Stitched Mats: Dual Stitched Rectangles to create the stitched border.

Amy_ChristmasStamps4


My second card uses the same supplies and techniques however I took them one step further.  I gold heat embossed the main Classic Christmas Stamp onto Bristol Smooth cardstock and colored with my Zig Clean Real Brush Markers. 

Amy_ChristmasStamps

I ran this whole panel through with the 2 largest rectangles from Stitched Mats: Dual Stitched Mats.  The inside rectangle was added to my note card with foam adhesive and the border adhered with regular adhesive.  A few red Nuvo drops were added to the poinsettia.


Amy_ChristmasStamps2

Here are the two cards side by side.  Which do you prefer?

Amy_ChristmasStamps5


Supplies:
Classic Christmas Stamps
Stitched Mats: Dual Stitched Rectangles

**************************


Now for the fun part!  There is a giveaway for one lucky commenter......so make sure to check out the Lil' Inker Designs Blog for details!

Tuesday, October 23, 2018

Lil' Inker Designs / October Release Day 1 / Giveaway

Amy_BlossomsAndBanners 

Hello!  
Welcome to Day 1 of the Lil' Inker Designs October Release!  This release is FULL of amazing dies and stamps for fall and Christmas......are you ready?  Guess what??  The whole new release is now available and can be found HERE!!!


Blossoms and Banners is perfect for a simple fall card but pair it with the Cover Up Die: Stitched Woodgrain?  It totally takes it up a notch!

My image was Copic colored and die cut.  To create my woodgrain panel, I applied some brown ink to the edges to add a distressed look.  My image was added with foam adhesive and a few gems from Pretty Pink Posh.

Amy_BlossomsandBanners2

Supplies:
Blossoms and Banners
Bossoms and Banners Dies
Cover Up Die: Stitched Woodgrain

**********************************

Amy_DiagonalPlaid_Hap-PieThanksgiving

I've used Hap-Pie Thanksgiving along with the Pie Die and the previously released Cover Up Die: Diagonal Plaid.  I created a clean and layered card assembling the Pie Die with various cardstocks to resemble pumpkin pie.  I added my pie to a Stitched Mats: Squares along with a sentiment done in black ink.

I layered my Stitched Square focal point to an aqua panel that was layered with the Cover Up Die: Diagonal Plaid.  Some burlap twine was added at the side to finish.

Amy_DiagonalPlaid_Hap-PieThanksgiving2

Supplies:
Hap-Pie Thanksgiving
Pie Die


**************************


Now for the fun part!  There is a giveaway for one lucky commenter......so make sure to check out the Lil' Inker Designs Blog for details!


Friday, October 19, 2018

Hello Bluebird / Merry Little Christmas


Hello!  I'm here with a holiday card using Christmas is Coming from the new October Hello Bluebird release.  
This set is so unique with these adorable images that are so unlike any I've seen!


To create my card, I started with a panel of Bristol Smooth carstock and white heat embossed the Falling Snow Background.  Using Cracked Pistachio Distress Ink, the ink was blended in ombre fashion upward on my panel.  Using a paper towel, the snow was buffed to wipe away any left over ink to really make the snow stand out.   While I had my Cracked Pistachio Distress Ink out, I continued to ink blend onto a panel.  Using the Christmas Words Die #1, the word "merry" was die cut from this Cracked Pistachio panel and once from white cardstock.

Christmas is Coming

I chose the bear carrying the tree, squirrel carrying the coffee, and one of the cute little birds.  The images were Copic colored and white pigment pen details were added.  These were die cut using the coordinating Christmas is Coming Die.  I created a white hill using the Hill and Dale Die and stamped the sentiment.  I just love the fonts in Christmas is Coming!  To finish, the images were adhered using foam adhesive.

Christmas is Coming2
 

Thanks so much for sharing a part of your day with me!

Thursday, October 18, 2018

SugarPea Designs / Fall Fox


Fall Fox

Hello!  I'm here sharing a bit of fall using an older but adorable set called Fall Fox from SugarPea Designs.    There are five foxes included in this set along with five sentiments as well as some supporting images too!


The images were Copic colored and die cut using the coordinating Fall Fox SugarCut.  Next, I began playing with a layout I had in mind.  Using the Card Front Element Builder SugarCut, a panel was die cut from white cardstock.  To the upper center, a standard circle was cut out of the scallop panel.  A sentiment was stamped in black ink directly below the circle cutout. 

My scene uses the wavey edge die included in the Card Front Element Builder as grass and the clouds are from Whatever The Weather SugarCut.  To finish, I added a simple tied khaki bow with twine.

Fall Fox2 

Related Posts with Thumbnails