Wednesday, January 19, 2022

Avery Elle / Monster Love


Monster Love2

Hello!  

I have a fun technique for all those critter images using a background die!

***SHOP Avery Elle HERE***

The background was created using the Waves Elle-ments once as a stencil using soft ink blending and once as an actual die cut.  TIP:  Using this die as a stencil is a bit tricky but if you go easy (or use Pixie Spray) a fabulous ink blended background can be made!  


Monster Love

The monsters from Monster Love were Copic colored and die cut as well as some supporting images from the set.  The white Waves die cut was adhered over the ink blended background.  The little openings in the Waves die cut are the perfect spot to "tuck" the critters out of!  A few of the images were adhered with foam adhesive and the rest were adhered to make the scene come alive!


Monster Love1

Supplies:


--Amy ♥

Saturday, January 8, 2022

Reverse Confetti / Countdown to Confetti / Release Day


Cute as a Bug2

Welcome to the January Reverse Confetti Blog Hop!

Make sure to visit my past posts about all the new products available this month!  The new release is NOW available in the Reverse Confetti shop.


The Large Circle of Hearts is one of the stand alone dies this release!  I've used it here, along with an image from the Love Bug set, with pastel colors for a baby card!  The pattern paper is from the Pattern Play 6x6 Paper Pad.

Cute as a Bug

**********************

I'm not finished yet!  I have a pair of tags using the new Lovely Tag and more of the Poppies!!  Pattern paper is from the Sweet Stripes 6x6 Paper Pad.

Lovely Tag


Join us for a HUGE blog hop of inspiration!!!
--Amy ♥

Friday, January 7, 2022

Reverse Confetti / Countdown to Confetti / Day 3

Hello Daisy4

It's time for Day 3 of the January release from Reverse Confetti!  We welcome 6 new stamp sets and 9 new Confetti Cuts!  Let's welcome in the season of LOVE and friendship!  

Make sure to check out the Reverse Confetti blog for a list full of inspiration and information on all the new goodies!!

Hello Daisy is a grouping of gorgeous daisies.  There are so many ways to use a stamp like this!  I chose to do non-coloring for my designs.

This first card starts by embossing the Hello Daisy image onto vellum with white embossing powder and then die cutting with the coordinating die.  The floral image was layered over a background made with strips of pattern paper and a frame made with Stitched Note and Frames Confetti Cuts.  The 'HELLO' die included with the dies, is perfect for a simple sentiment that was added directly center on the floral image along with some white pearls.

Hello Daisy3

*************************************************
For this card, I went with another non-coloring look with Hello Daisy but this time gold heat embossing on a thick vellum and backed with a white die cut.  The floral image was layered over a panel of pattern paper from 'From Cupid' 6x6 paper pad on a slim line notecard.  The excess part of the image was trimmed.  

Hello Daisy2

A matching gold heat embossed sentiment from Valentine Sentiments done on black cardstock was added right justified over the image along with some gold pearls.  

Hello Daisy


*************************************************

Now for the prizes..........there are TWO $15 prizes up for grabs this release:  1 for blog commenters and 1 for Facebook commenters.
  So leave those comments and make sure to check the Reverse Confetti Facebook page too!  Details can be found over on the Reverse Confetti blog for all the prizes.
--Amy ♥

Thursday, January 6, 2022

Reverse Confetti / Countdown to Confetti/ Day 2


IMG_3958

It's Day 2 of the January release from Reverse Confetti!  We welcome 6 new stamp sets and 9 new Confetti Cuts!  Let's welcome in the season of LOVE and friendship!  

Make sure to check out the Reverse Confetti blog for a list full of inspiration and information on all the new goodies!!

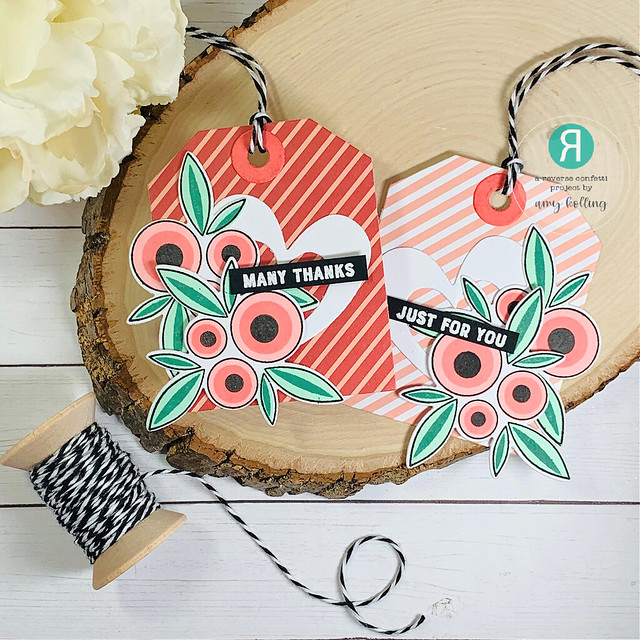
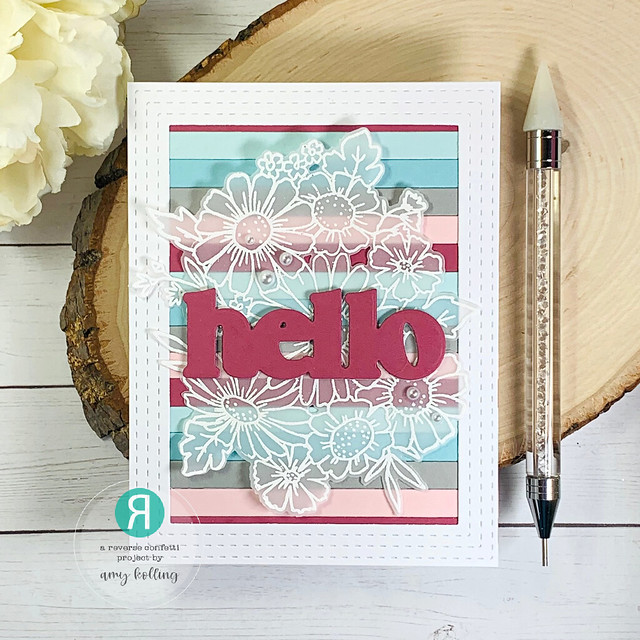
I just love today's featured set called Poppies!!

I went with some purple poppies.  These layers are so fun and easy to stamp.  Don't worry about them not lining up perfectly!  They are adorable stamped a little "off"!  For this card, I chose NOT to use the outline poppy image but rather left it loose without the outline. 

IMG_3957

The poppies were added over a Circle Rays Duo Confetti Cuts to "ground" my floral cluster.  The Circle Ray was tucked in next to the Outlined Frame Cover Panel.  A sentiment from Big Hearts Sentiments was gold heat embossed and added with additional layers for dimension.  As finishing touches, a few lavender pearls were added to the centers of the poppies and a few white leaves were trimmed from the Poppy Confetti Cuts and tucked behind the clusters.

*************************************************

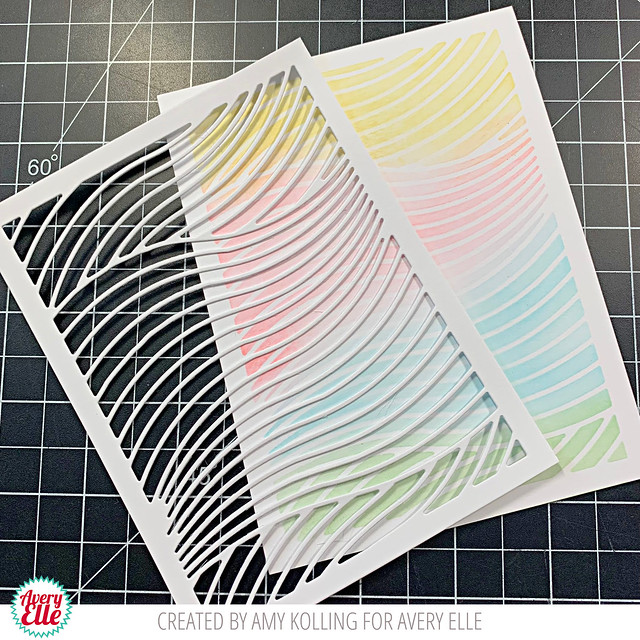
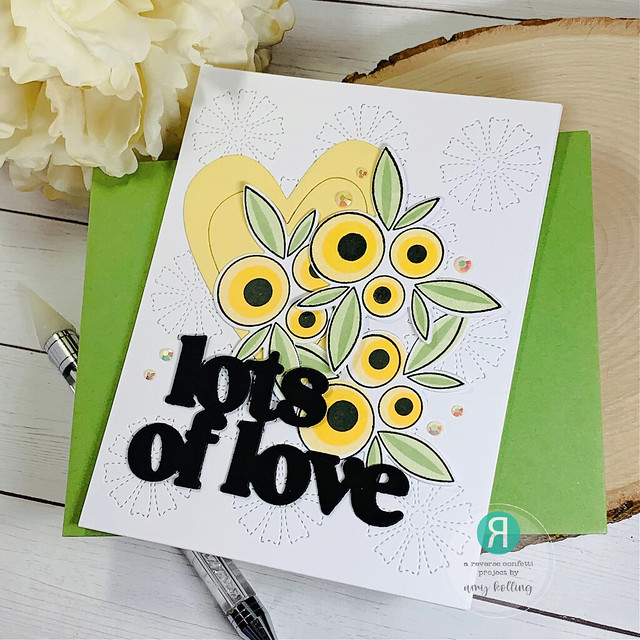
There's a new cover panel in this release called Stitched Daisies Cover Panel.  I love this type of background die as it adds gorgeous texture to your card. 

Poppies4


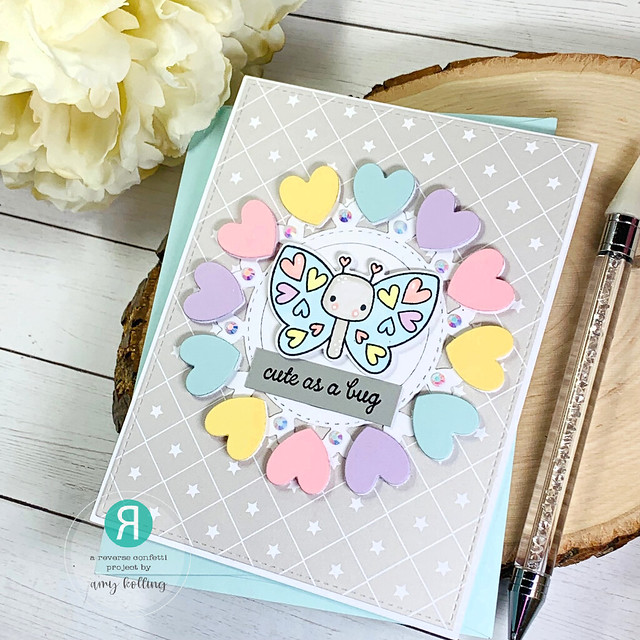
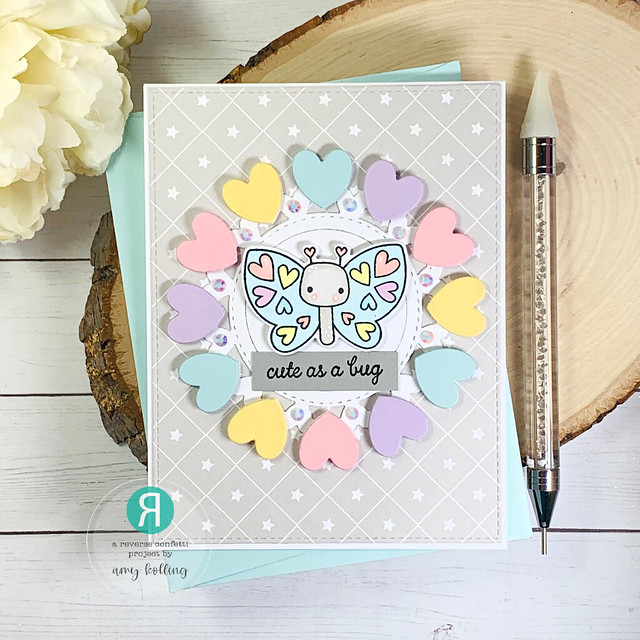
I added in some yellow die cut hearts from the Postal Cover Panel and added in my yellow poppies......this time they were stamped with the outline stamp.  The Layered Lots of Love Confetti Cuts was done in black with several layers for dimension.  I had to add in some yellow gems for that sparkle!   


Poppies3


*************************************************

Now for the prizes..........there are TWO $15 prizes up for grabs this release:  1 for blog commenters and 1 for Facebook commenters.
  So leave those comments and make sure to check the Reverse Confetti Facebook page too!  Details can be found over on the Reverse Confetti blog for all the prizes.
--Amy ♥

Wednesday, January 5, 2022

Reverse Confetti / Countdown to Confetti / Day 1


It's time for the January release from Reverse Confetti!  We welcome 6 new stamp sets and 9 new Confetti Cuts!  Let's welcome in the season of LOVE and friendship!  

Make sure to check out the Reverse Confetti blog for a list full of inspiration and information on all the new goodies!!

We have such a cute set to share today called Love Bugs and I've paired it with one of two new sentiment sets releasing!

Love Bugs2


The background was created using the new Postal Cover Panel.  While masking off the edges, I was able to ink blend yellow ink inside.  This panel was layered over a piece of Salsa colored cardstock.  After Copic coloring the bees from the Love Bugs set, they were die cut and details were added with a white pigment pen.  A little Stickles glitter for the wings and some tiny die cut hearts for the clouds.  For the sentiment, "Bee Mine" (from Big Heart Sentiments) was selectively masked off to stamp at the bottom of my panel.

Love Bugs


*************************************************

My second card uses another new sentiment set called Valentine Sentiments.  The sentiment was gold heat embossed onto Piggy Bank cardstock, trimmed, and set aside.  The frame, from Scalloped Squares Confetti Cuts, was die cut from Gold Foil Cardstock and layered with a second layer using white cardstock.  

Valentine Sentiments2


For the heart, Circle of Waves Confetti Cuts was used with various colors of Reverse Confetti Cardstock.  The heart die from Postal Cover Panel was used to die cut into the waves for a fun unique striped look.  Over my background and heart, gold watercolor was splattered across with a fine waterbrush.  Adding in the sentiment with foam adhesive and a few gold pearls finish this off.

Valentine Sentiments


*************************************************

Now for the prizes..........there are TWO $15 prizes up for grabs this release:  1 for blog commenters and 1 for Facebook commenters.
  So leave those comments and make sure to check the Reverse Confetti Facebook page too!  Details can be found over on the Reverse Confetti blog for all the prizes.

--Amy ♥

Avery Elle / Dragon Love

Hello!  
Amy here with a non-traditional card size.  Sometimes it's just easy to make an A2 card but it is fun to change things up too! 

Dragon Love

I've created a 4 bar sized card which measures 3 1/2 x 4 7/8.  This was the perfect size for the adorable mini stamp set Dragon Love.  The XOXO Elle-ments was ideal for this card size and the Copic colored dragon fit perfectly in the "O" of the XOXO!  Grass and clouds were added using the Slimline Borders Elle-ments to a lightly ink blended pink sky.  For a little dimension, the balloon was lifted using foam adhesive.  To add a little sparkle, a few tiny gems were sprinkled with the die cut hearts.


--Amy ♥
Related Posts with Thumbnails