Tuesday, June 28, 2022

Avery Elle / Ranunculus

Hello friends!  

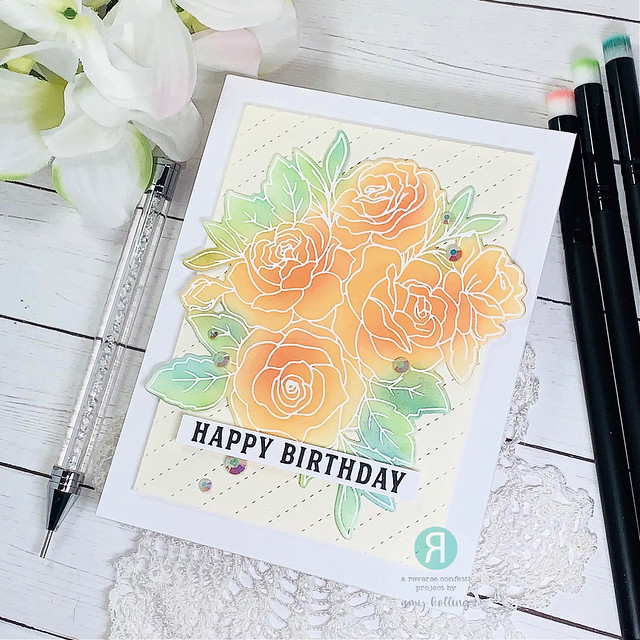
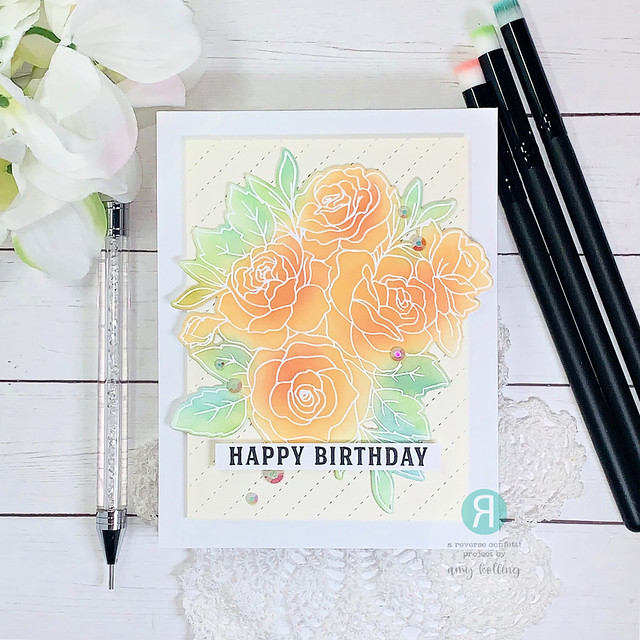
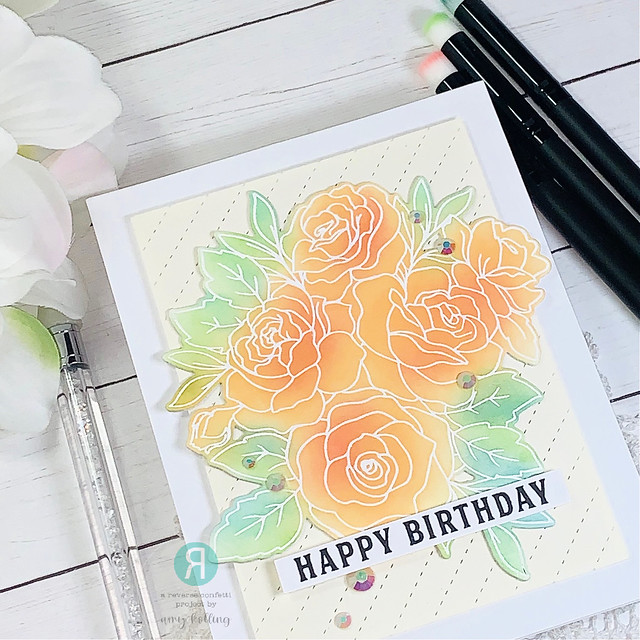
I am here with probably my most favorite Avery Elle set to date......the Ranunculus.  This set is so absolutely perfect for any type of card!


Ranunculus2

Layering stamps are one of my favorite things to use!  Using colors of pinks and oranges, the flowers were done with FOUR layers to give them stamped dimension.  The leaf bunches were all done with THREE layers of stamping.  Once die cut, they were arranged over a stacked frame made with the Pierced Ray Frame Elle-ments.  This die set has two extra die cut words that make it so versatile!  I've done the inner frame and the sentiment 'congrats' in gold cardstock.  Gold pearls were added as finishing touches to match the frame and sentiment.


Ranunculus

Supplies:
Ranunculus
Ranunculus Elle-ments
Pierced Ray Frame Elle-ments


--Amy ♥

Tuesday, June 21, 2022

Avery Elle / Hoot Hoot Hooray

Hi everyone!  

I am here with a birthday card using Hoot Hoot Hooray from Avery Elle!  The owl holding the banner is so cute.  

***SHOP Avery Elle HERE***


The background was made by ink blending Blueprint Sketch Distress Oxide ink over a panel of cardstock.  The background was spritzed with water droplets and once dry, sheer shimmer spray was spritzed over the top.  I love the look this spray gives to a background!  From this background, the Oval Scene Elle-ments was die cut into it discarding the "frame" that the die creates.


Each of the images was Copic colored with some primary colors and die cut.  The images were then added with foam adhesive to create dimension for the scene.  Randomly placed die cut clouds, from Oval Scene Elle-ments, were added to complete my scene!


Supplies:


Thanks for sharing a part of your day here!

--Amy ♥

Wednesday, June 8, 2022

Reverse Confetti / June Blog Hop

June Blog Hop2

Welcome to the Reverse Confetti June Blog Hop!  
  
Go check out the Reverse Confetti blog for all the details of this hop and for a full list of inspiration and information.  


I couldn't resist using the gorgeous Roses stamp set again along with some more emboss resist!  This technique is super easy and you can blend to your hearts content!

June Blog Hop


My roses are a peachy pink color.  I added bits of color with a small blender brush to parts of the roses and leaves.  I love the two toned leaves!  The spray of roses was die cut several times, layered together, and added to a Diagonal Stitches Cover Panel done in ivory cardstock.  The panel was added with foam dimension and embellished with ivory gems.

June Blog Hop3


--Amy ♥

Tuesday, June 7, 2022

Avery Elle / Fabulous

Hello!  

I am sharing a project using the new FABULOUS stamps, dies, and shapes dies.  I used the nesting hearts for my card but you could adapt and use the rainbow or apple shape too!


Using the heart shape die, the heart was die cut from pink, peach, yellow, and gold glitter cardstock.  After layering them back together interchanging layers, they were picked up with Press 'n Seal and added to a white notecard with foam adhesive.  A few other glitter hearts and embellishments were added.  A frame from Pierced Birthday Frame Elle-ments done in white cardstock was added with a double layer of foam adhesive.  The sentiment, from Fabulous, was gold heat embossed onto white cardstock along with a supporting sentiment.  To finish, the sentiments were added over the center heart with foam adhesive.  


Supplies:
Fabulous
Fabulous Elle-ments
Fabulous Shapes Elle-ments
Pierced Birthday Frame Elle-ments


--Amy ♥
Related Posts with Thumbnails