Wednesday, October 7, 2020

Reverse Confetti / Countdown to Confetti Mini Release Day 2

Ornament2


Welcome to Day 2 of Countdown to Confetti with Reverse Confetti.  We are celebrating a mini release this month that's full of some must haves for this holiday season!


Today we feature an amazing tag die perfect for the holidays!  

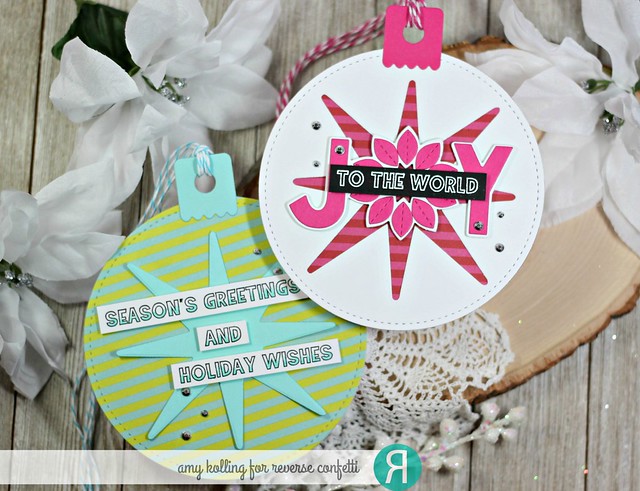
The Ornament Star die is very large.....measuring almost 5".  The dies that come with it can turn this easily into a gift card holder!  My two tags feature pattern paper from Reverse Confetti and the large Star Die from the set.  

The pink star tag uses paper from Cue The Confetti and the Wreath of Joy Confetti Cuts to embellish the tag along with a sentiment from the new Seasonal Say It All.  

The green star tag uses paper from Cue the Confetti paper pad along with the Seasonal Say It All sentiment.

Ornament


Ornament3


Avery Elle / Aw, Nuts

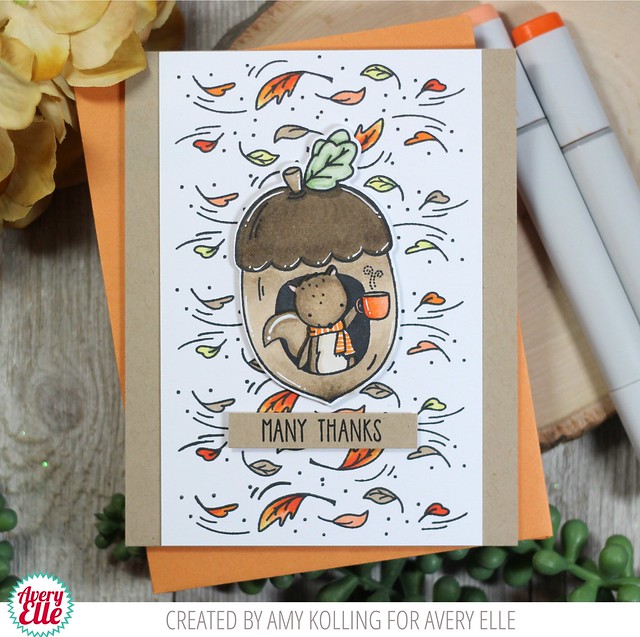
Aw, Nuts!  I'm here using the adorable Aw, Nuts stamp set from the new Avery Elle release.

I created a falling leaf background by alternatively stamping the image......stamp, ink, rotate stamp, repeat.  The leaves were Copic colored with YR02, YR04, YR08, and Y13.  

Aw, Nuts

The squirrel in the acorn was Copic colored and die cut using the coordinating Aw, Nuts Elle-ments.  The image was adhered with foam adhesive to the trimmed,background panel stamped above.  A simple sentiment stamped in black on kraft and also added with foam adhesive.

Aw, Nuts2


Supplies:

Aw, Nuts

Aw, Nuts Elle-ments


Thanks for sharing a part of your day here!


Tuesday, October 6, 2020

Reverse Confetti / Countdown to Confetti Mini Release Day 1

Cookies and Milk2


Welcome to the start of Countdown to Confetti with Reverse Confetti.  We are celebrating a mini release this month that's full of some must haves for this holiday season!


We are celebrating with the Cookies & Milk today!  Not really, but it does sound good, doesn't it?

Some fall colors outside translated to my card here.  How adorable are these little bears?  Image was Copic colored and adhered with foam adhesive over two raised white panels and orange polka dot paper from Darling Dots.  I added a simple white heat embossed sentiment strip with a tiny twine knot.

Cookies and Milk


***BLOG HOP***

Monday, October 5, 2020

Hero Arts / October My Monthly Hero Blog Hop / Giveaway

MMH-OctoberCard2

Hello! 
Welcome to the My Monthly Hero Blog Hop!
  Hero Arts My Monthly Hero Kit will get you ready for wrapping up some packages with CUTE tags!   Quantities are LIMITED for this kit so grab it while you can!

Hero Arts


The main kit and add-ons are fabulous!  The kit is available for a limited time only - once it's gone, it's gone. ****Kits should begin shipping from Hero Arts on Friday, October 9th.****  You can now subscribe to receive the kit monthly and never miss one!  The kit value is over $70......but only costs $34.99.  Once this kit is gone, it's gone!


Kit Contents:
6 x 8 Clear Stamp Set
12 Coordinating Frame Cut Dies
1 Ornament Shaped Die
2 Inner Ornament Dies
3 Embossing Powders (Red, Glacier Blue, White Sparkle)
1 Watermark and Embossing Ink Cube

*********************************************

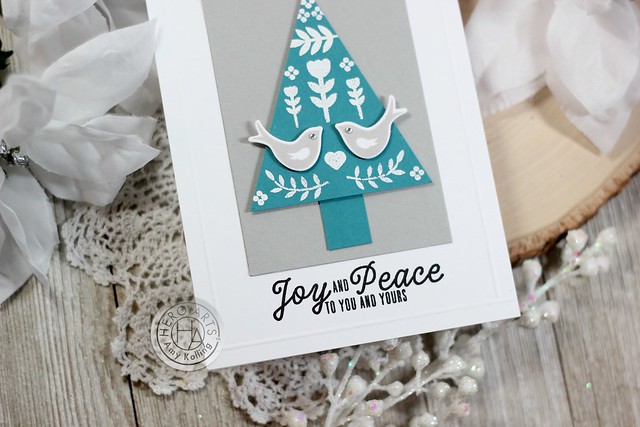
I love the folk art style of this month's kit.  
I created my own folk art tree using the stamps from the set along with the birds.  I created my own triangle tree and white heat embossed the images onto the turquoise cardstock.  Once adhered to the gray panel, the white note card was scored every 1/4" to frame my folk art.  Below, the sentiment was stamped in bold black ink.

MMH-OctoberCard

*********************************************

I also created a pair of tags using the ornament die.  One using the santa and his sleigh and one adding in a rainbow tree line!  

MMH-OctoberTags


Here are all the add-on sets available this month too!
*********************************************

**GIVEAWAY**

What's a blog hop without a giveaway?  Hero Arts is giving away a $50 gift card to one blog reader - selected from the comments across all of the blogs in the hop. Giveaway closes Sunday, October 11th at 11:59pm Pacific, and the winner will be announced the following week on the Hero Arts Blog.  


Sunday, October 4, 2020

Taylored Expressions / Just Checking In....

Gus and Gertie

I am sharing a card today that I made just for fun!!  
I recently had a fun crafty day with friends so I just enjoyed stamping and die cutting images.


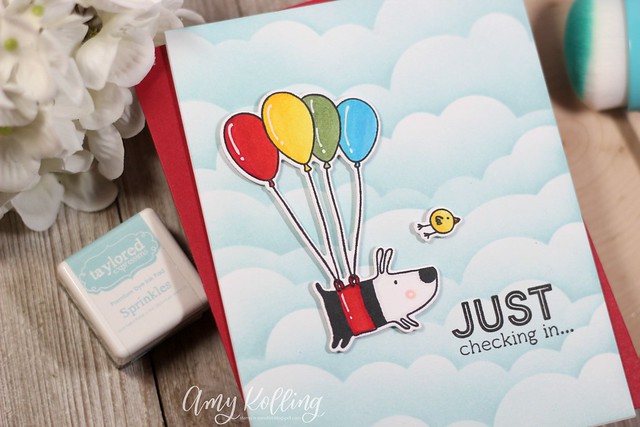
Gus & Gertie is from Taylored Expressions and I just love this set!  
Using a cloud stencil, the clouds were stenciled with Sprinkles Ink and the blending brushes from Taylored Expressions.  Once my images were Copic colored and die cut, they were adhered using foam adhesive.  Finally a simple sentiment from the new set Good Vibes stamp set that is included in the Hey There Kit!  Come on, isn't these images adorable?  

Gus and Gertie2


Saturday, October 3, 2020

Ink to Paper / The Joy of Noel


Hello!
I love when I thought a post went live and I didn't hit publish!!!  Anyway, I have a few Ink to Paper projects that I have already shown over on Instagram.


The Joy of Noel is a fabulous stamp and die set from the last release.

Noel

My first card uses the NOEL dies with paper strips.  I love using this technique!  Once my letters were die cut, they were layered over a white on white die cut panel using the On the Border: Fir Branches Die.  Random branches were embellished with glitter on the ends. 
 
Noel2

************************************

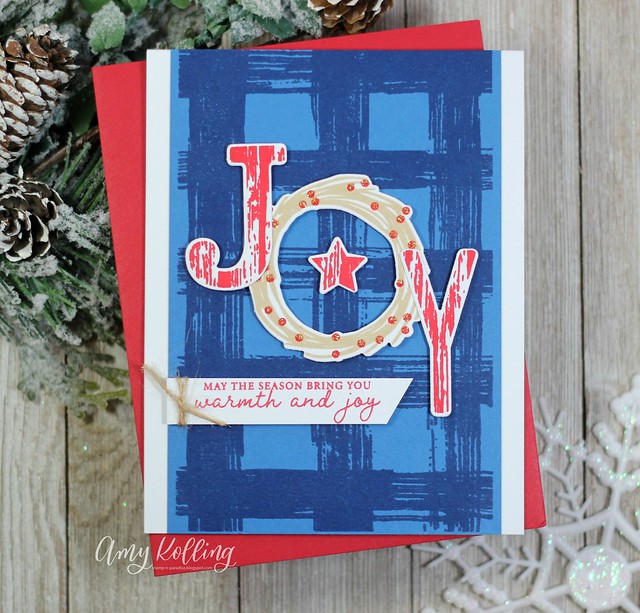
Joy

My second card uses the JOY portion of this set.  Using the wreath for the "O" and adding it to the wood inspired wood.  JOY was layered over a background stamped with the Brushed Plaid stamp set.  A simple sentiment banner trimmed at an angle was added with foam adhesive with a tiny twine knot.

Joy2

Thanks for sharing a part of your day with me!

Wednesday, September 30, 2020

Avery Elle / Boo to You

Hello!  

I am here today with a Halloween treat!  I love to make shaped cards and the Boo to You set is adorable and perfect for this!  Let me show you how!

****Shop for your Avery Elle HERE****


The images were Copic colored and die cut using the coordinating Boo to You Elle-ments.  After setting these all aside, I set to work on the shaped portion of my card.  While the pumpkin image can be die cut, it also cuts out the center to create a scene.  Once I cut out my main colored pumpkin image, I used that to trace the image onto white card stock.  My background was ink blended with Black Soot, Chipped Sapphire, Wilted Violet, and Broken China Distress Inks and then trimmed out.  Water was flicked across the panel to create the stars.  The top was scored and a sentiment stamped at the bottom that will only be seen once the card is opened.  


All of my images were die cut twice----the second one being just in white card stock.  The images on the front were adhered with foam adhesive.  I wanted to create a window card but to the make the back part of the window look "clean" (ie. where you don't see all the Copic blending), the extra die cuts were layered face up and adhered to the clear card stock that was layered between the two pumpkins.  


TIP--Use the negative of the die cut to trace the image to create a full scale pumpkin image for the "back" of the card.  Cut out using scissors.  To create the folding portion of the card, simply score a small part of the top of the pumpkin.


Supplies:

Boo to You 

Boo to You Elle-ments


Related Posts with Thumbnails