Showing posts with label Pretty Pink Posh. Show all posts

Friday, June 15, 2018

Pretty Pink Posh / New Product Release Blog Hop

Hello Friend

Hello and welcome to the Pretty Pink Posh new product release Blog Hop!  I am so excited to be joining the entire DT and amazing guests again as part of this hop!


I thought it would be fun to infuse rainbow colors into some of the new products from this release!  Starting with the Hello Shaker Die.

I started with a panel of Bristol Smooth Watercolor paper and using Zig Clean Color Real Brush Markers, I scribbled them onto the panel.  When done blending, I spritzed the panel with water and allowed to dry.  What I was left with was this rainbow 'hello'!  To create the black frame, I simply die cut and cut off the 'hello'.  I added my shaker element to a panel of rainbow notebook paper from Lawn Fawn.  

My shaker element was made using the Mini Iridescent Star Confetti and 3mm Sparkling Clear Sequins.  To finish, I added my shaker panel to a notecard layered with a panel of red cardstock.

Hello Friend2

***********************

You're an A+

Next, I thought it would be fun to create a-typical 'love' card using some of the supporting images from the School Friends Stamps.   I did keep with the "school" theme by creating a chalkboard message along with a rainbow stack of books (colored with Copics).  The scalloped frame is from Scallop Frame Dies.  

My chalkboard message was white heat embossed onto the black panel behind the frame.  To finish, I added my rainbow colored books with foam adhesive.

You're an A+2


***PRIZES***

There are 4 $25 gift certificates up for grabs (two winners each day). Winners will be picked randomly along the blog hop. Comments must be left by 11:59 PM PDT on 6/19/2018. Winners will be announced on the PPP blog.

♥♥Amy Kolling♥♥ 
Justine Hovey    

Thursday, January 11, 2018

Pretty Pink Posh / 4th Birthday Celebration!

Pretty Petunias

Welcome to the Pretty Pink Posh 4th Birthday Celebration!!  I am so excited to help my friend Paulina celebrate FOUR years of Pretty Pink Posh of which I was a part of!  Her designs are just the cutest and I will forever be a fan!

There are some fantastic gifts and goodies with this release and blog hop so make sure to scroll to the bottom to see them!

I have two cards to share today so let's get started! 

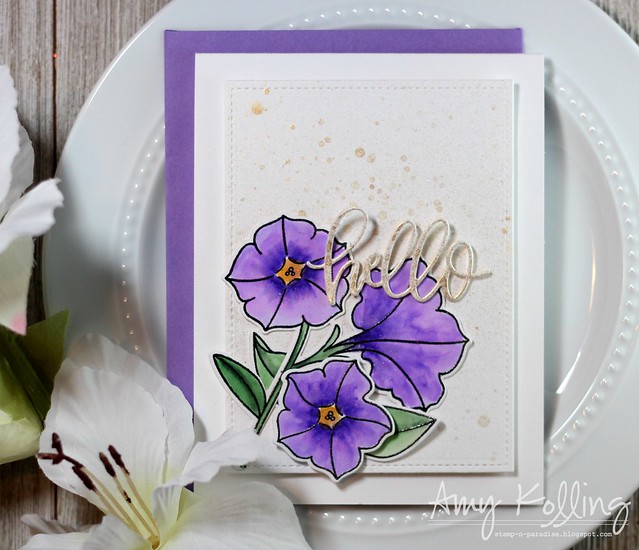
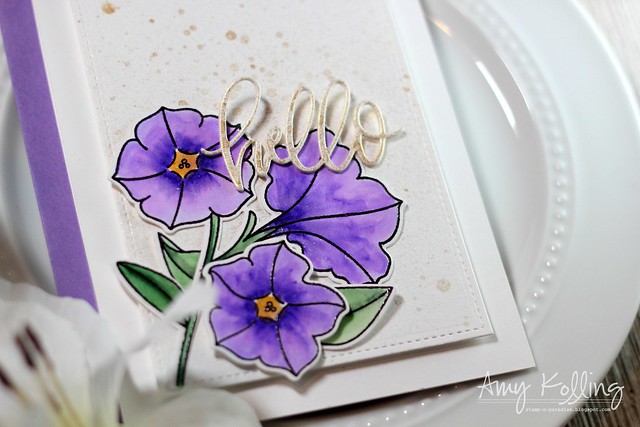
My first card uses the beautiful Pretty Petunias stamp set and coordinating Pretty Petunias Dies.  I black heat embossed the images, colored with my Zig Clean Color Real Brush Markers, and die cut.  I die cut a panel with the Stitched Notes Die and spritzed Heidi Swapp Gold Color Shine.  This panel was adhered using foam adhesive.  My petunias were arranged and adhered to my panel along with a stacked die cut Hello from the Hello Friends Script Die.

Pretty Petunias2

**********************************

Love Sentiments

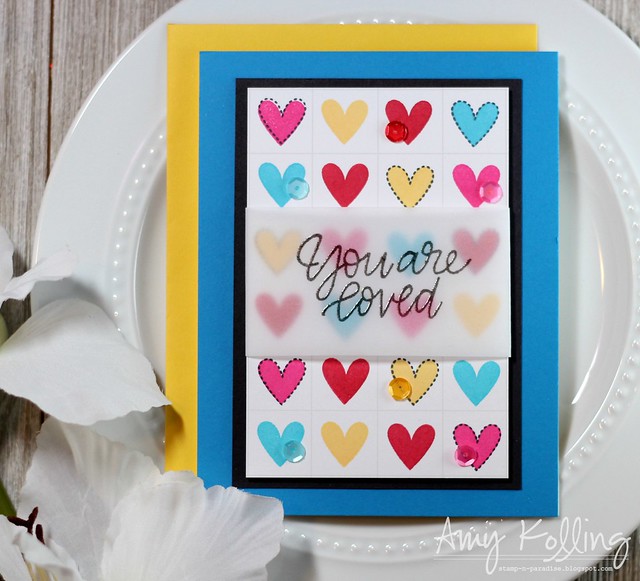
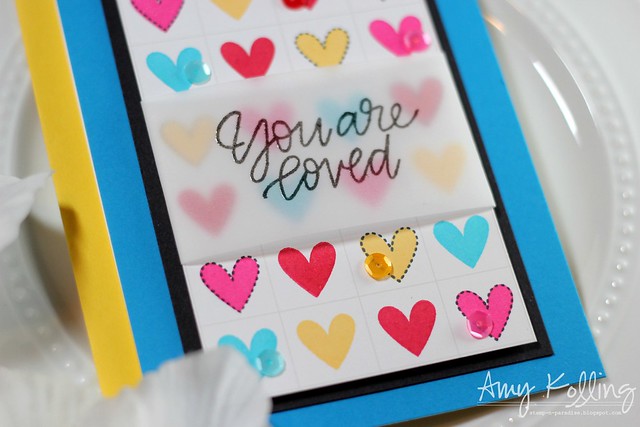
Now I switch gears and go all lovey dovey!  Using just the Love Sentiments set, I stamped the hearts onto a panel of blocked paper from Papertrey Ink (I've had this paper forever!) using Catherine Pooler Inks (LOVE LOVE LOVE!).  Once done, I stamped some of the hearts with the stitched outline heart over the top.  The panel was wrapped with a stamped and heat embossed sentiment on vellum.  As a finishing touch, random Pretty Pink Posh coordinating sequins were added to some of the hearts!
  
Love Sentiments2

Remember it's a blog hop!  You need to keep hopping so here's the full hop list to get you started.  Make sure to leave comments as there are prizes for commenting along the way!

Amy Kolling ♥♥♥


Thursday, November 23, 2017

Pretty Pink Posh / 25 Days of Christmas Tags

Welcome to the 25 Days of Christmas Tags! 
With the holidays fast approaching, it's time for Tracey McNeely's
annual 25 Days of Christmas Tags.  Make sure to check out her blog for all the details on the sponsors, ways to win, and how to link up your own tags!  
Tracey's blog:  In My Creative Opinion
I am helping celebrate today's sponsor, Pretty Pink Posh, by sharing my own tags!

Pretty Pink Posh has lots of fun winter/Christmas themed goodies to use for tags.  Since I tend to wrap at the last minute, I wanted some very CAS tags.  I love the Joy Shaker Die cut out of some thick red glitter cardstock.  I backed it with a white circle that had some light Broken China Distress Oxide inks blended.  My second tag uses the Scallop Square Tag Dies.  I die cut and quickly colored my snowman from Happy Snowman.  It was added over a hand trimmed glittery snow hill.

25 Days of Christmas Tags

Friday, November 3, 2017

Pretty Pink Posh / New Product Release Blog Hop

Wild Rose 

Hello and Welcome to the Pretty Pink Posh New Product Release Blog Hop Day 2!  
Paulina released some amazing new products Nov. 1st and we are here to show them off.  There are prizes too so make sure to scroll down for details and the full hop list!

The new Wild Rose stamps are perfect images to watercolor which is one of my favorite ways to color florals.  I black heat embossed my images onto Bristol Smooth cardstock.  Using my Distress Inks in Pickled Raspberry, Worn Lipstick, Mustard Seed, Shabby Shutters, and Peeled Paint, I loosely watercolored my images by first wetting them with clean water then dropping color in.  After die cutting my images, they were arranged onto a trimmed white panel that has Broken China Distress Oxide ink blended in the center.  I love the light hue the blue gives off!  My sentiment is the new Thank You Script Die done in several layers of black cardstock.  To finish, I used sequins and dew drops from the new Berry Bright sequin mix.

Wild Rose2

***********************************

My second card uses a FUN new stamp set that really has so many uses called Sparkle Dot Patterns 1.  I've used it here as it was meant for......sequins!  I love this!  I actually found applying the sequins very relaxing as it forced me to slow myself down.  

Sparkle Dot Patterns

I began by stamping the heart image in light ink onto a Scallop Square Tag along with a sentiment from Everyday Greetings.  Next I added Multi Medium Matte to the circles and began adding my sequins with my Jewel Picker by Marvy.  I used 4mm sequins for my heart in colors from the new Berry Bright Mix along with Tangerine.  My tag was layered with foam adhesive onto a block of striped pattern paper (from ages ago) that was die cut using the Stitched Notes.  To finish, I adorned the top with a simple burlap twine bow.  Here's a closeup of all those gorgeous sequins!

Sparkle Dot Patterns2 


Now's the time to continue on the blog hop.  Here is the amazing lineup for today!  Make sure to comment along the way.  There are 4 $25 gift certificates up for grabs (two winners each day).  Winners will be picked randomly alng the hop.  Comments must be left by 11:59 PM PST on 11/7/2017.  Winners will be announced on the PPP blog.


Amy Kolling ♥♥

Thursday, October 5, 2017

Reverse Confetti / CASology--Grid

CASology

Hello!  
Today, I made time to visit some of my favorite card challenges and play along.  CASology is such a great one but sometimes it's hard to remember "less is more"!  I figured I would give this week's CASology challenge a try.  This week's cue word is "GRID".  As soon as I saw the cue word, I knew what I wanted to make!  I love when this happens (which for me isn't very often!).  

I started with the Ragged Confetti Cuts done in white cardstock and added this to a top folding white notecard.  Then I stamped the images from Pumpkin Patch with Reverse Confetti inks using the "rock 'n roll" technique using Bumblee Yellow, Sunshine, Tangerine, Rust, Sand, Dark Roast, Parakeet, and Lime Green.  After die cutting, I arranged my pumpkin and leaves how I wanted them.  Using Press 'n Seal, I picked up my arrangement and began adding liquid glue and adhering my images.  I did leave 2 leaves to add with foam adhesive.  AND just because I needed to, I added a few Espresso Sequins from Pretty Pink Posh.  TIP:  Add a few details to leaves and pumpkin using a few Copics!  :)

CASology2


Thanks for sharing a part of your day with me!

Wednesday, October 4, 2017

Pretty Pink Posh / Halloween Inspiration


Hello!  Welcome to the Halloween Theme Week from Pretty Pink Posh!  


I wanted to share a quick peek at my card and post you can see in full (including supplies) over on the Pretty Pink Posh Blog today!

I've used all the Halloween goodies and colors I could on my card!  Go check it out all the Pretty Pink Posh supplies I've used!

Halloween Week3


Thanks for sharing a part of your day with me!


Friday, September 15, 2017

Pretty Pink Posh / STAMPtember

Damask Greetings

Hello!  Did you know STAMPtember is now in full swing over at Simon Says Stamp?  This whole month there are new products released and one of the most fun are the collaborations they do with other companies! 


I am sharing the collaboration between Pretty Pink Posh and Simon Says Stamp with the new stamp set called Damask Greetings.

I've used ONE image from this stamp set to stamp an entire panel in a light pink pigment ink from Fresh Ink.  To  make this easier, I've used some grid cardstock I've had in my stash for years but Simon Says Stamp now has a background stamp so you can stamp your own!  My sentiment was heat embossed onto a vellum banner from Stitched Labels 1 and sewn on using my sewing machine.

Damask Greetings2

Thanks for sharing a part of your day with me!


Pretty Pink Posh / Fall Product Release Hop

Trick or Treat Friends

Welcome to the Pretty Pink Posh blog hop celebrating the new September "fall" release!  There are so many new adorable images for the fall/winter!


I thought I would start sharing the first holiday of the fall:  Halloween.  This is my favorite holiday!  I love the trick or treating, jack 'o lanterns, fall breeze, and costumes.  Soon, I won't have kiddos that do this any more!  

Since carving jack 'o lanterns is one of "my" things to do every year, I thought I would use the cute little pumpkin stamps from Trick or Treat Friends.  I stamped the pumpkin images randomly with Versafine Onyx Black onto a panel of Bristol Smooth Watercolor paper and clear heat embossed the images.  I also did the same for the bat (from Halloween Friends) and the mini star (from Birdie Notes) to create my own custom background paper!  I watercolored my images with Zig Clean Color Real Brush Markers and a waterbrush.  I loosely colored the background (very messy nothing fancy) with watered down Distress Oxide in Broken China.  After it was completely dry, I added it to a white top folding notecard but pulling up the edges for a fun effect.  My sentiment "Boo!" (from Halloween Friends) was stamped with Staz-On black onto vellum that was die cut using the new Stacked Edges 1 Dies.  

Trick or Treat Friends2

***********************************

Now, I'm going to switch gears (aka holidays) and share a card made with the uber adorable set called Angel Friends.  I started this card with watercoloring my 2 angel images, diecutting, and setting aside.  I die cut the tag from Stitched Duo 1 Dies and blended a Broken China background, spritzed with water, and once dry, added some Prisma Glitter to dots of liquid glue to look like glistening snow.  Over the top of all this, I white heat embossed snowflakes (from Winter Wonderland).

Angel Friends 

For the background on my notecard, I simply made 2 passes of the scalloped die from the new die set Stacked Edges 1 and layered them onto the notecard.  I added liquid glue to the scallop edges and more Prisma Glitter.  My images were added with foam adhesive to my tag and added the tag to my white notecard wth foam adhesive.  As a final touch, I added some new Marshallow Confetti Mix.

Angel Friends2


****GIVEAWAY****

There are a total of 4--$25 gift certificates up for grabs for the hop - 2 for each day of the hop. Winners will be picked randomly from comments left along the hop - so make sure and leave lots of love along the way as you hop along! All comments must be left by 11:59 PM PST on September 19, 2017 - and winners will be announced on the Pretty Pink Posh Blog.

Related Posts with Thumbnails