Tuesday, February 10, 2015

Virginia's View Challenge: Shaker cards


I'm so excited to guest design along with Pretty Pink Posh for Virginia's View Challenge.   Virginia's challenge is all about SHAKER CARDS!  What better than sequins to fill it!  Well, Paulina happens to sell the best sequins out there!

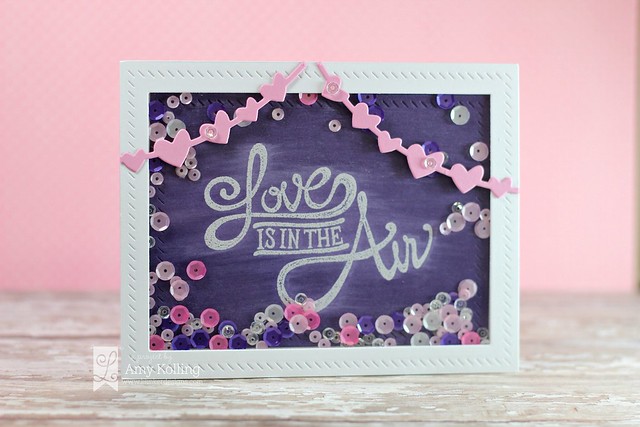
I've used some fabulous newer Lil' Inker Designs products for the base of the card and paired it with my FAVORITE sequins from Pretty Pink Posh!  

I started with making my "frame" and mat using the Stitched Mats: Side Stitched Rectangles.  My sentiment, from All you Need is Love, was white heat embossed onto dark purple cardstock and then white pigment ink was literally smeared over the top.   

VirginiasViewChallenge

I used 4mm Sparkling Clear and Pink Blush sequins along with 6mm Amethyst, Pink Peonies, Marshmallow, and Pink Blush sequins to fill my shaker.  I embellished the front of my shaker with Heart Banner Dies


 Paulina is offering up a sweet prize so make sure to go check out the challenge and all the entries so far over at Virginia's View Challenge!

http://www.shopprettypinkposh.com/

Thanks for sharing a part of your day with me!

Sunday, February 8, 2015

Reverse Confetti February Blog Hop!


BlogHop2

Welcome to the February Reverse Confetti Blog Hop!  The DT is showcasing some fabulous ways to use Reverse Confetti products for Valentine's gifts!  You should have arrived from the Reverse Confetti blog......HERE.


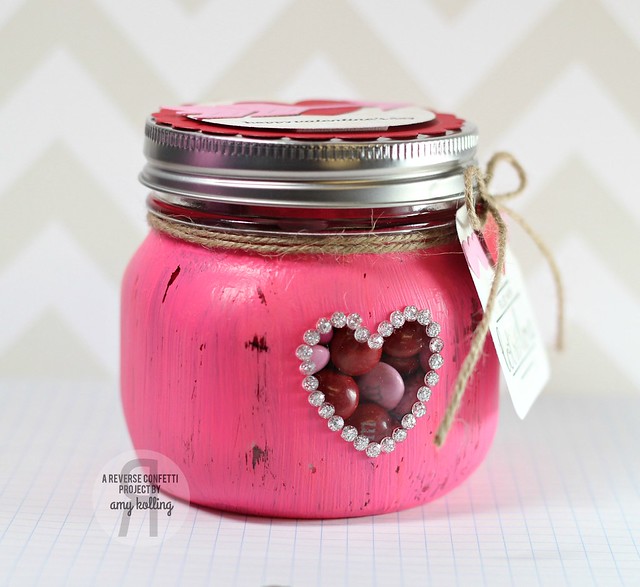
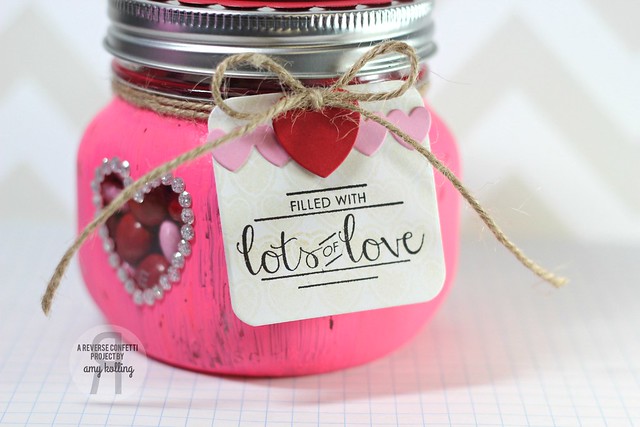
I've been planning this project for my daughter's teacher for Valentine's day ever since my friend Wanda Guess showed these amazing jars she did for the Christmas holiday.  I wanted to translate her idea into a Valentine theme.  

BlogHop1

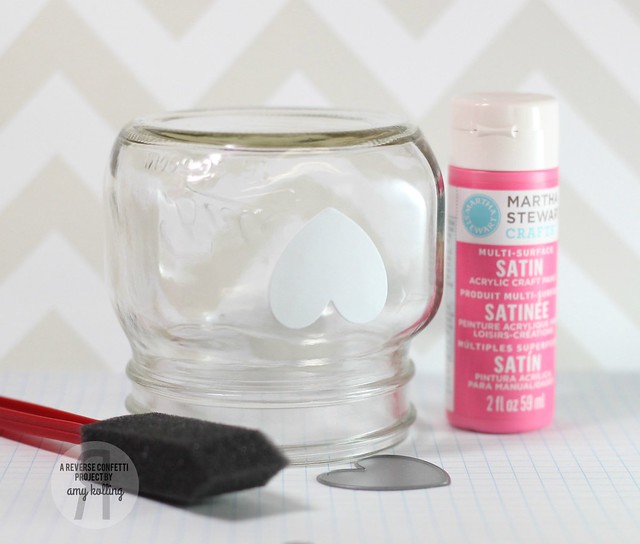
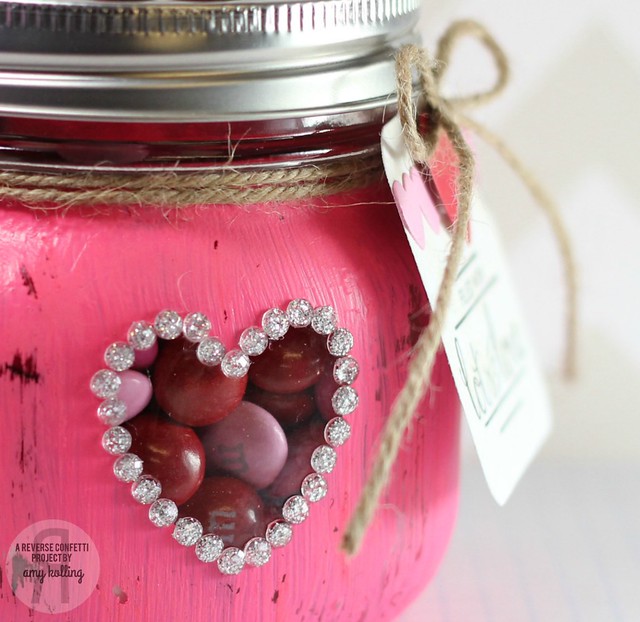
I started with diecutting the largest heart from the Love Note Confetti Cuts and adhered it to my jar with removable tape.  This will serve as my "window" to show off the goodies inside.  I started by painting the jar with 2 coats of acrylic craft paint by Martha Stewart.  (hence the picture of my jar upside down).  You must start with a clean jar and allow plenty of dry time in between coats.  Once done, I peeled off the heart diecut, sanded lightly with sandpaper, and embellished the perimeter with glitter gems.

BlogHop3

I attached a tag that was cut down into a square with the rectangle die from Class Act Confetti Cuts.   I stamped the hearts from Whole Lotta Hearts in Antique Linen Distress Ink that was stamped off for a very light stamping effect so that I could stamp my sentiment from Label Me.  A few die cut  hearts from Love Note were attached at the top of the tag and was tied off with twine.

BlogHop4

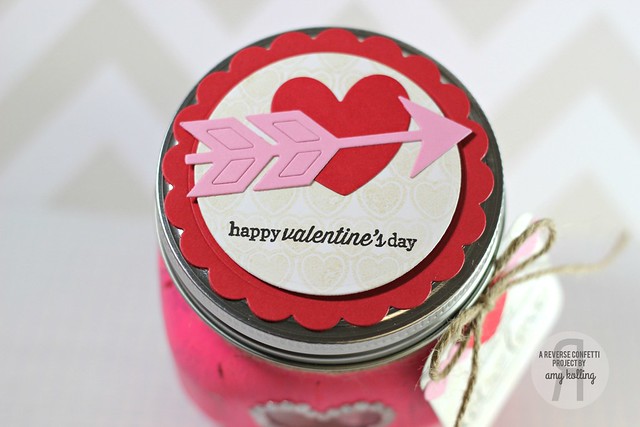
Lastly, I want to share how I embellished the top of my jar.  I used the Circles 'n Scallops Confetti Cuts to use as my layers for the top.  I again stamped the hearts (Whole Lotta Hearts) in Antique Linen Distress Ink onto my white circle and added a die cut heart (Love Note) and Arrow Confetti Cut.

BlogHop5


I hope you’ve enjoyed hopping with us today. Be sure and hop with us on the 8th of EVERY MONTH for more REVERSE CONFETTI inspiration! Now it’s time to hop on over to Heather’s blog. If you get lost along the way, you can find the hop order and list of all the participating designers over on the Reverse Confetti blog.


A few things before you hop along though, just to keep you “in the know”…

February’s SKETCH FOR YOU TO TRY is open for you to play along.  Check it out for a chance to win and become our newest ‘Fetti Fave! 

**********************************

Now for something FUN for all the Reverse Confetti fans out there.......a SALE!  


Thanks for sharing a part of your day with me!

Thursday, February 5, 2015

Retro Sketches #151


When I saw this sketch over at Retro Sketches this week, I fell in love and knew right away what I wanted to do.  Friends......my creative process doesn't work this way so when it happened for this sketch, I ran with it!  

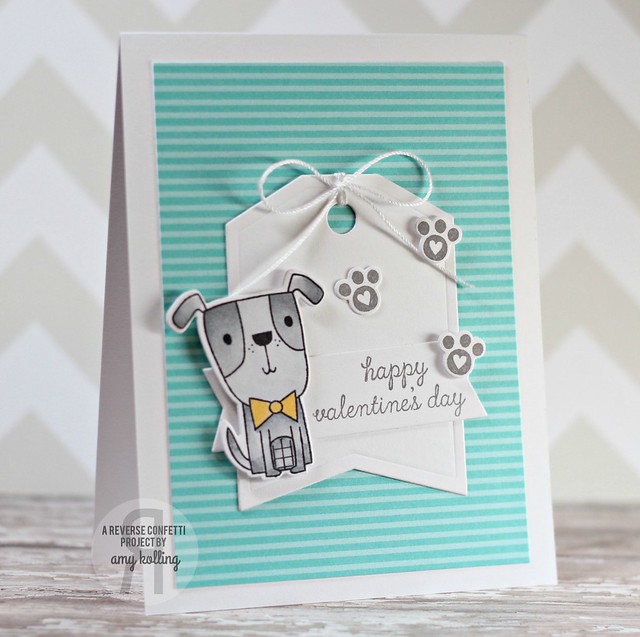
I've used the adorable (and I can't stop using it) Puppy Love by Reverse Confetti.  I stamped and Copic colored in the puppy and layered him onto a Tag Me Confetti Cuts.  Sentiment banner is also from Tag Me selectively inked!

RetroSketches

Here is a close-up of my puppy......just too cute and I have to admit (since I'm not a colorer) that I have been enjoying using my Copics to color!!!

RetroSketches2


Thanks for sharing a part of your day with me!

February Verve Diva Inspiration Hop!


It's the 5th of the month and time for the Verve Divas to bring you our monthly Diva Inspirations Challenge and Blog Hop! There are two ways to win Verve prizes.. comment on the design team's blog hop posts (linked below) to see their take on the inspiration, then go get inky and link up your take on the challenge to be eligible in our prize drawings!

Our February challenge is Vivacious Valentine...

Nothing says "I love you" like a handmade Valentine in your signature style. 
Use the inspiration graphic as a starting point, or head off in your own direction  - just make us swoon with a fabulously flirty creation!

I couldn't resist doing a card in gray and pink for Valentine's!  I paired up pattern paper from Bella Rouge by Pink Paislee and the sketch over at Fusion.  I used Love Notes by Verve along with Wavy Hearts Dies and Pennant Trim Die (my all time favorite Verve die!).

VerveDivaHop

Click here to link up your challenge entries

Challenge deadline: Thursday, Feb. 19.
Prize: $40 gift voucher to the Verve online store!


Need a little inspiration? Check out the blogs linked below to see what the other Divas did with the challenge! It's sure to be a treat, and speaking of treats, we've got a prize for one lucky commenter along the hop! Check out the Verve Blogtoday for all the prize info and deadlines!


1. Julee8. Sarah
2. Amy9. Susan
3. Anya10. Marisa
4. Betty11. Maureen
5. Jen12. Stacey
6. Karen13. Verve Blog
7. Sankari 

Wednesday, February 4, 2015

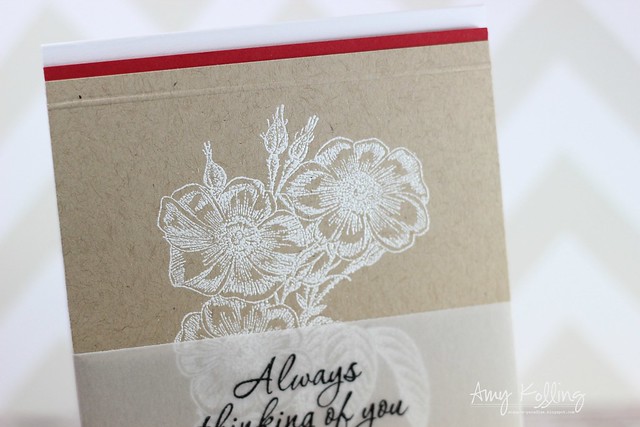
Always thinking of you......


Hello friends!  
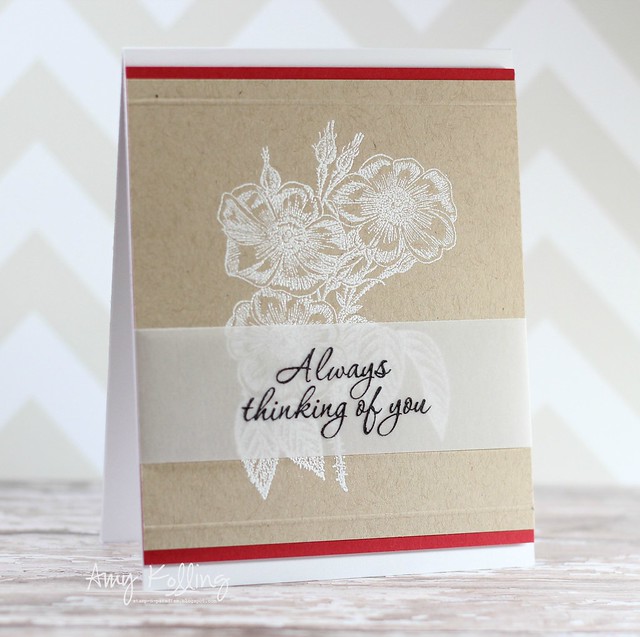
Do you ever need a thinking of you card?  I know I need more in my stash for sure.  This one is super easy and quick!  

I started by white heat embossing the Redoute Rose #3 from Frantic Stamper on kraft cardstock.  I just love how it becomes the focal point just like that!  To this panel, I've scored a line above and below the embossed flower.  

Thinking of You

Adding a sentiment onto vellum is always a fabulous choice for layering over a large focal point.  This sentiment is from Good Friends by Hero Arts.

Thinking of You2


Thanks so much for sharing a part of your day with me!

Sunday, February 1, 2015

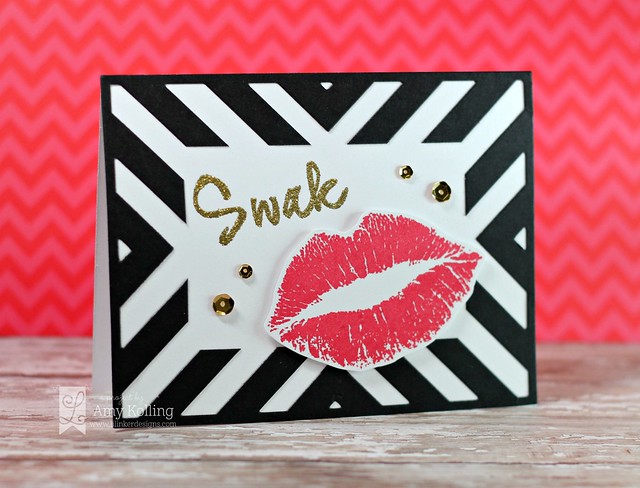
Curtain Call Inspiration Challenge: Kissing Booth


It's time for a new Curtain Call Inspiration Challenge!


Curtain Call Challenge


When I looked at the inspiration photo, I couldn't get passed the black and white chevron "frame".  I created my own using the Center Point Chevron Cover Up Die from Lil' Inker Designs.  And you can't have a kissing booth without some lips!  In comes the Smooches Stamps with the awesome fonts!  I've gold glitter heat embossed the sentiment onto my cardstock base after diecutting a rectangle from my Center Point Chevron panel.  Adding in the handcut smooches lips and a few gold sesquins finished it off.  :)


photo source: thetomkatstudio.com


The LEAD of the Kissing Booth challenge will be invited as a Guest Designer in a future Curtain Call challenge!

Make sure you visit each of the designers' blogs for more inspiration!

Kissing Booth Designers

Guest Designer, Joanne Basile


Saturday, January 31, 2015

love.....


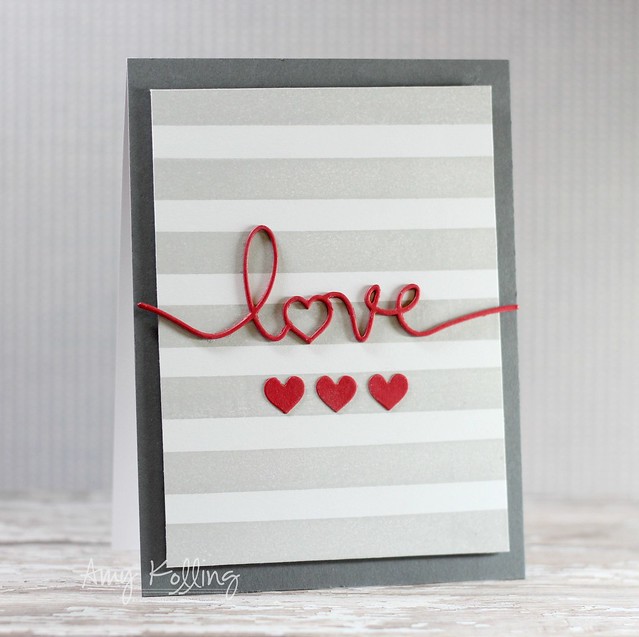
Hello!  I have a quick card to share today using ONE die.......a word die.  I love word dies.........the scripty font of this "love" die is just so beautiful!

This die is from Frantic Stamper is one of my favorites.  I started my card by stamping gray stripes from Set of 3 Lines cling stamps onto a trimmed piece of cardstock.  The sentiment was diecut multiple times and glued all together for dimension!  When diecutting, always remember to keep even the tiniest things to be used later.  On my card, I've used the 3 hearts that were dicut from the center of the Handwritten Love die to add some interest below my sentiment!


Scripty Love


Thanks for sharing a part of your day with me!

Related Posts with Thumbnails