
Welcome to the February Reverse Confetti Blog Hop! The DT is showcasing some fabulous ways to use Reverse Confetti products for Valentine's gifts! You should have arrived from the Reverse Confetti blog......HERE.

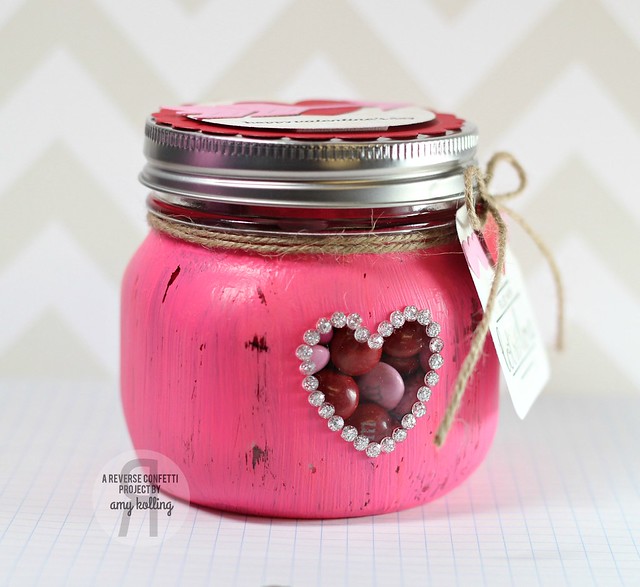
I've been planning this project for my daughter's teacher for Valentine's day ever since my friend Wanda Guess showed these amazing jars she did for the Christmas holiday. I wanted to translate her idea into a Valentine theme.
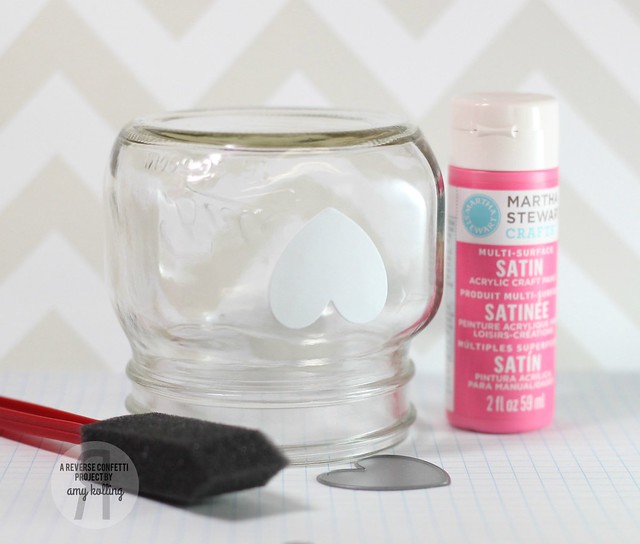
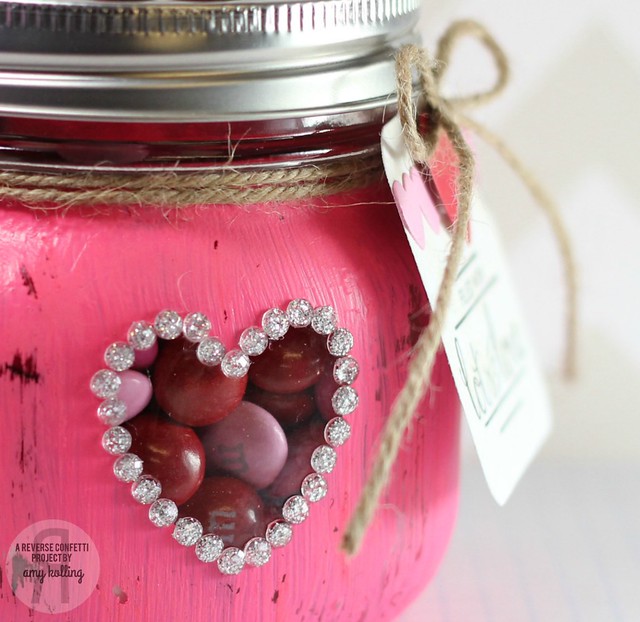
I started with diecutting the largest heart from the Love Note Confetti Cuts and adhered it to my jar with removable tape. This will serve as my "window" to show off the goodies inside. I started by painting the jar with 2 coats of acrylic craft paint by Martha Stewart. (hence the picture of my jar upside down). You must start with a clean jar and allow plenty of dry time in between coats. Once done, I peeled off the heart diecut, sanded lightly with sandpaper, and embellished the perimeter with glitter gems.
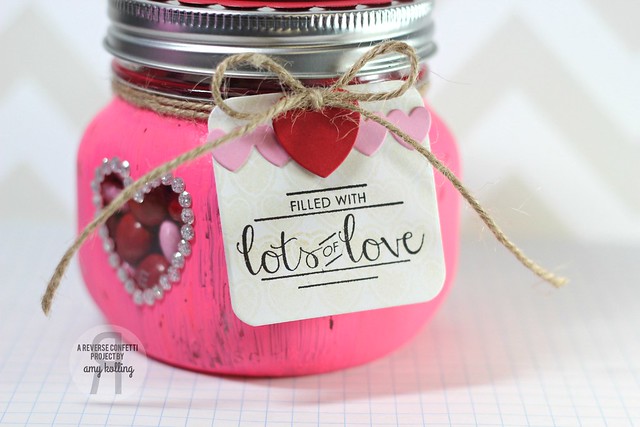
I attached a tag that was cut down into a square with the rectangle die from Class Act Confetti Cuts. I stamped the hearts from Whole Lotta Hearts in Antique Linen Distress Ink that was stamped off for a very light stamping effect so that I could stamp my sentiment from Label Me. A few die cut hearts from Love Note were attached at the top of the tag and was tied off with twine.
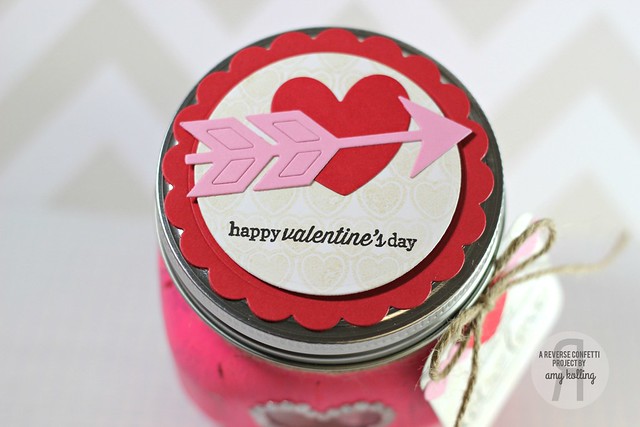
Lastly, I want to share how I embellished the top of my jar. I used the Circles 'n Scallops Confetti Cuts to use as my layers for the top. I again stamped the hearts (Whole Lotta Hearts) in Antique Linen Distress Ink onto my white circle and added a die cut heart (Love Note) and Arrow Confetti Cut.


I hope you’ve enjoyed hopping with us today. Be sure and hop with us on the 8th of EVERY MONTH for more REVERSE CONFETTI inspiration! Now it’s time to hop on over to Heather’s blog. If you get lost along the way, you can find the hop order and list of all the participating designers over on the Reverse Confetti blog.
A few things before you hop along though, just to keep you “in the know”…
February’s SKETCH FOR YOU TO TRY is open for you to play along. Check it out for a chance to win and become our newest ‘Fetti Fave!
**********************************
Now for something FUN for all the Reverse Confetti fans out there.......a SALE!

Thanks for sharing a part of your day with me!

Hey Amy!! I love your mini mason jar!! Who wouldn't want to receive this gift. Can I ask you a question, how do you take your photos? They are so nice and bright!
ReplyDeleteCute jar - love the heart surrounded by the sparkly gems.
ReplyDeletethis is darling! love the rustic pink paint job. beautiful RC embellies, too!
ReplyDeleteYour fabulous pink treat jar, with the lovely decorated lid, note and glittery heart will delight you daughter's teacher immensely! This alone, is a wonderful gift...add treats is a bonus! Thank you for the how-to details! Inspired and inspiring!
ReplyDelete~c
Oh, this is so super cute and clever! Love the bit of bling you added too!
ReplyDeleteHmmm this is a awesome idea for teachers!
ReplyDeleteI am a sucker for treats in jars and this painted jar is just the cutest! I love the decorated top, too. :)
ReplyDeleteVery cute project!
ReplyDeleteLoveLoveLove
ReplyDeleteWhat a pretty jar you made there ! Lovely Valentine's gift !
ReplyDeleteThis is so cute, perfect for teachers.
ReplyDeleteOh I love this! Great and fun candy jar!!! ♥
ReplyDeleteYou could definitely adapt this for any occasion! Fun!
ReplyDeleteSo cute. would make a great little thank you gift!
ReplyDeleteSo cute, Amy! Love your painted, blingy jar!!
ReplyDeleteSweet idea! I knew I wanted those mini mason jars for something!!
ReplyDeleteSweet valentine jar, love the added jewels!
ReplyDeleteSuper cute jar! Love all the sweet detail!
ReplyDeletedarling project, amy!
ReplyDeleteeeks, I love this and also curious on how you take your photos...love the clarity!! The painted jar is just gorgeous and love how you did the tag!
ReplyDeleteThis is DARLING, Amy!!
ReplyDeleteThis is ADORABLE, Amy....LOVE!!
ReplyDeleteSo Cute! Love the open window!
ReplyDeleteAwesome little gift jar!! Love the little heart window you created!! I love that lot's of hearts die!!
ReplyDeleteThis is super cute, Amy! LOVE it!
ReplyDeleteWhat a great idea and it's just adorable!! Love the window with the gems around it!!
ReplyDeleteWhat a darling idea! I'm definitely going to have to try painting a jar - love the heart opening!!
ReplyDeleteCute project! I'll be adding this to my "projects to try."
ReplyDeleteThis is fabulous Amy!
ReplyDeleteWhat a cute way to package treats! I love the painted jar look you created!
ReplyDeleteDarling tag and love the bling heart.
ReplyDeleteSuper cute treat jar - love the bling around the heart.
ReplyDeleteisoscia at aol dot com
Another really cute idea! I like how you kept the "window" so you can see the treats inside!
ReplyDeleteOh,my! Super SWEET, Amy! Love!
ReplyDeleteAdorable! I would love ve to get one of these!
ReplyDeleteLove the project.
ReplyDeletecraftymom205 at yahoo dot com
Amy this is just perfect in every way. I love the painting and that you masked the little heart and the tags and decorations on the lid, so so sweet!
ReplyDeleteWhat a creative and fun gift idea! This is super cute!
ReplyDeleteAmy!!!! I am SO CASING this project!!! This is down right GORGEOUS!!! LOVE it!! Seriously... This is GORGEOUS and BRILLIANT!!!
ReplyDeleteSweet project! Love this idea! Fun little tag to go with the jar!
ReplyDeleteGreat teacher gift idea. Love the jar lid!
ReplyDeleteWhat a lovely gift! It's sure to be loved!
ReplyDeletesweet little project!
ReplyDeleteOh, this is so pretty!
ReplyDeleteFantastic jar Amy. I love the sweet little heart framed with those gems. Nice tag too.
ReplyDeleteOh my gosh, this is the cutest jar ever!! LOVE it!
ReplyDeleteDeanne :)
This is adorable! I've been saving some little jars and this will be prefect to try on them. Thanks for showing how you made it.
ReplyDeletegreat idea and looks so sweet and beautiful!
ReplyDeleteWHat a cute little way to hold some candies...very nice jar.
ReplyDeleteGood idea to color the jar and leave the heart opening. Love the bling
ReplyDeleteGreat gift for a friend or teacher.
thanks for sharing.
I love "other than a card" projects and yours is so cute. The glitter gems just add the necessary bling to your creation.
ReplyDeleteyour projects are always so fun Amy! Love it!
ReplyDeleteLove it--thx for sharing!
ReplyDelete